LinkedIn is the largest professional network, and it is no stranger to many subscription options. Naturally, every LinkedIn Premium subscription plan is a monthly-based service. However, have you ever thought about how wonderful it would be to try LinkedIn Premium free of charge?
Luckily, you can. Here are seven different ways to get LinkedIn Premium free. As a bonus surprise, we’ve even thrown in a way you can even get a LinkedIn Premium discount. But surprises do not end there…
Disclaimer: We are not LinkedIn support and cannot assist with LinkedIn Premium free activation. This blog is designed to help you discover the best ways to get LinkedIn Premium free from our experience and how you can get it as well.
LinkedIn Premium subscriptions explained
The words “LinkedIn Premium” became synonymous with Premium Business plan. However, LinkedIn Premium is a true name for all LinkedIn subscriptions plans. So, to avoid confusion, we will make a note of what type of LinkedIn Premium subscription you can get for free with the methods described below.
First, let’s see what every LinkedIn subscription plan has to offer.
- Premium Career plan allows you to find jobs easier, access salary information, and job-seeking communities. In addition you can be a featured applicant, and learn from the LinkedIn Learning platform.
- LinkedIn Premium Business plan has many features. Sone of them include 15 InMail, premium search filters, company insights, and access to LinkedIn Learning courses.
- Recruiter, aka LinkedIn Premium for big company recruiters is a real booster. It contains 150 InMails, advanced filters, saved searches, alerts, reference searches, and much more.
- LinkedIn Premium for small company Recruiters, aka Recruiter Lite is the more affordable version of Recruiter. It contains less features than Recruiter, but it has better features VS price ratio.
- Sales Navigator is also know as LinkedIn Premium for Sales Professionals. Among other benefits, it includes the possibility to create lead lists and a large number of advanced search filters for LinkedIn prospecting done right.
Did you know that we have detailed comparisons of every LinkedIn subscription plan? Be sure to check them out:
- For our sales folks: LinkedIn Sales Navigator VS Premium For Lead Generation
- And all our recruiters out there: LinkedIn Premium VS Recruiter Lite VS Recruiter
How to get LinkedIn Premium free?
LinkedIn really tries to give back to the community. And giving away LinkedIn Premium free for use is one way they do it. However, it is worth noting that, even though each of the ways described below will allow you to use LinkedIn Premium free, it won’t be forever.
Nevertheless, there is plenty of time to test out and decide if you wish to use this subscription package to jump-start your career or for LinkedIn lead generation. Let’s jump to the ways you can try LinkedIn Premium free.
LinkedIn Premium free trial
If you wish to test out the features, you can always opt-in for the LinkedIn Premium Free Trial. This way, you can explore every subscription plan and find which one suits you best.
The free trial lasts for 1 month, and everyone can initiate it. In addition, you would need to insert your credit card details at the beginning of the trial.
After the free trial ends, your subscription will start automatically. Consequently, your credit card will be charged. Thus, if you decide not to pay for the subscription plan, you need to cancel the LinkedIn Premium free trial before it ends. You can also cancel the free trial at the beginning of the trial period, as you will get the entire month for free either way.
Furthermore, if you start a LinkedIn Premium free trial, you won’t be able to have another one for at least the next 12 months.
Starting LinkedIn Premium free trial - Steps
Here’s how you can start your LinkedIn Premium Free Trial.
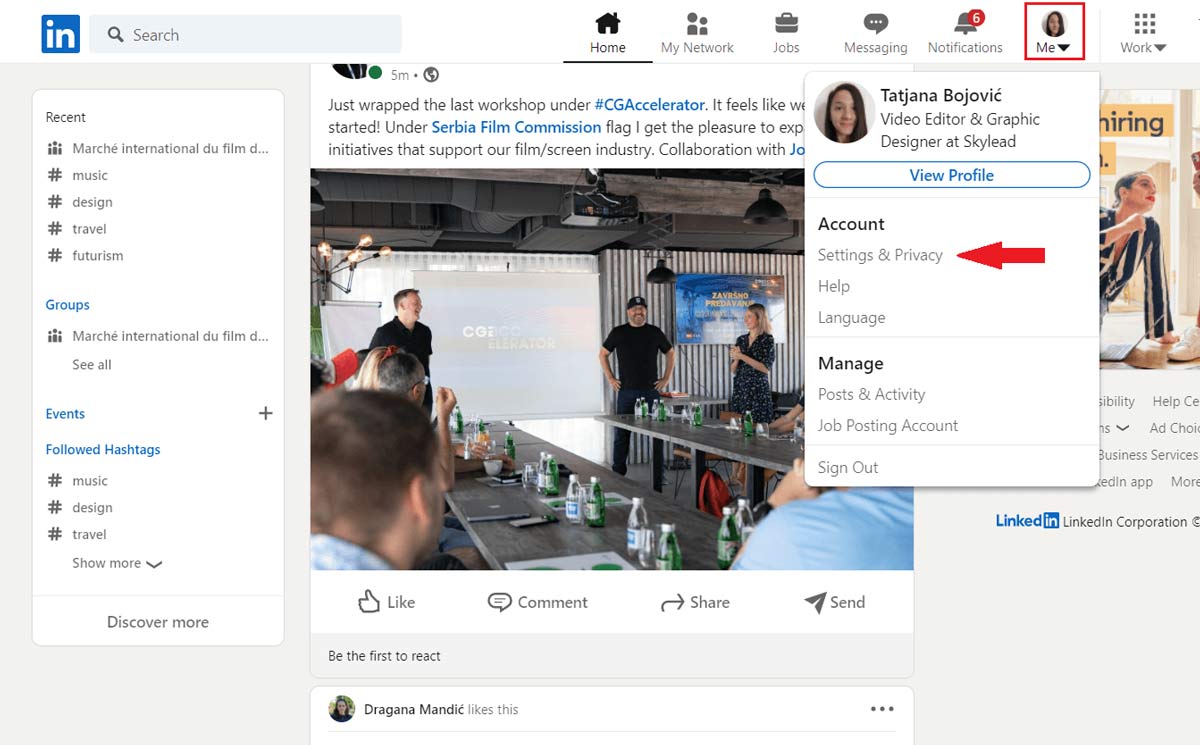
Firstly, click the profile icon at the top of the homepage. Then, select the Settings & Privacy option.
Secondly, click the Account preferences. Then, navigate to Subscriptions & payments and click the Change button next to Upgrade for free option.

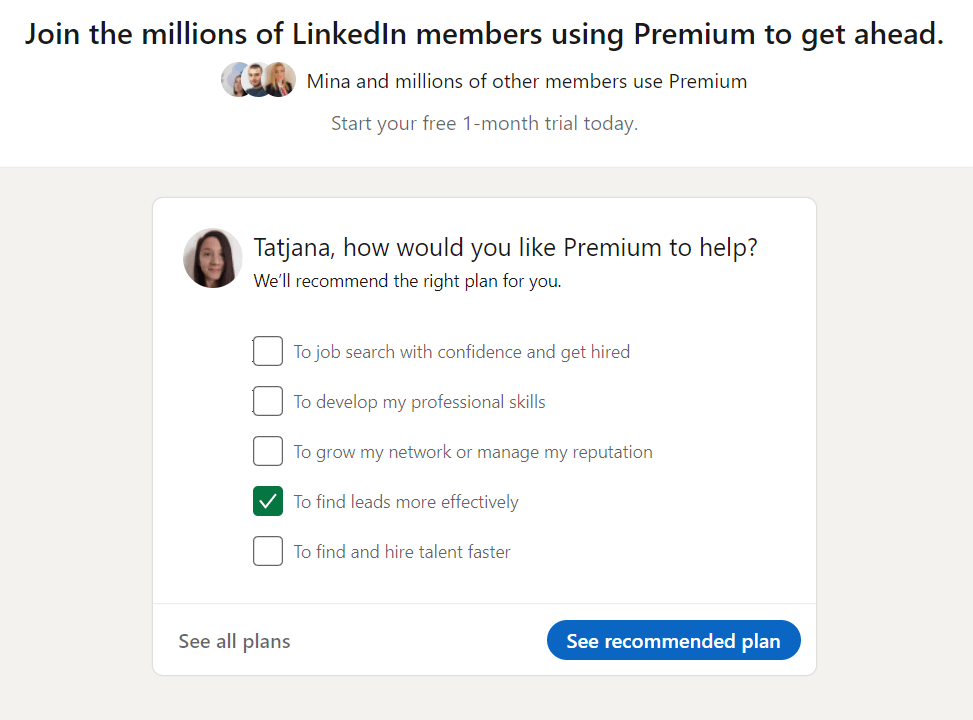
Next, the new page will open up. LinkedIn will ask you what you would like to achieve with an upgrade so it can suggest the plan for you. Thus, you can choose the subscription from the recommended section. Or you can check out all the plans and select one from there.
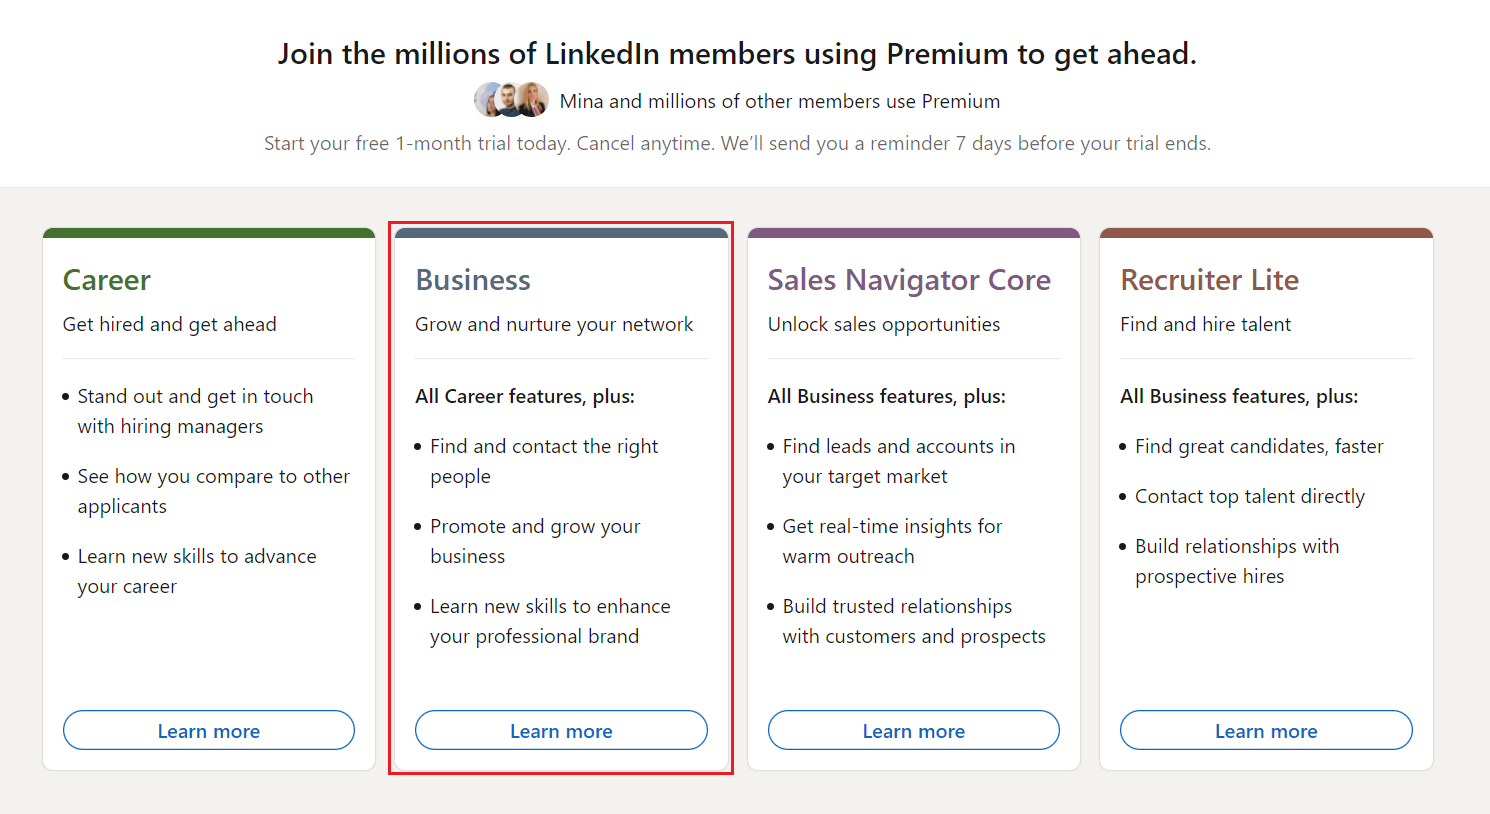
Here is where you can read more about the Premium plans. So, choose one that best suits your needs. Since Premium Business is versatile and many job hunters, recruiters, and sales managers use it, we will use it as an example.
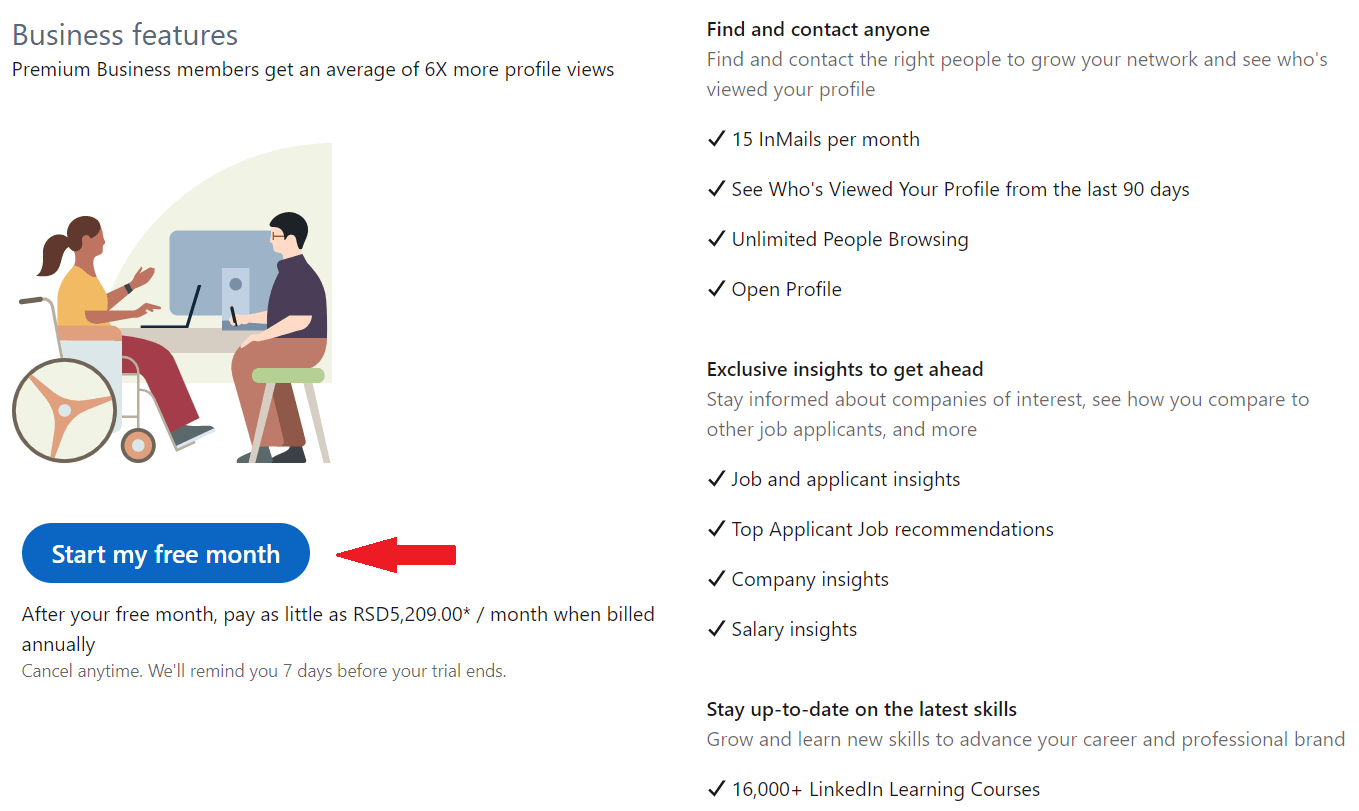
Lastly, click on the Start my free month button, enter the credit card details and complete the upgrade.
In addition, please note that the price displayed below the button doesn’t include the tax or VAT. So you need to be aware of that if you wish to continue to a paid subscription afterward.
Getting LinkedIn Premium free from employees
One of the perks of working for LinkedIn is that almost every employee gets the LinkedIn Premium free subscription for 6 months. In this case, most of the employees give away these coupons to give back to the community.
However, many have certain conditions you need to fulfill to receive a LinkedIn Premium free coupon. Nonetheless, this is a great way to help those that need it the most.
To find an employee that is giving away LinkedIn Premium free coupons, first go to your LinkedIn search bar. Then, type either #linkedinpremium or #PlusOnePledge and hit enter. Click on Posts, and either sort them by latest or those posted in the last week.
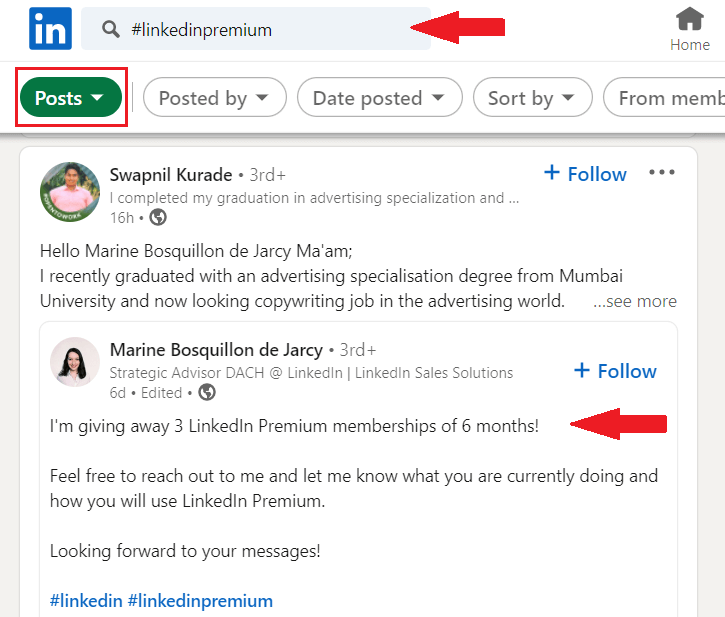
Then, you can reach out to that person and ask them to provide you with that coupon. Simple as that.
The best-case practice is being honest and providing detailed information on why you need LinkedIn Premium free. In addition, describe your life circumstances and how you will use that to develop your career.
Linkedin Premium free for military veterans
LinkedIn joined forces with SheerID, an identity verification platform, for a special occasion. They wanted to offer 12-month access to LinkedIn Premium free of charge for all U.S. military veterans. In addition, all those granted to use LinkedIn Premium free will also have access to more than 16,000 courses.
The reason behind this initiative is that LinkedIn understands how difficult it is to move from military to civilian life. Thus LinkedIn took steps to help U.S. military veterans as much as possible. In addition, LinkedIn offers LinkedIn Premium free use for military spouses, as well.
Here are the benefits that military individuals can expect using the special LinkedIn Premium free membership:
- Access to Premium Career subscription for free during the 12 months;
- Getting noticed by recruiters;
- Building a network;
- Find and apply for jobs easier;
- Learn new skills;
- Support in the military to student life transition;
- Veteran-focused learning content;
- Additional resources to help you on your new career path.
So, how to apply for the LinkedIn Premium free program for veterans? All you need to do is to go to their Veterans subscription page and fill in the required form.
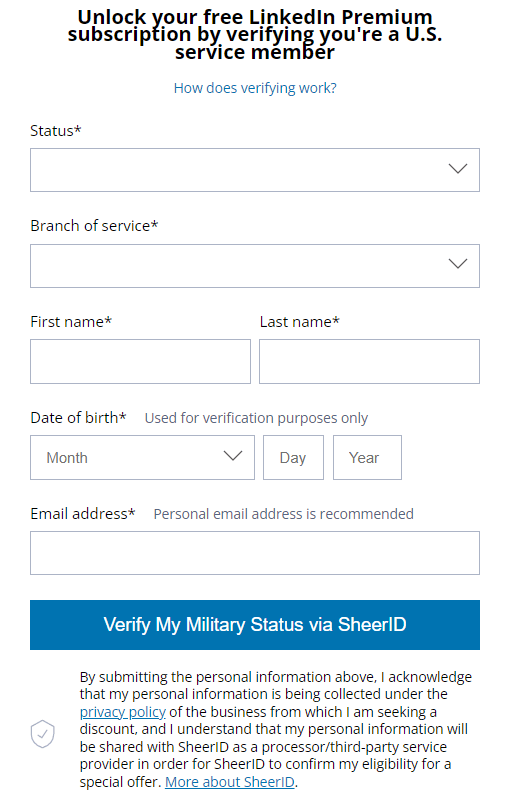
Tip: Be sure you reference that you are a veteran or have military experience on your LinkedIn profile before applying.
Lastly, please note that if for any reason, you already started a LinkedIn Premium free trial or subscription, you would need to cancel it first before applying to the LinkedIn Premium free veterans program.
Students and graduates can use LinkedIn Premium free too
Sometimes LinkedIn forms partnerships with different educational institutions as a part of their student program. The result of this partnership is that students and graduates can use LinkedIn Premium free for a 12-month period.
To check if your school partnered up with LinkedIn, go and ask if they have access to these subscriptions. If your university says they do not have access or partnership, ask them to reach out to LinkedIn. This way, they can check if they can become a part of the program and offer students LinkedIn Premium for free.
Keep in mind that you need to have an email from the school's domain to be granted free LinkedIn Premium subscription.
If, however, this doesn’t work for you, you can always check for other active LinkedIn Premium free programs for students.
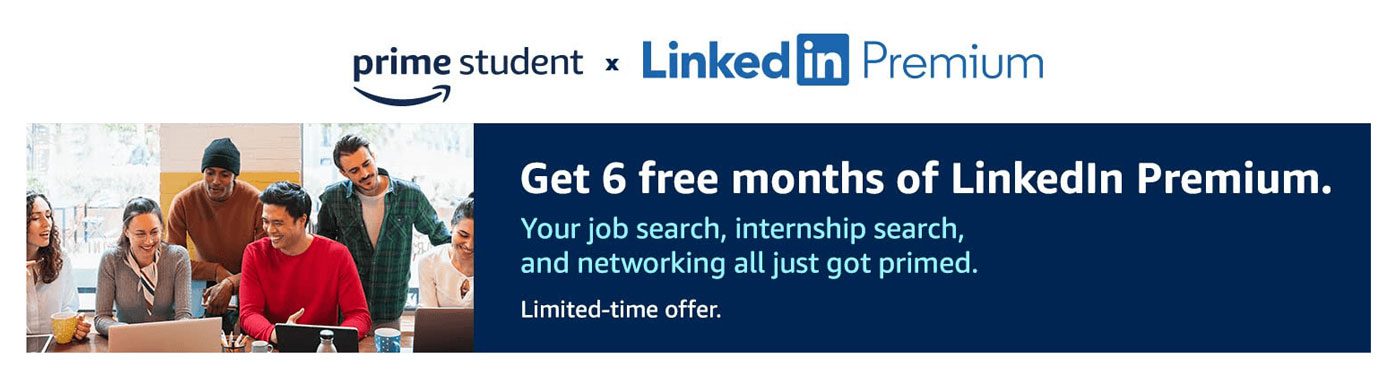
For example, LinkedIn partnered up with Amazon to allow students to use subscriptions for free. So, if your Amazon account is Prime Student, then you are eligible to get a LinkedIn Premium free subscription for 6 months.
All you need to do is sign in to your Prime Student and LinkedIn account and redeem your Premium Subscription.
Yet, keep in mind that if you have an active Premium subscription plan, then you won’t be eligible for this offer.
Visual Studio users get LinkedIn Premium free of charge
Visual Studio Dev Essentials is a developer program created by Microsoft. Among the benefits, they provide various tools and training courses, and the LinkedIn Learning center is one of them. In other words, LinkedIn offers a Premium Career plan free for all Visual Studio Dev Essentials users.
This way, you get access to the LinkedIn Learning courses, acquire certificates and develop your skills. This offer lasts for 1 month, and you don’t need a credit card to start the subscription for free.
To use this LinkedIn Premium free offer, firstly, you need to have a Microsoft account. Once you create it, go to Visual Studio Dev Essentials and click the Join or access now button. Once there, navigate to the Benefits page. Then, find the LinkedIn Learning offer and click the Activate button.
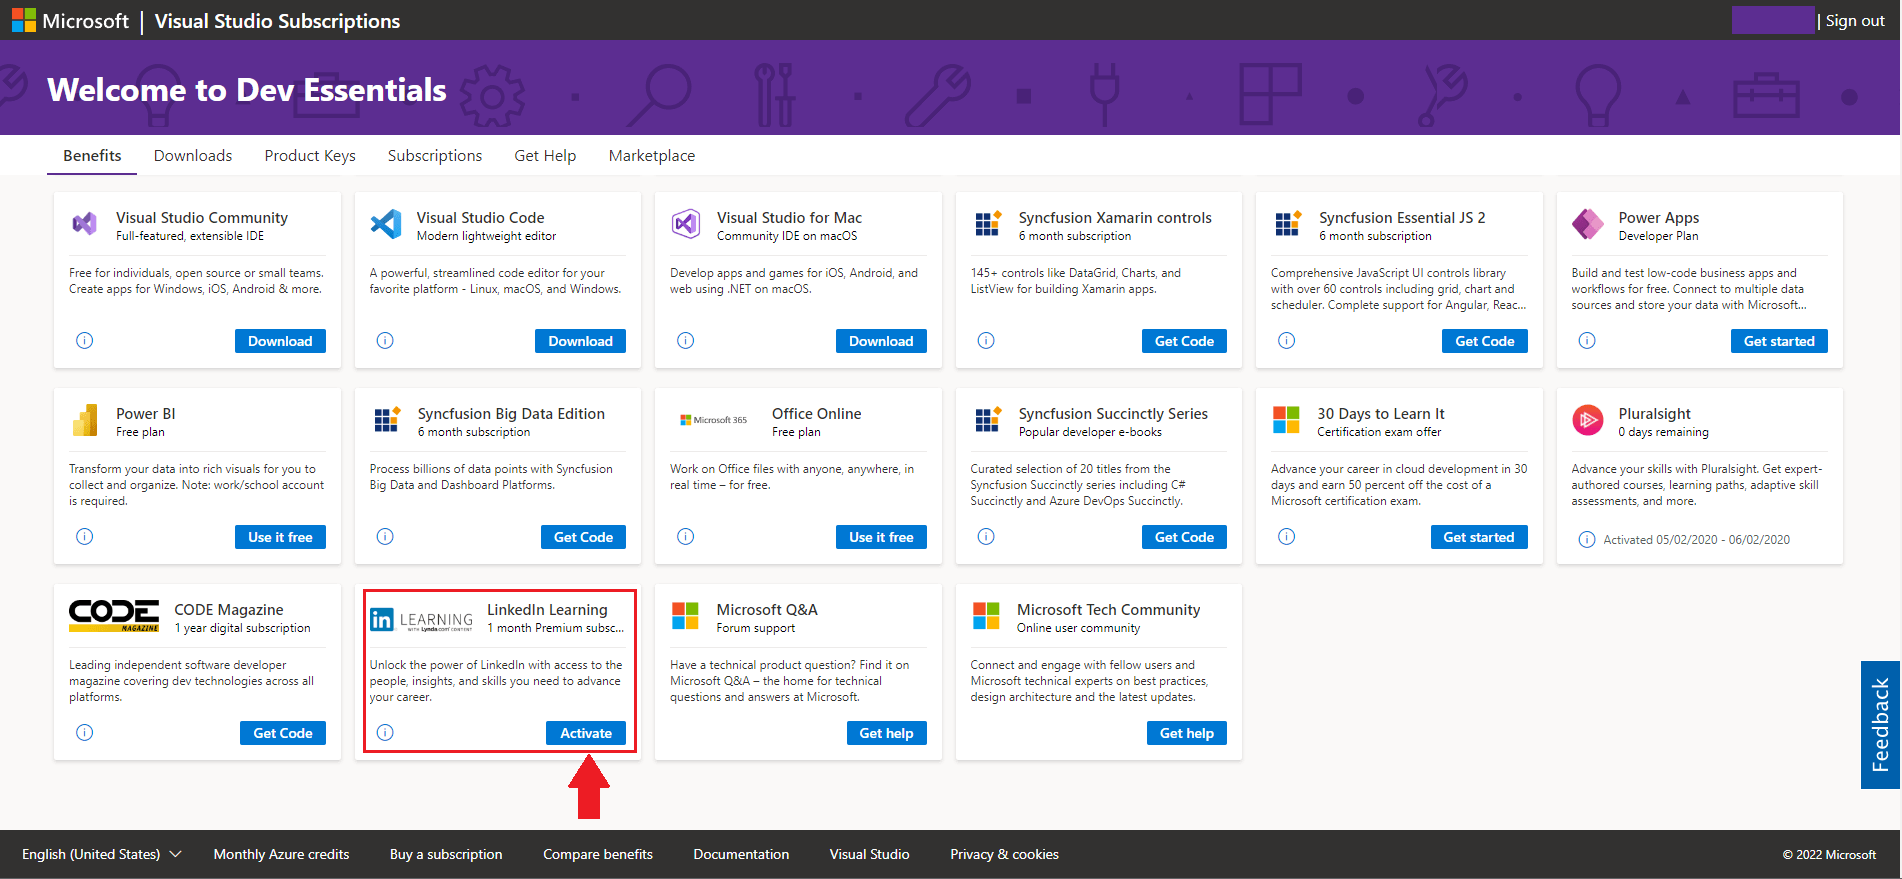
After you’ve done it, you will go to the LinkedIn page, where you can activate the subscription.
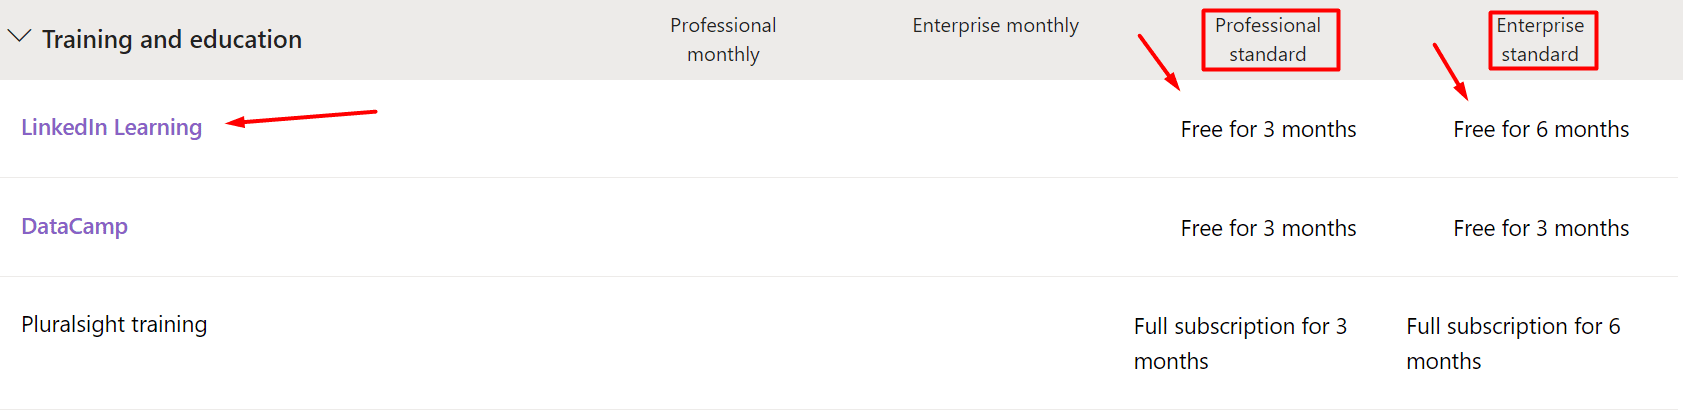
Bare in mind that you have to need at least Business (Professional standard or Enterprise standard) Visual Studio subscription to be able to access this benefit.
Quarterly-based LinkedIn Premium free subscription for journalists
If you are a journalist who strives to perfect the craft, and join the journalist community, then, LinkedIn has a nifty solution for you. They offer access to journalist network, insights, and webinar. In addition, you get LinkedIn Premium free. LinkedIn offers this promotion each quarter.
However, only qualified health journalists can apply for the webinar and receive a free one-year subscription to LinkedIn Premium Business. In other words, qualifications include but are not limited to the following conditions:
- Firstly, to attend the webinar, you need to be a member of the LinkedIn for Journalists group;
- Secondly, your profile must demonstrate your journalism career path.
To apply for the webinar, you need to pay close attention to the application window for each quarter. You can do so by visiting the LinkedIn LinkedIn For Journalists page.
Bonus: Getting Sales Navigator for free
Here is the surprise for all you Sales Navigator lovers. Apart from starting the 1-month Sales Navigator free trial, you can also get Sales Navigator 2-month free use. This is only possible if your connections refer you through the Sales Navigator Referral program.
Here is how someone can provide you with a Sales Navigator referral or vice versa in 2 easy steps. First, go to your Sales Navigator platform, and click the Referrals button.
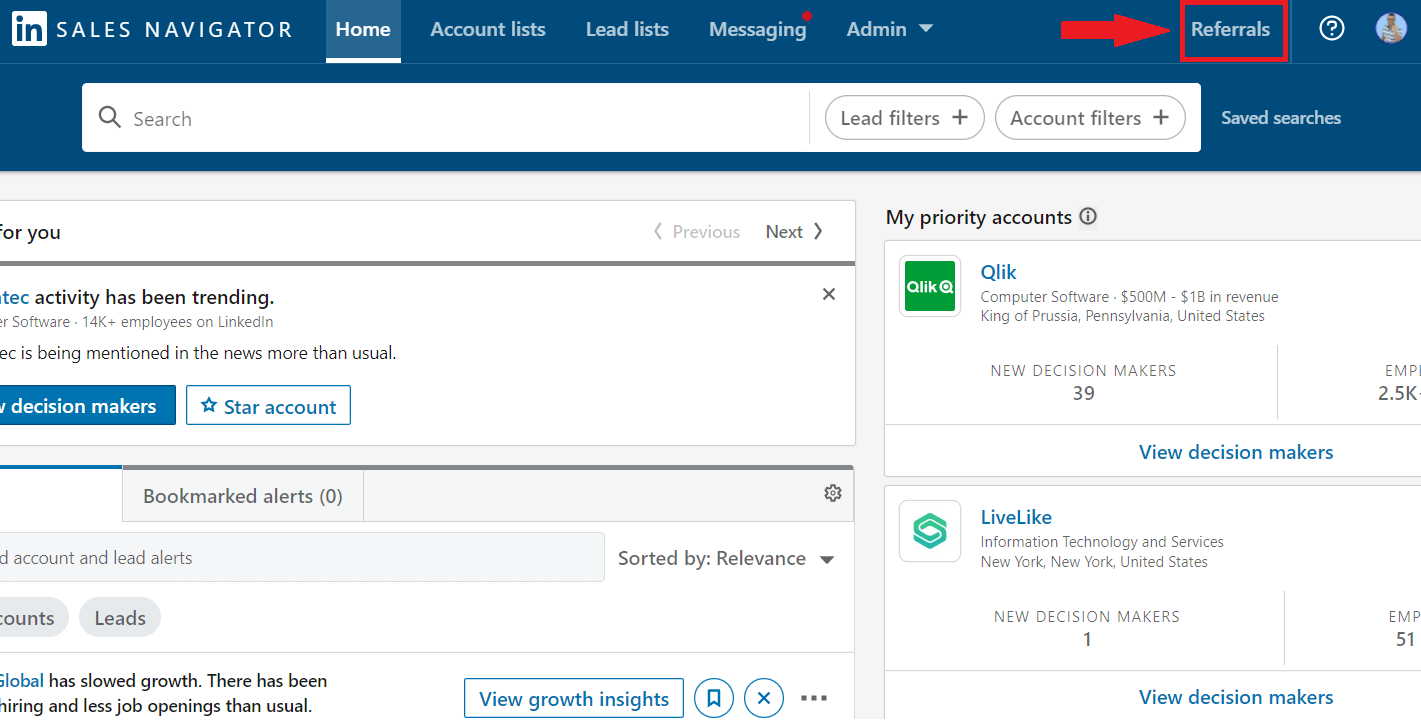
Next, type the person’s name you wish to refer to try this LinkedIn Premium free subscription. The only thing left to do is to hit the Send button. Each Sales Navigator user gets to send 10 referrals.

And, that’s it. Your connection will receive the confirmation email with the joining link that will lead to the activation page.
However, there are certain conditions you need to fulfill to receive a 2-month free Sales Navigator subscription:
- You are the 1st-degree connection to the referrer;
- not currently using any LinkedIn Premium subscription;
- Haven’t used a LinkedIn Premium free trial in the past 12 months.

How to get LinkedIn Premium discount?
As you can see, there are many ways to try LinkedIn Premium free. However, LinkedIn limits every account to only one such promotion per year. Nonetheless, if you are unsure if you would like to pay the full price, you can always get a discount.
Here is how you can do it in 2 ways.
LinkedIn Premium discount
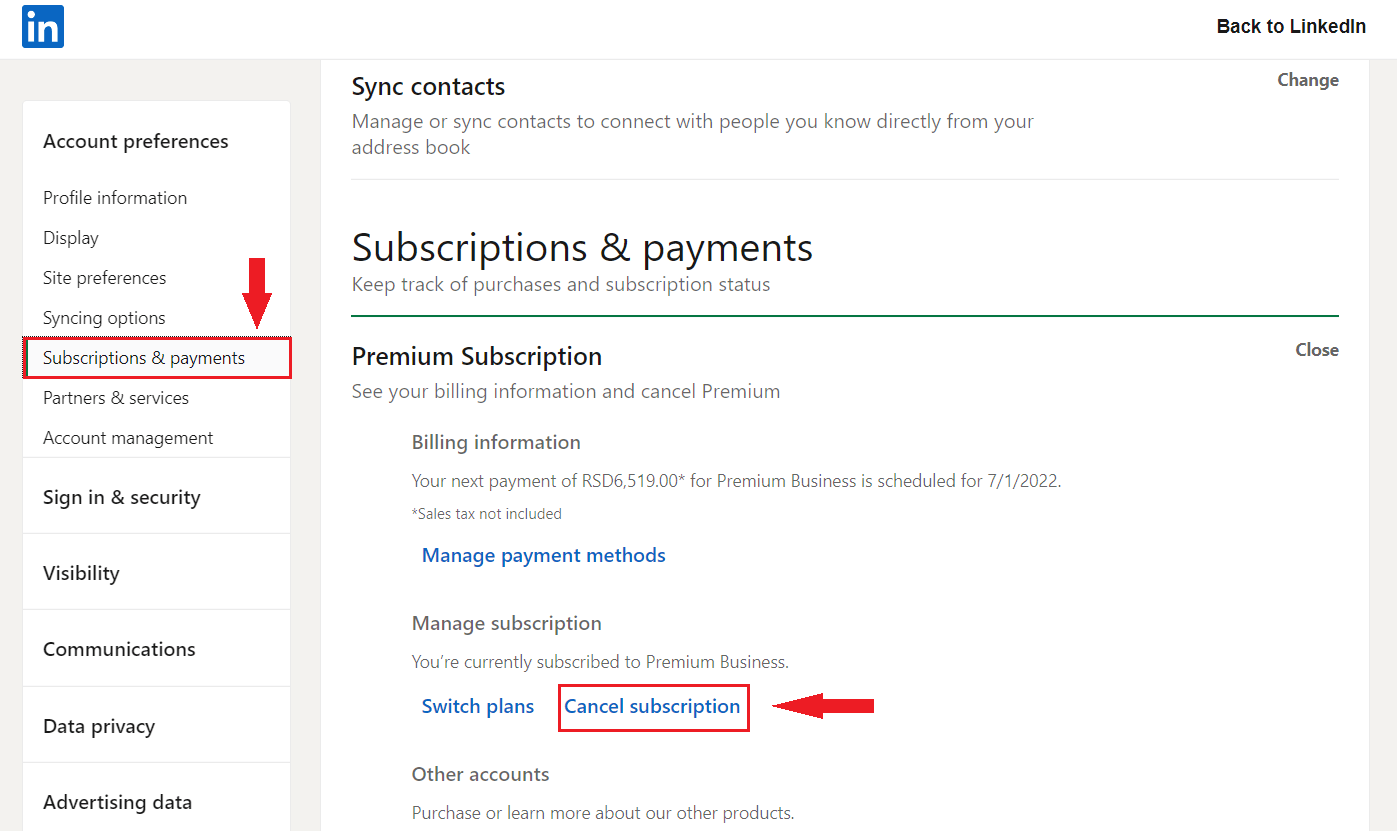
You can get LinkedIn Premium discount when you start your subscription cancellation process. First, go to your Settings & Privacy page. Next, under Subscriptions & payments click the Cancel Subscription button.
Next, the new window will open up. Continue the cancellation process.
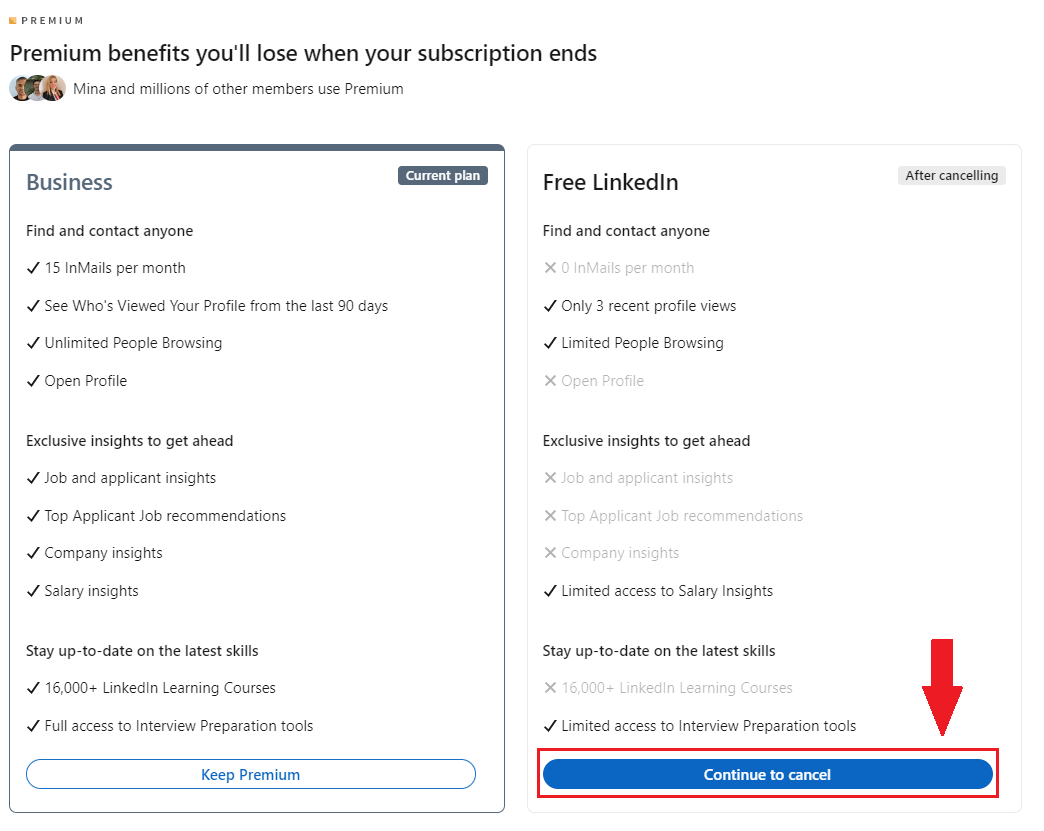
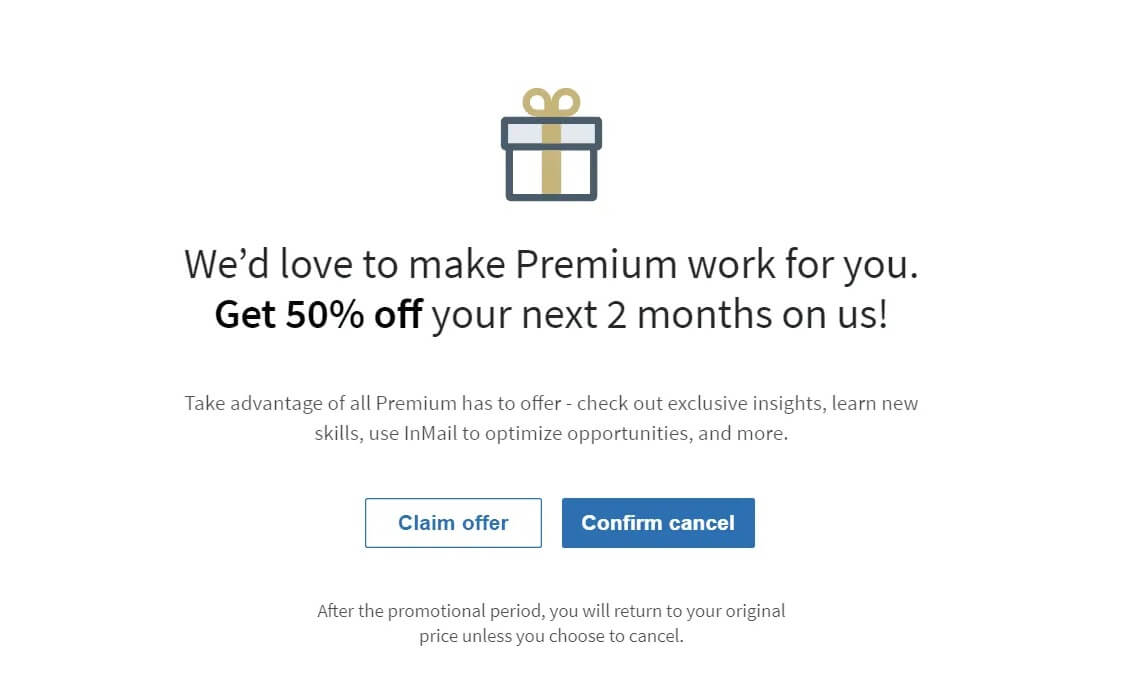
Lastly, LinkedIn will ask you for the reason you wish to cancel. Respond with It’s too expensive.
Once you do, LinkedIn will give you a 50% discount for 2 months. This will be more than enough to decide whether you wish to pay the price or not.
Sales Navigator discount
If you don't have any active subscription but you paid for Premium or Sales Navigator in the past, you might see this info pop up in the top right corner: Get 50% off Sales Nav.
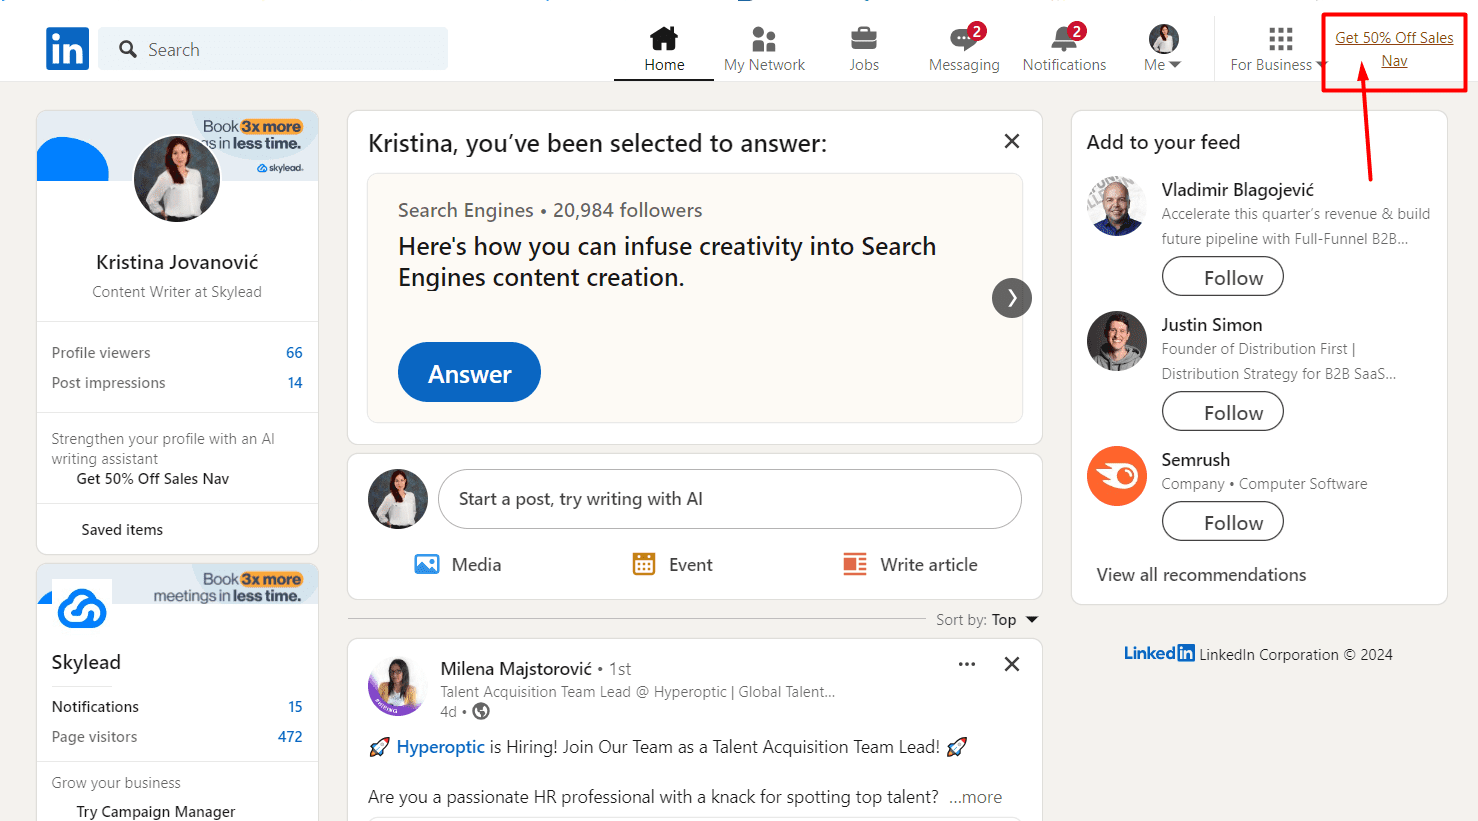
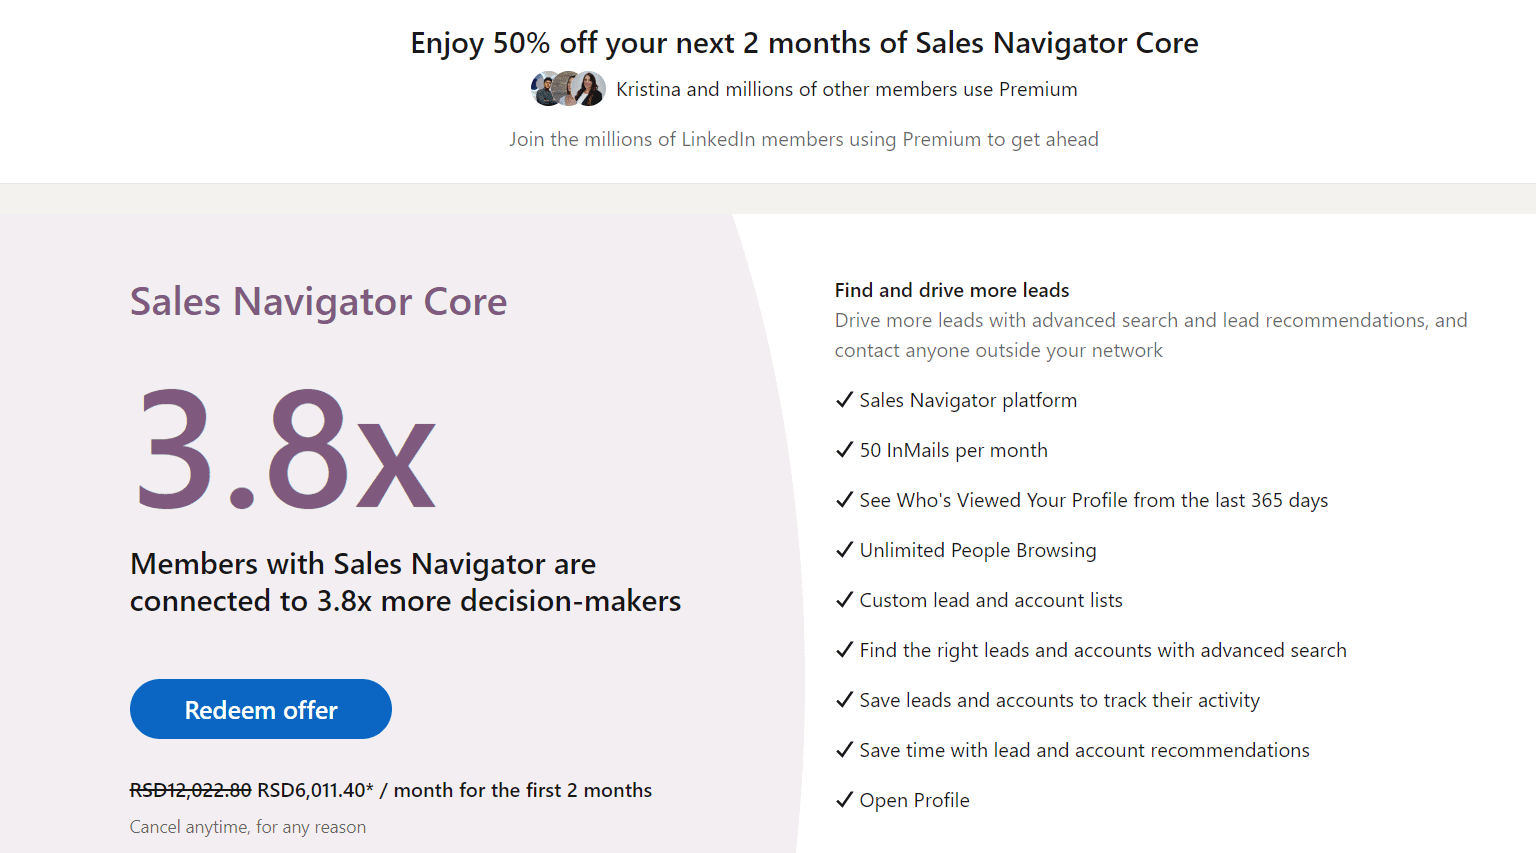
If you don't have any active subscriptions, LinkedIn will do this from time to time to remind you of their subscription benefits. Once you click it you can redeem 50% discount for Sales Navigator for 2 months.
FAQ
How do LinkedIn's Premium features specifically benefit different types of professionals, such as marketers, sales professionals, or recruiters, beyond the general descriptions provided?
LinkedIn Premium specifically aids professionals by providing enhanced tools for better targeting and networking. Marketers gain insights for more effective campaigns, sales professionals access detailed company and individual data for outreach, and recruiters get in-depth search capabilities to find ideal candidates, making each role's efforts more fruitful and efficient.
Are there any hidden costs or common pitfalls to be aware of when using these methods to get LinkedIn Premium for free, especially regarding the need to cancel subscriptions before they automatically renew?
Seeking LinkedIn Premium for free requires vigilance regarding trial periods and automatic renewals. Users must actively manage their subscriptions to avoid unexpected charges, as forgetting to cancel after a trial can result in automatic conversion to a paid subscription, leading to unwanted expenses.
Can these methods for obtaining LinkedIn Premium for free be combined or used sequentially to extend the free period, or is there a strict limit on how many promotions a user can access over a certain timeframe?
Leveraging multiple promotions for extended LinkedIn Premium access is subject to LinkedIn's monitoring of promotional usage. While users might attempt to sequentially use offers to maximize free access, LinkedIn's systems are designed to recognize and potentially restrict such activity, enforcing limits on the accessibility of consecutive promotions over a specific period.
Conclusion
LinkedIn really tries to give back to the community, and various LinkedIn Premium free promotions are the proof of that.
However, please be aware that LinkedIn keeps track of if and when somebody uses one of these promotions. If, for example, you used a 1-month free trial, LinkedIn won’t allow you to repeat it or get any other promotion from our list. Not for 12 months at least.
Furthermore, LinkedIn is not big on giving refunds. So, be careful to cancel the promotion in time. Otherwise, you will be charged after the free period ends. If, for any reason, you think that LinkedIn Premium is not for you, keep track of the date or set a reminder alert.
Lastly, keep in mind that if you are already a Premium user, you’ll need to cancel your Premium subscription. Only after you wait for the billing cycle to end will you be able to activate LinkedIn Premium free promotions.
That said, enjoy your LinkedIn Premium free promotions!

Are you a recruiter or a sales manager who wishes to outreach your candidates or prospects on autopilot and close more deals? Welcome! We are Skylead. Let’s chat and see how we can help you with your outreach. Contact us via chat or test out Skylead for free directly!
Disclaimer: Skylead is not affiliated, endorsed by, or connected with LinkedIn in any way.
When it's time to remove LinkedIn connections, remember to do it discreetly. You may want to remove someone without them knowing, whether for work or to clear up your LinkedIn network.
Fortunately, LinkedIn has ways to do this without causing disturbance. You can block people or remove connections without tipping off the other person.
Below, we’ll discuss a few ways you can try to remove connections from your LinkedIn network. Go through the list and see what methods suit you best!
How do you remove connections from your LinkedIn network? Quick answer
Here's the fastest way to remove LinkedIn connections via the LinkedIn desktop site.
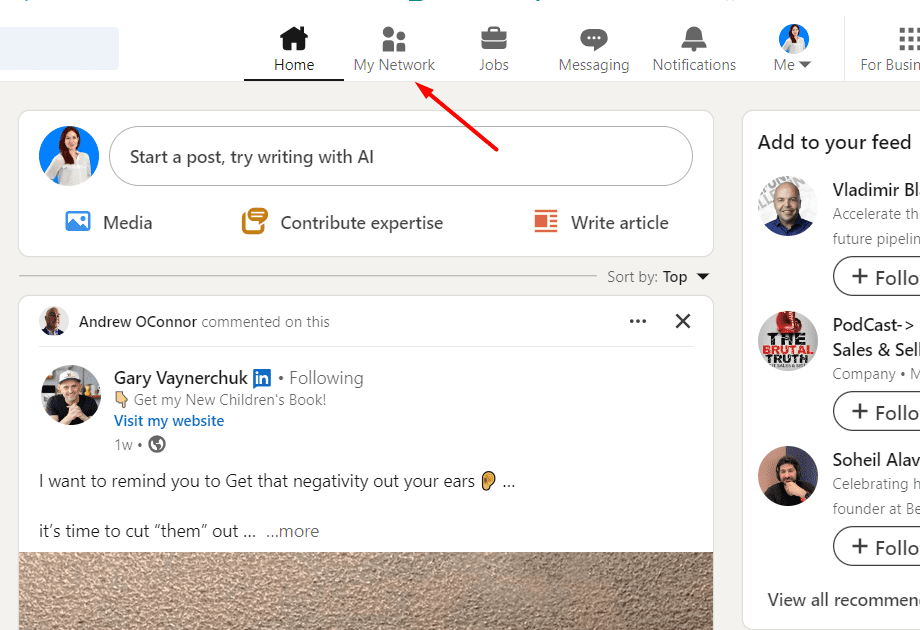
First, go to your LinkedIn homepage and click the My Network tab.
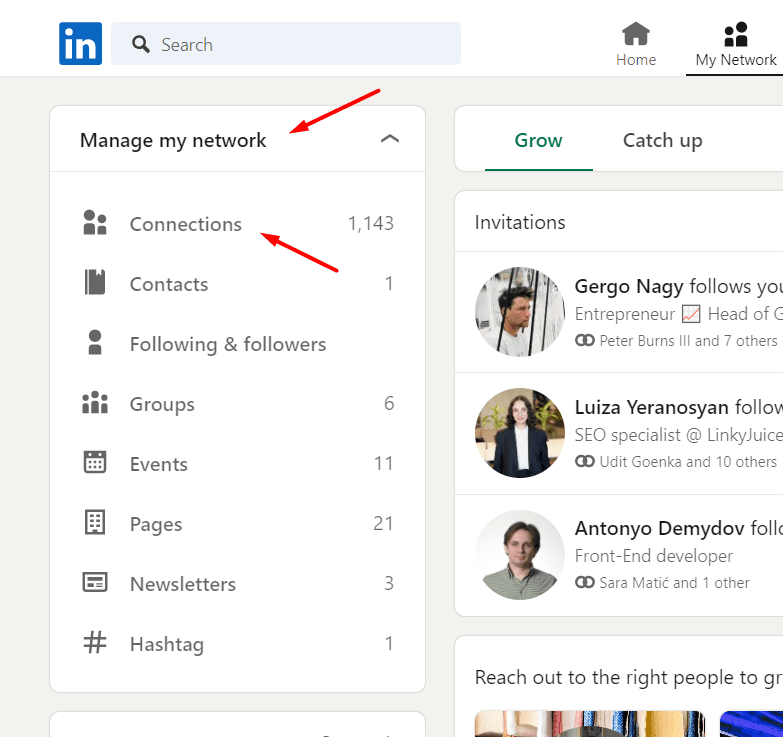
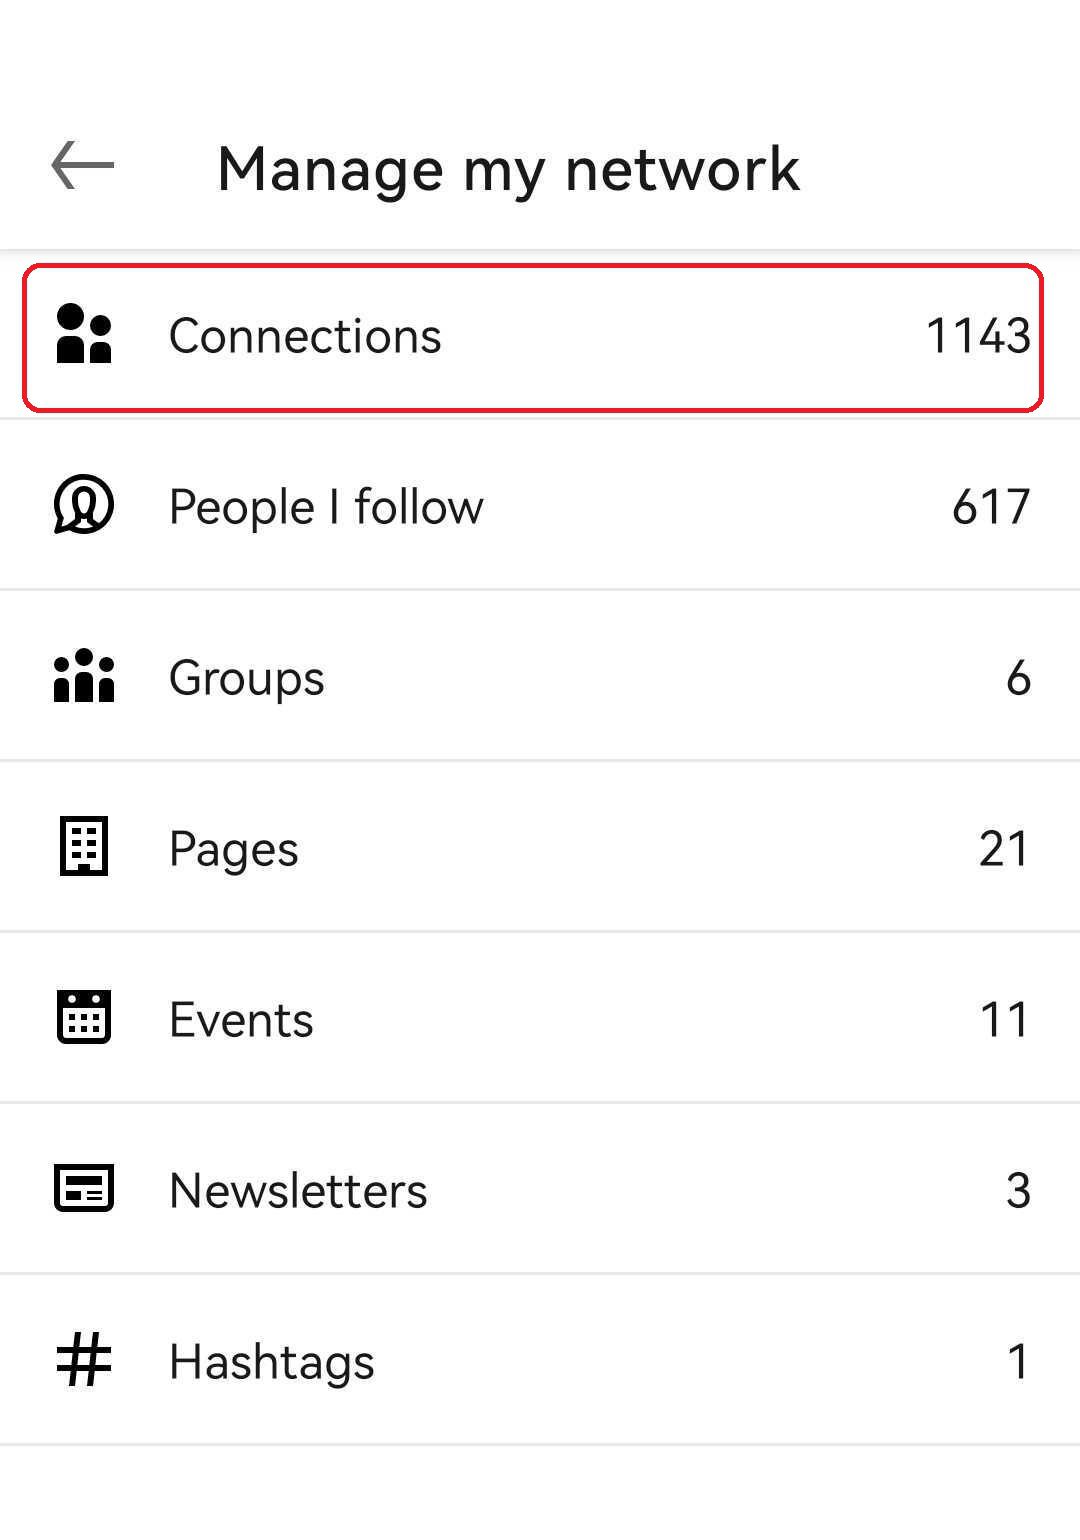
Next, hit Manage my network, select Connections from the left-hand menu.
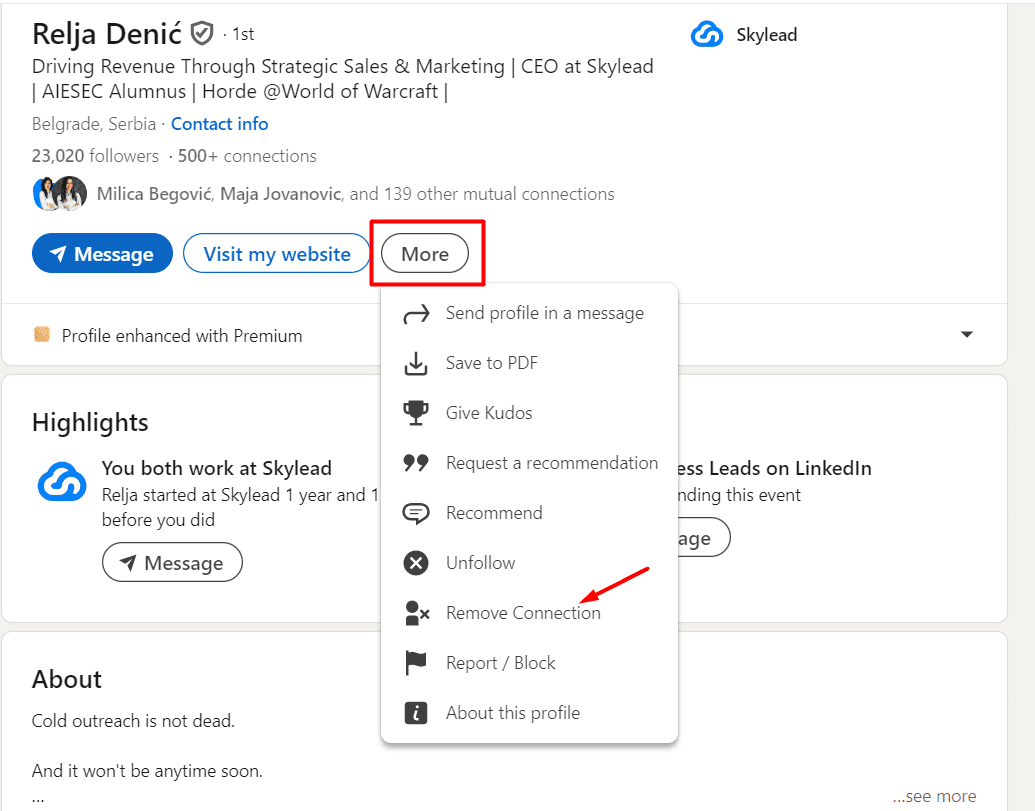
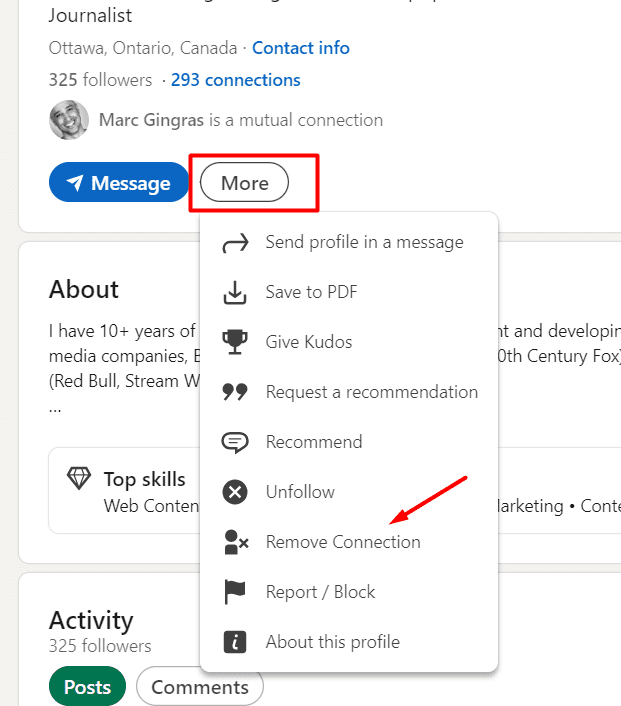
Then scroll through your list of connections, and find the person you want to remove. Open up their Profile page, and click the More option below their LinkedIn name & title info. Lastly select Remove connection from the drop-down list, and confirm your choice.
Remove connections on LinkedIn via mobile app (android and IOS)
If you want to remove connections from your LinkedIn network via the mobile app, here’s what you can do.
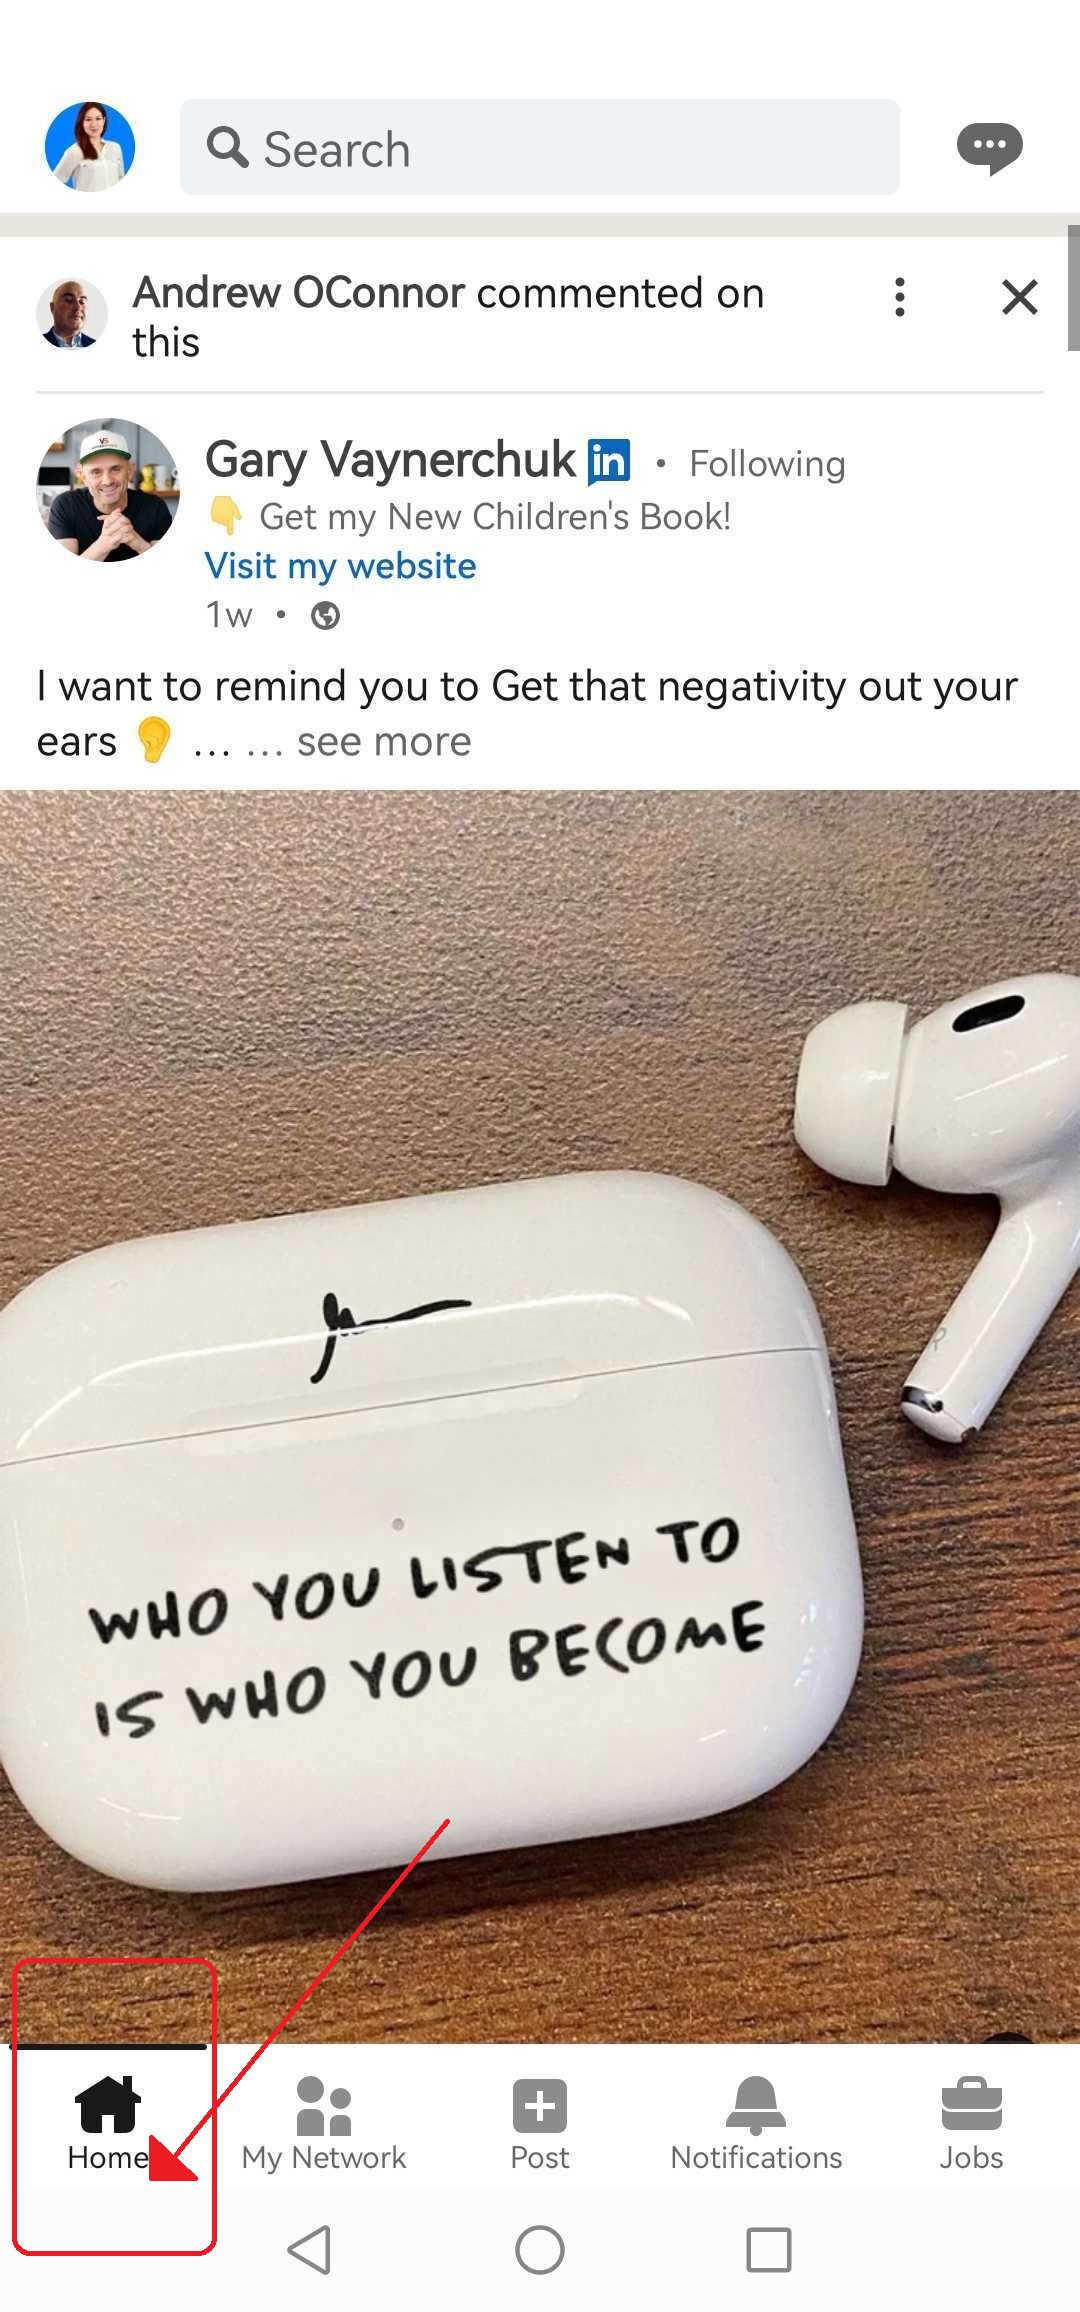
Firstly, launch the LinkedIn app on your phone or tablet, and tap the “My Network” option from the button menu list.
Now, tap on the option titled Manage my network.
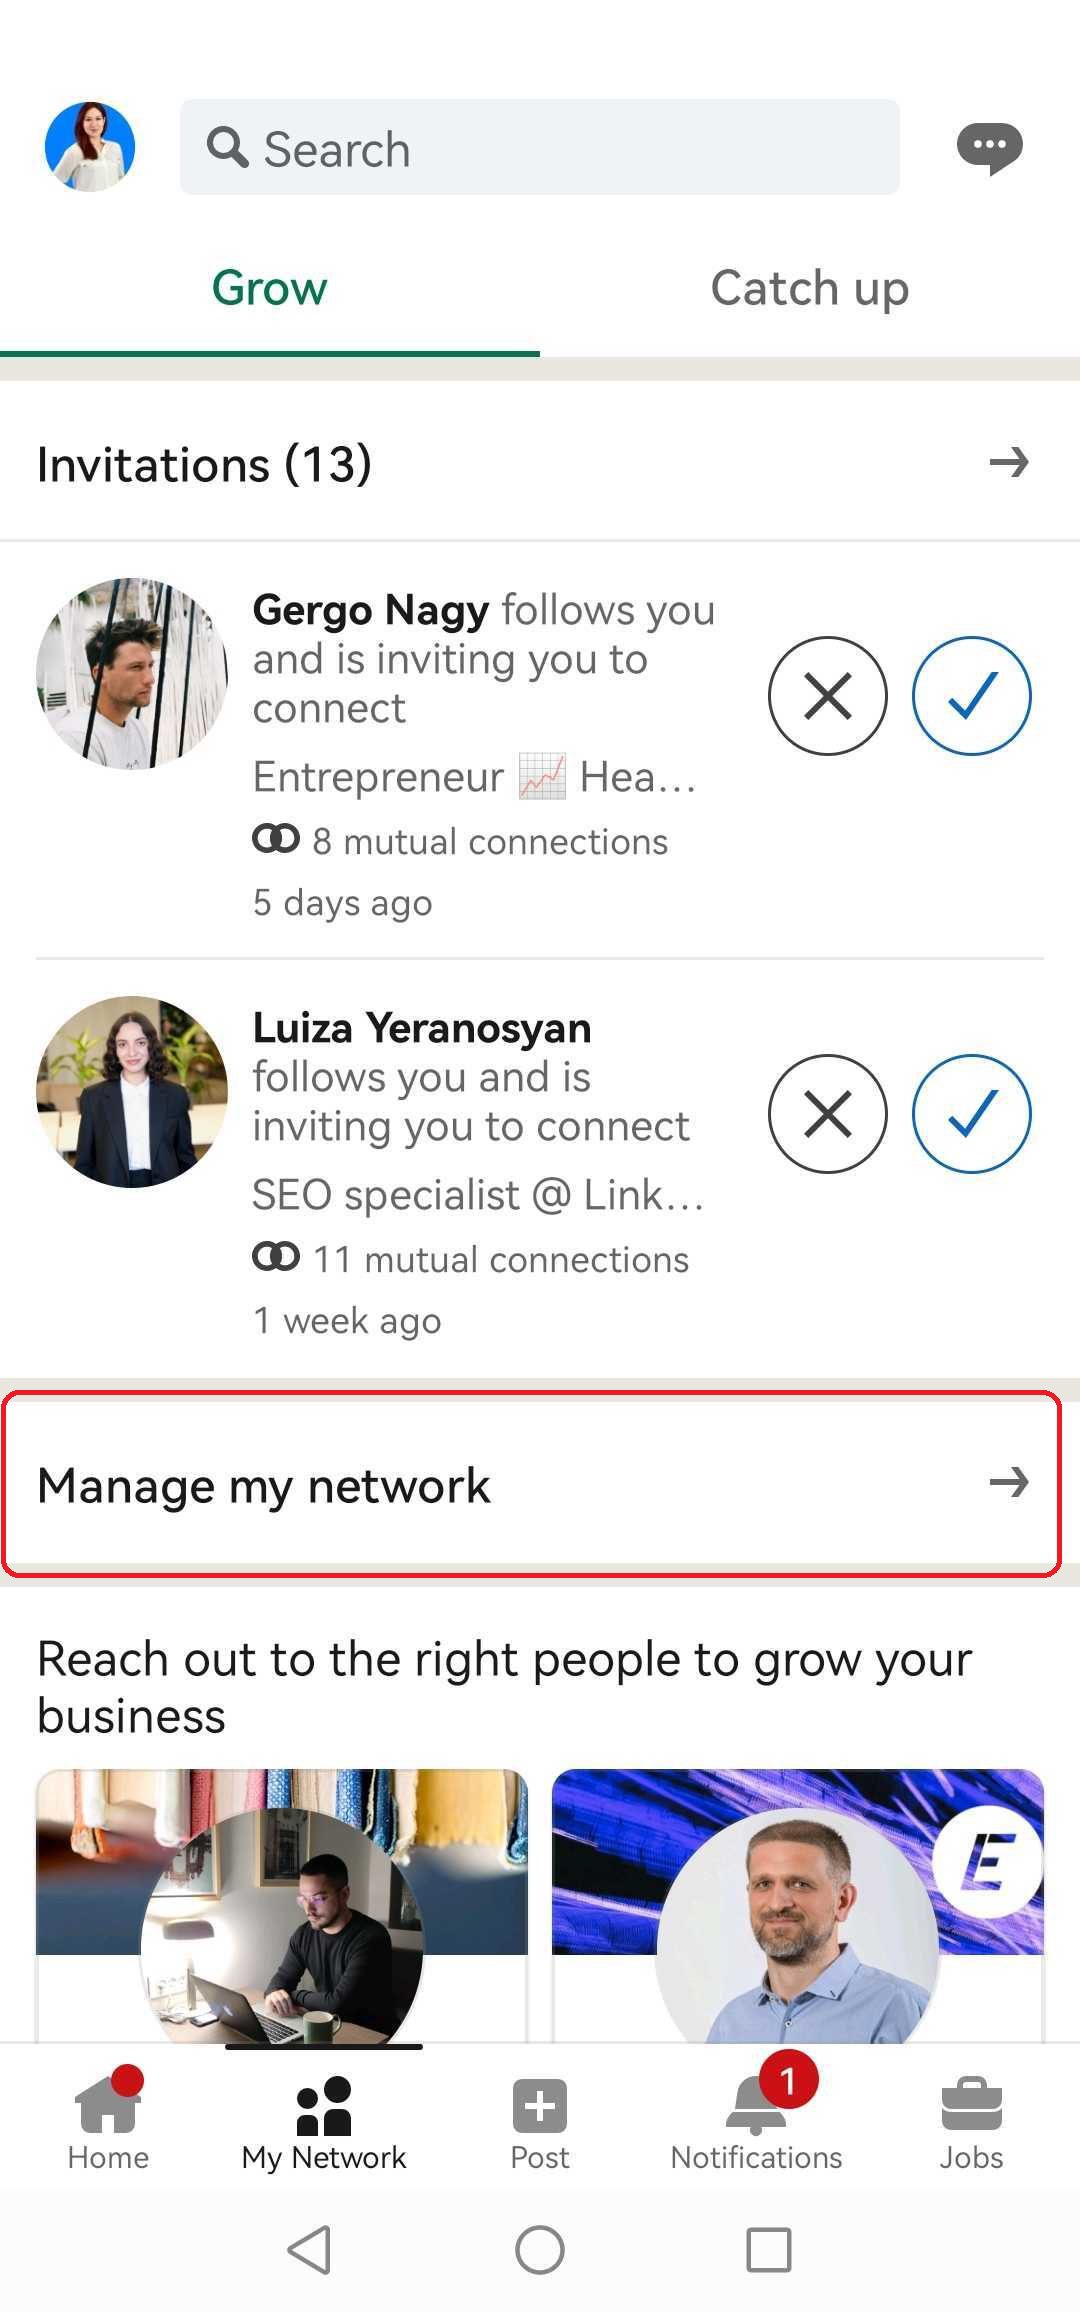
Tap on “Connections, and locate the profile of the connection you want to remove.
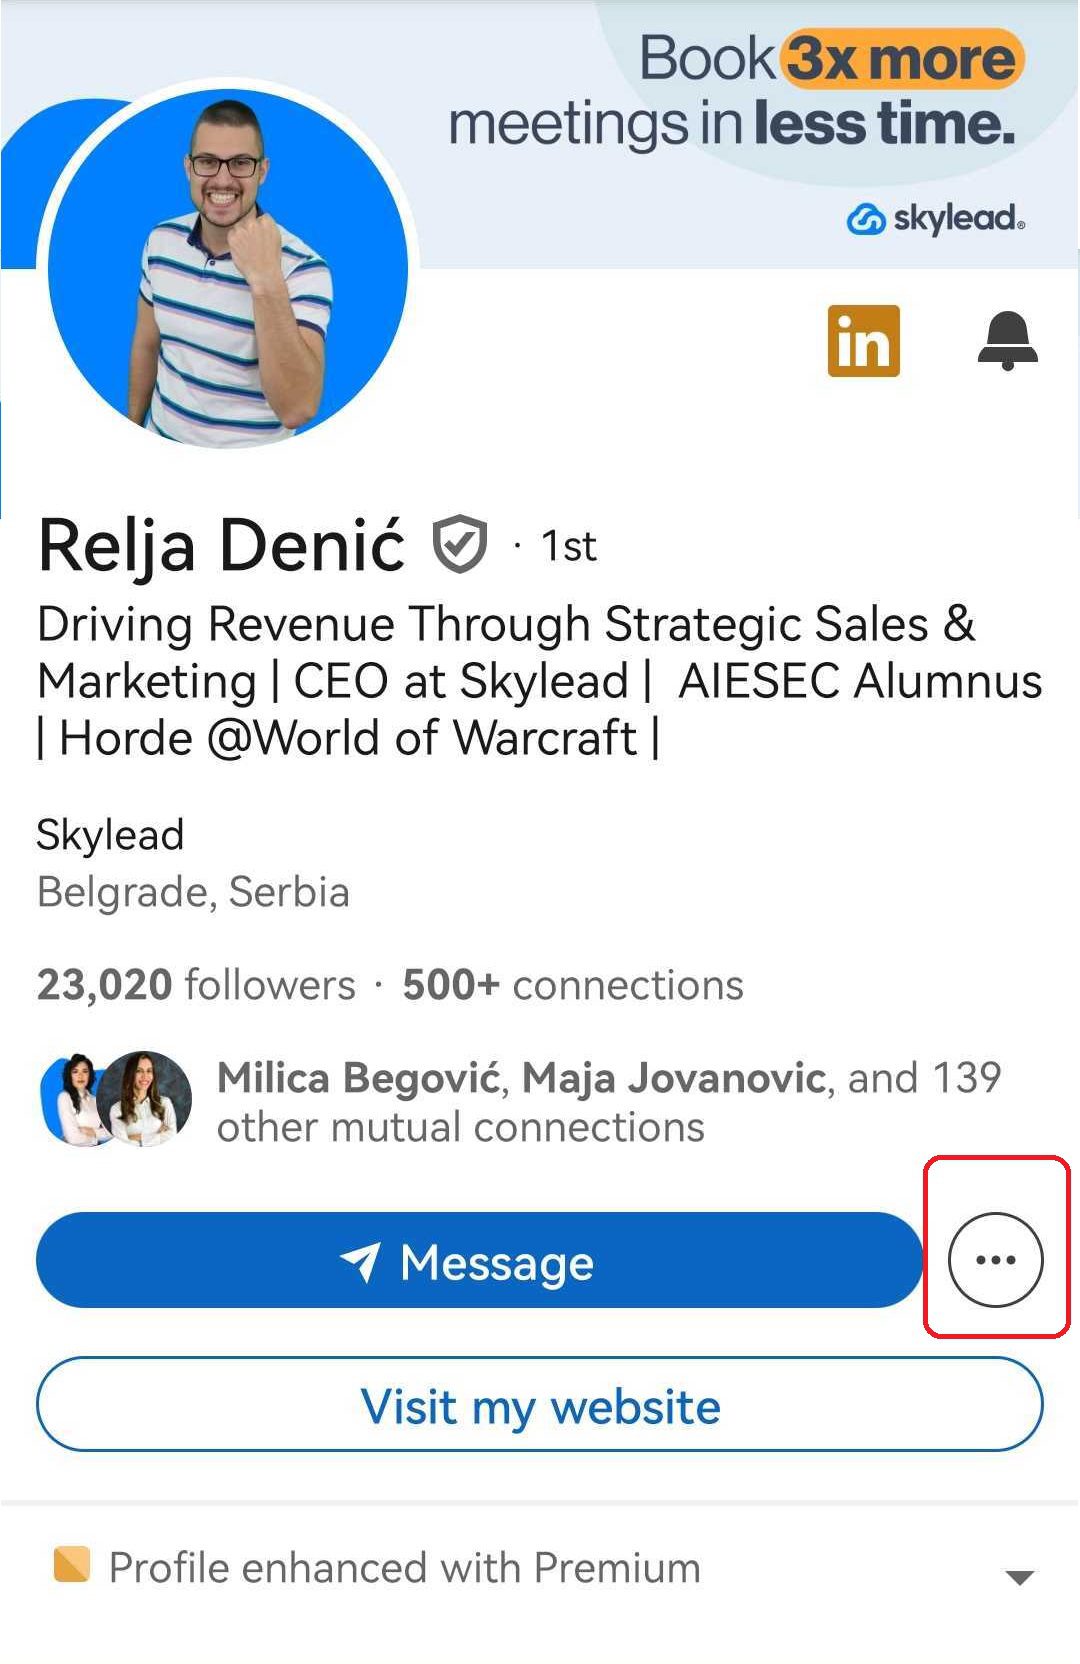
On their profile, tap the "three dots" button next to the message option.
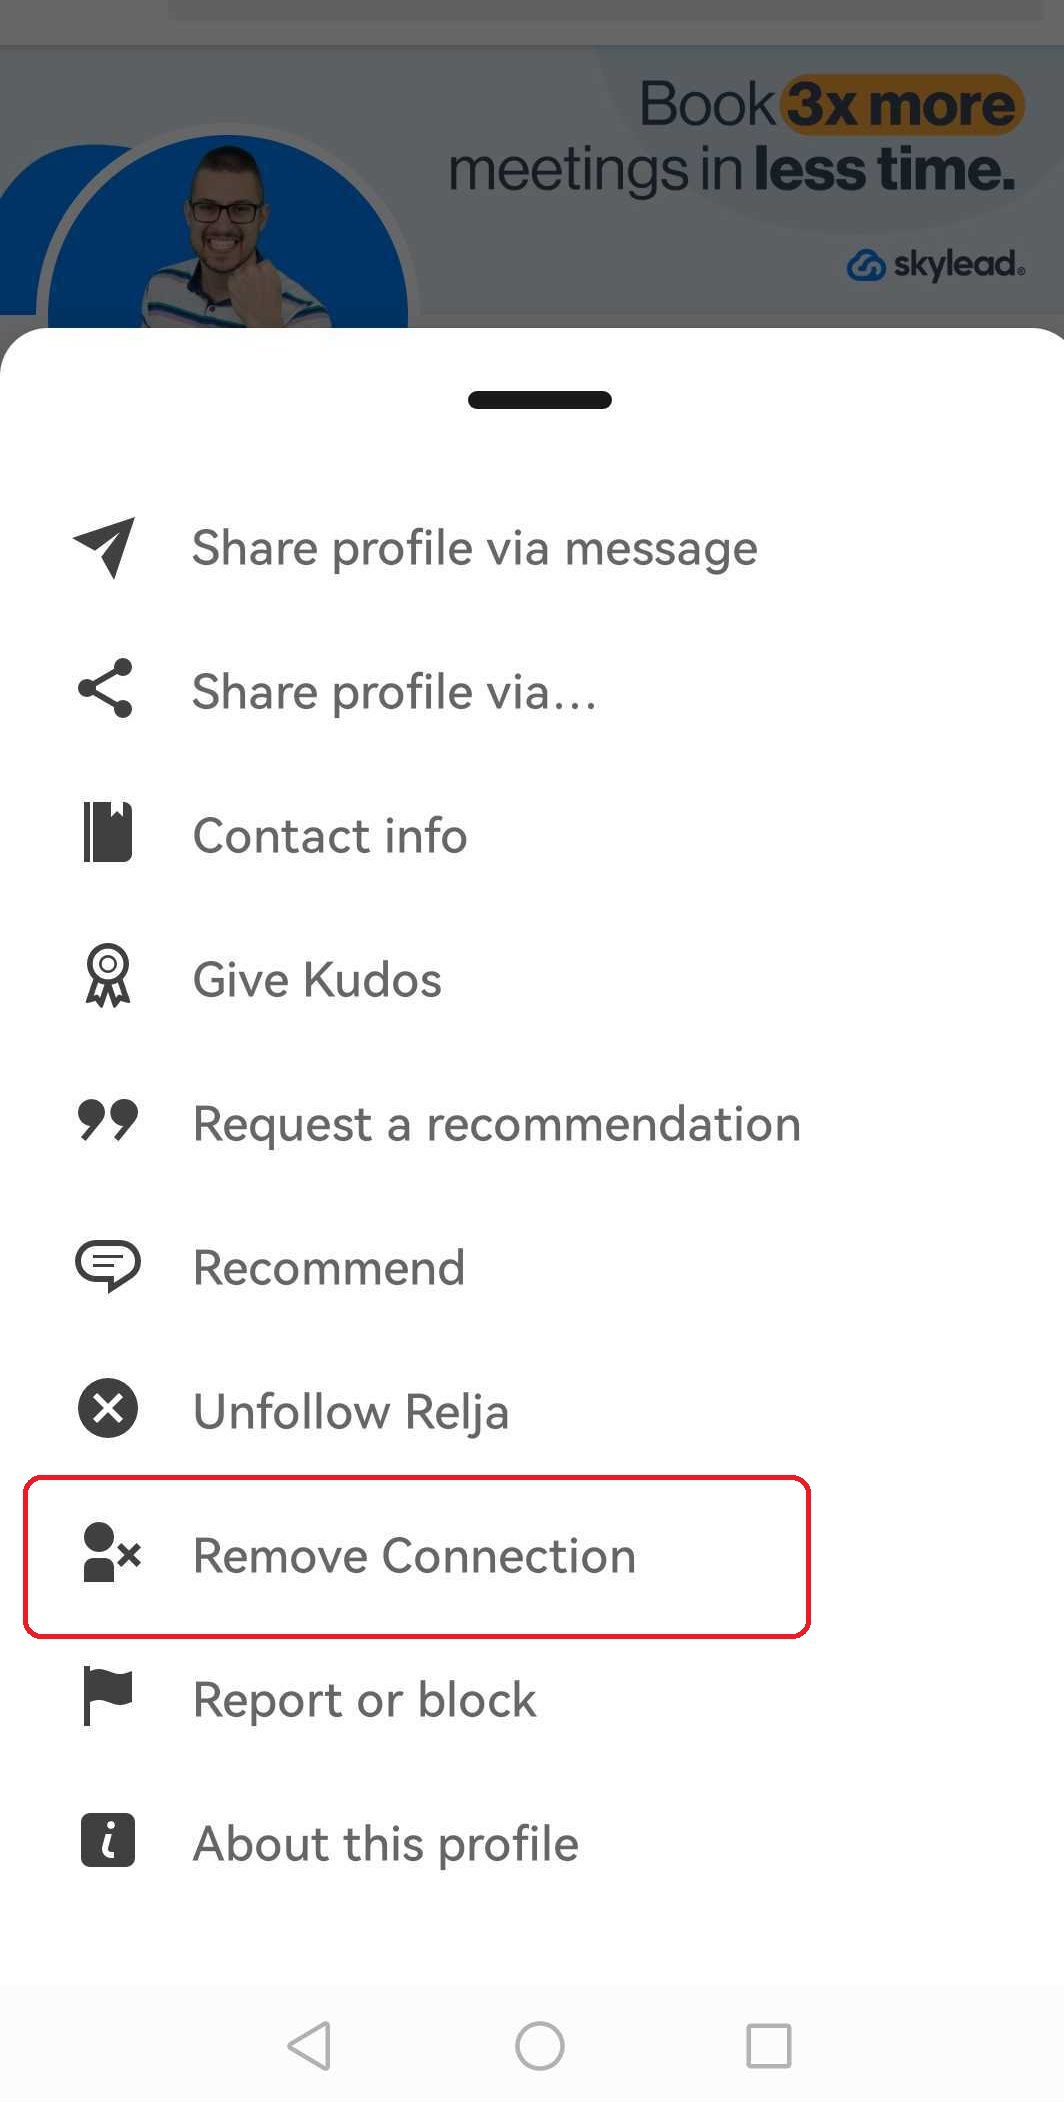
Lastly, select "Remove Connection" from the menu and confirm to complete the removal.
Bonus point: How to remove LinkedIn connections with Skylead?
Are you a sales professional, marketer, recruiter or a business owner that uses LinkedIn for outreach to generate leads? If you are, you can manage your leads using different tools.
For example, Skylead is the all-in-one sales engagement and cold email outreach solution through which you can send outreach messages.
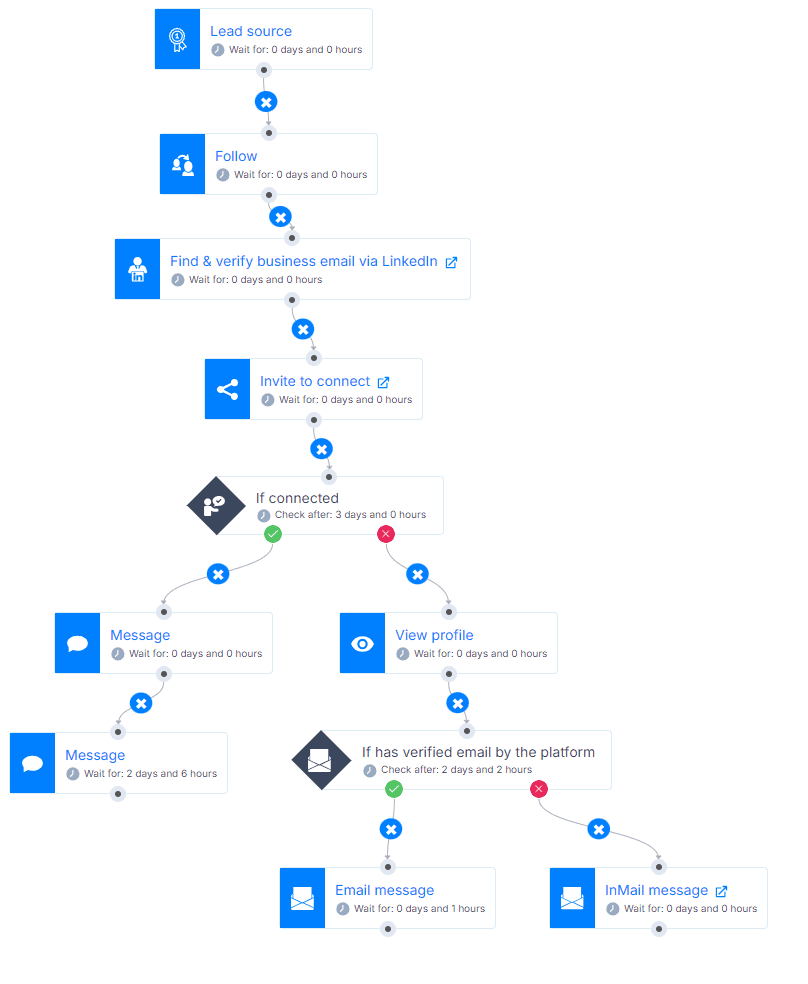
Moreover, you can combine these actions with if/else conditions and create a Smart sequence - a coherent outreach flow that Skylead will follow based on your leads’ behavior.
Lastly, in Skylead you can incorporate email discovery and verification action, to enrich your contacts without breaking an outreach flow. That said, a picture's worth more than a thousand words, so here’s how one smart sequence can look like.
You can also include variables, hyper-personalized images, and GIFs to customize your messages. Thus, significantly increasing your response rates.
And what about managing your leads once they reply? In that case, you can respond to all your messages from Skylead’s Smart inbox. You can save response templates for easier replies and create labels to prioritize leads there.
However, what if (for any reason whatsoever) you want to remove a lead from the connections built via your campaigns? You can either try the method discussed above. Or, you can go to your Skylead’s app interface and directly remove the connection from there.
You can remove your LinkedIn connections using Skylead through two ways.
1# Remove connections on LinkedIn through Skylead’s Leads page
Here’s the step by step process of how you can remove LinkedIn connections via Skylead’s Leads page.
Go to the Leads page on Skylead's platform, and click the name of the lead whose connection you want to remove.
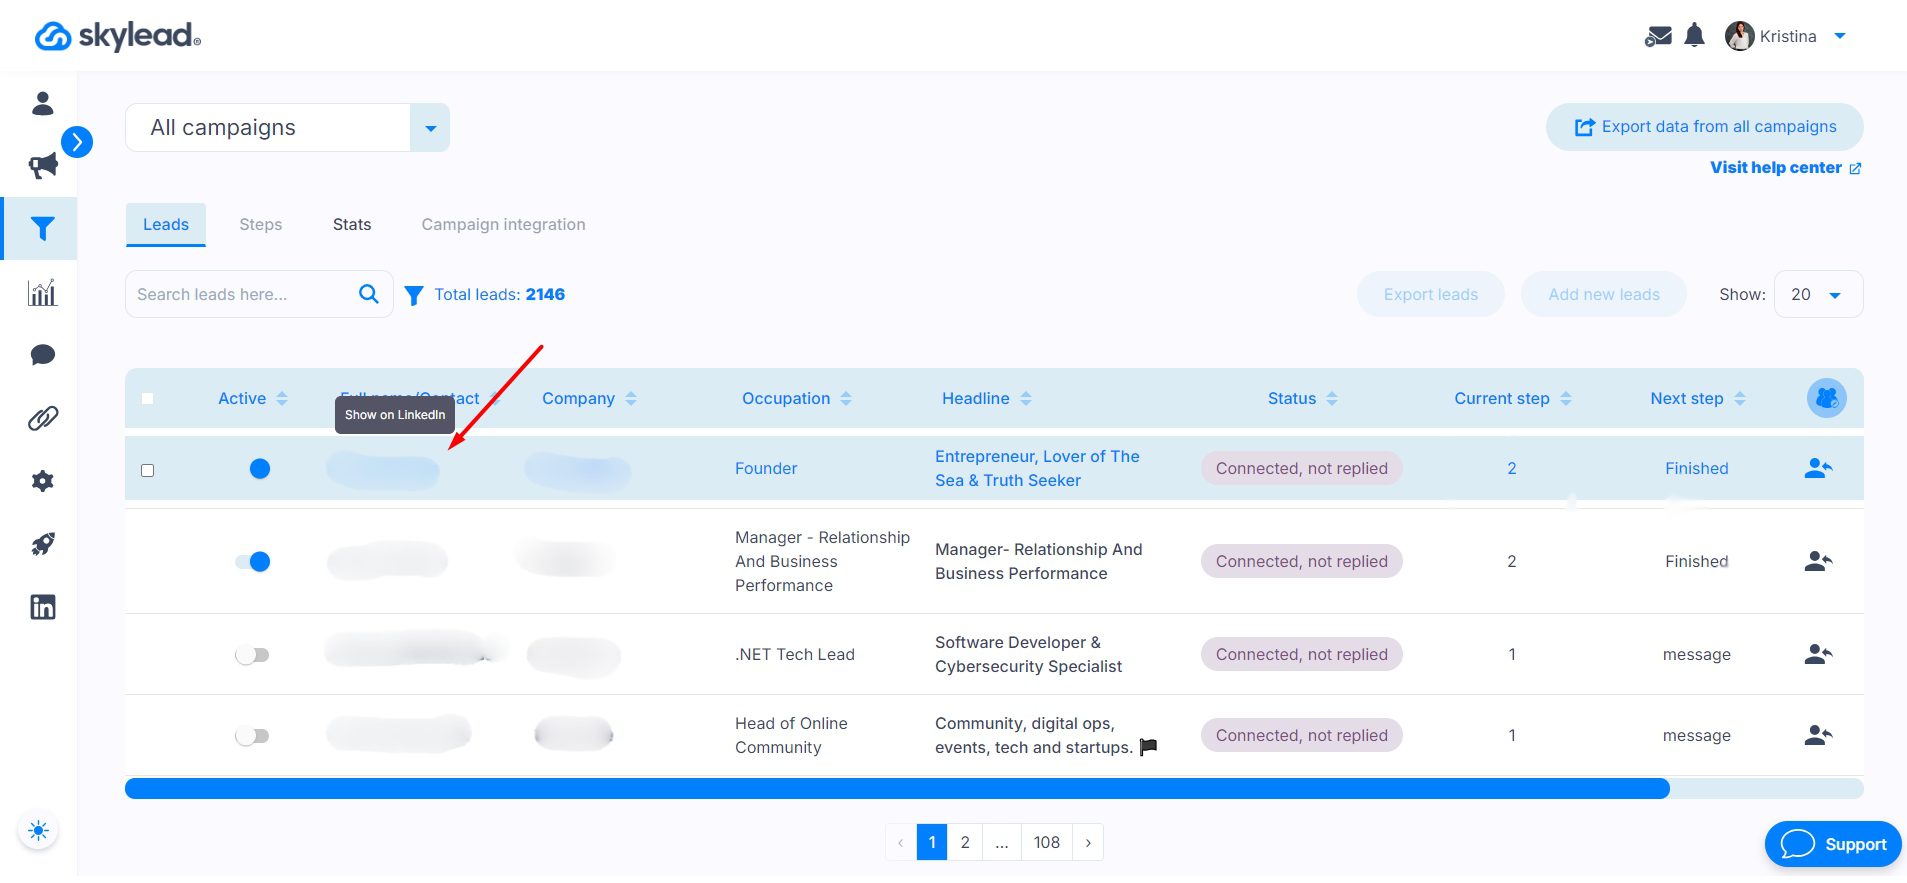
Next, on the LinkedIn profile, hit the More button next to the Message button. Lastly, locate and Remove connection from the dropdown menu and confirm the action.
2# Remove connections on LinkedIn through Skylead’s Smart inbox
Instead of manually going through your LinkedIn or Sales Navigator inbox to check conversations, you can also remove connections on LinkedIn through Skylead’s Smart inbox.
Simply go to the Smart inbox page and select the name who you wish to remove from LinkedIn. Then, click their name next to the LinkedIn icon, that will prompt you to their LinkedIn page.
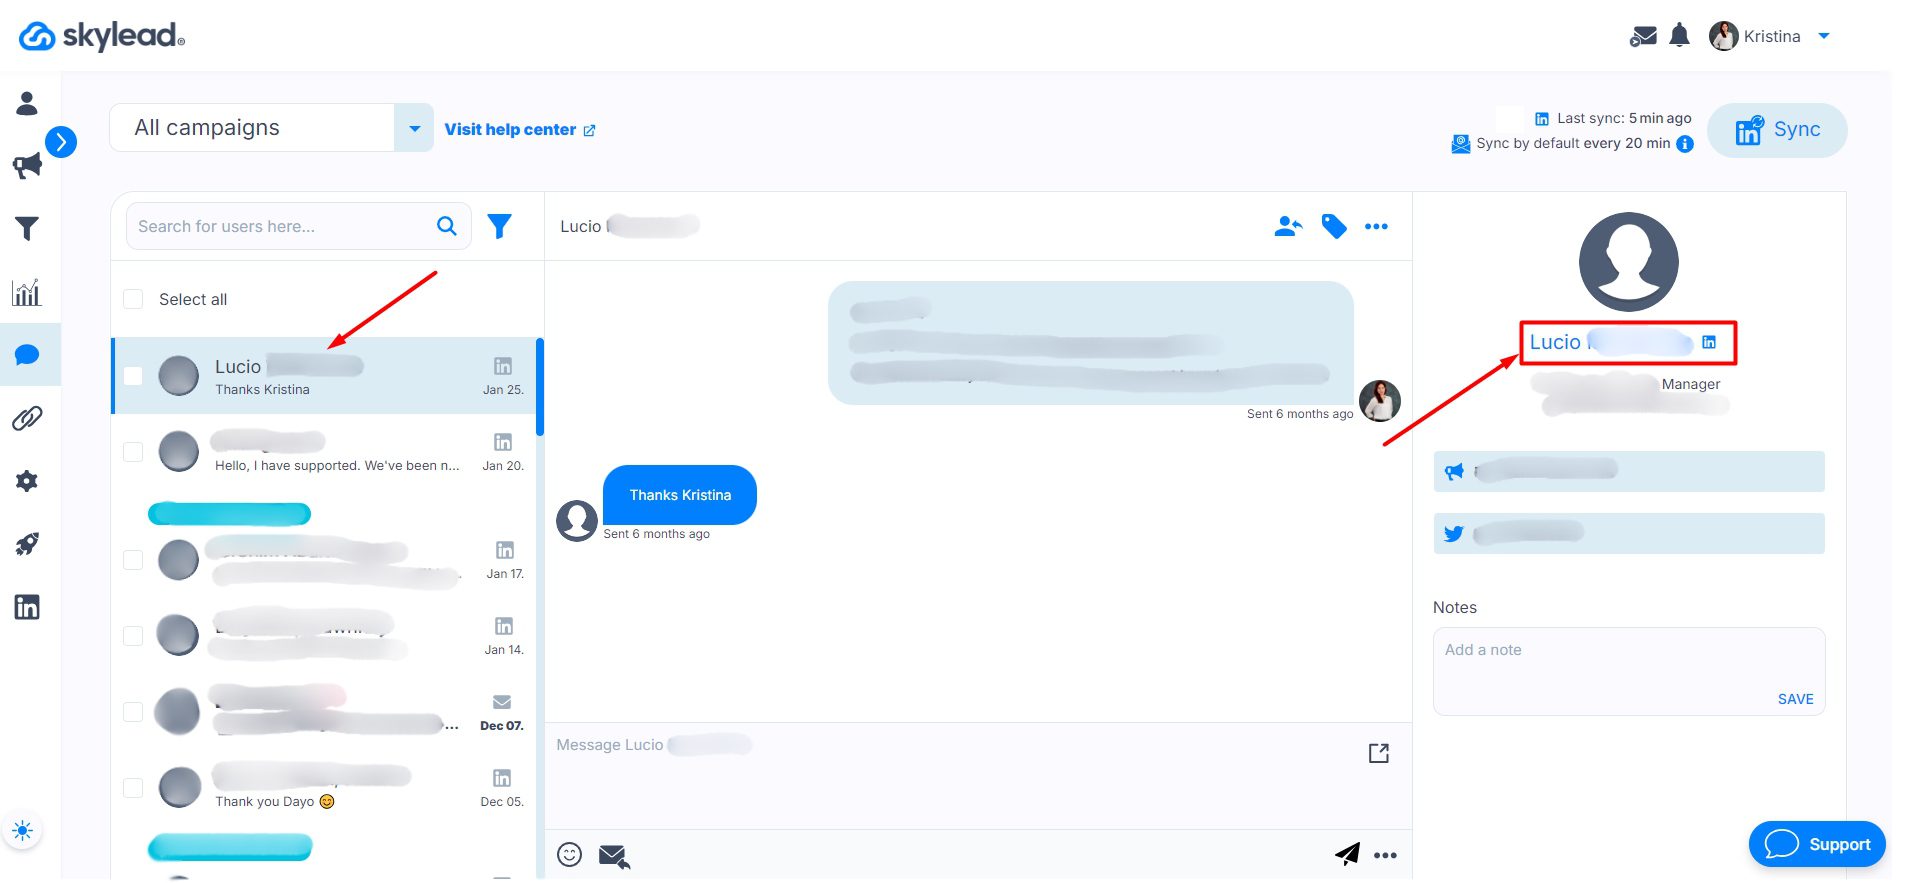
After that, you’ll be prompted to their LinkedIn profile, where, once again, you click the More button, and then Remove connection.
💡 Can I remove multiple LinkedIn connections at once or in bulk?
Unfortunately, LinkedIn doesn't offer a direct way to remove multiple connections in bulk; each connection must be removed individually.
While some third-party tools and browser extensions claim to automate this process, using them poses significant risks. These extensions often inject code into LinkedIn, making it easier for LinkedIn to detect and potentially restrict your account.
Therefore, it's important to be cautious when considering such options.
When should you remove your LinkedIn connections? [5+ reasons]
Here are some scenarios when removing connections from your LinkedIn network might be appropriate.
1. When your lead doesn't match your ICP or buyer persona
In sales, it's necessary to have a network that aligns with your Ideal Customer Profile (ICP) or Buyer Persona. If you have connections that don't fit these criteria, they can clutter your network. Removing these connections can help you maintain a more targeted outreach, effective LinkedIn presence and leave room for relevant connections. In other words, this ensures that your interactions are relevant for your sales goals.
To clarify, the ICP is a detailed description of the type of company who would benefit most from your product or service. The Buyer Persona, on the other hand, represents a key individual who works in your ICP. They are either decision-maker or active users of your product or service. This persona includes more than just demographics or job titles. A well-developed Buyer Persona includes detailed insights into the individual's motivations, pain points, challenges, and goals.
That said, here's why it is important to align your LinkedIn network with ICP and Buyer Persona.
Targeted outreach
Connections that do not match your ICP can lead to wasted efforts on outreach that is unlikely to convert.
Relevant content sharing
Sharing content customized to your ICP and buyer personas is a key strategy in nurturing leads. When your network consists of irrelevant connections, the engagement metrics for your posts can suffer.
Data-driven decision making
A network cluttered with irrelevant connections can skew your data analytics, leading to inaccurate insights. Maintaining a network that mirrors your ICP ensures that the data you collect from interactions and engagements is more accurate.
Enhanced engagement
A focused network encourages meaningful interactions. When your connections align with your ICP, the likelihood of engaging in mutually beneficial conversations increases. This leads to stronger relationships and more opportunities for conversions.
Optimized sales funnels
Connections outside your ICP can disrupt your sales funnel. You may attract leads that are less likely to progress through your business’s funnel stages.
If you remove connections on LinkedIn, you can streamline your sales process. This ensures that each stage of the funnel is populated with high-quality leads that are more likely to convert.
2. Remove a connection that you might suspect to be a fake account
If you stumble upon a LinkedIn connection that seems fishy, it's necessary to act swiftly. Suspected fake accounts can harm your network's integrity and reputation. Essentially, report these accounts to LinkedIn before removing them.
To report an account, you can go to the suspected fake profile in your LinkedIn network and:
- Click on the "More" button
- Select "Report/Block"
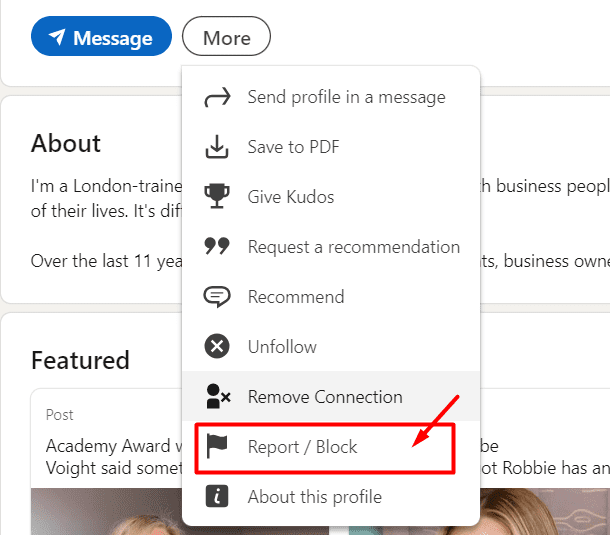
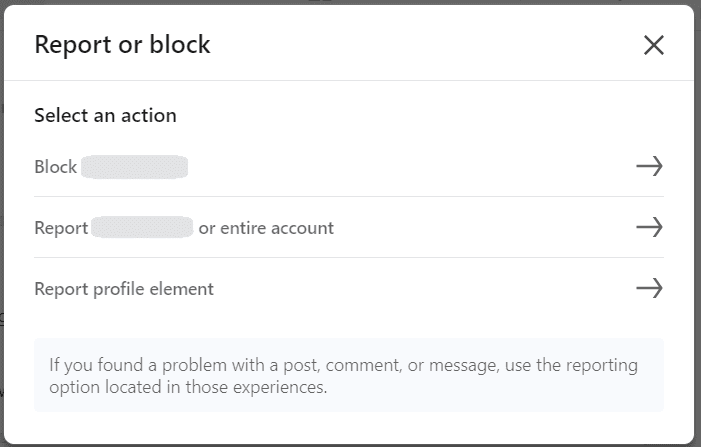
Then choose whether you wish to report or block them.
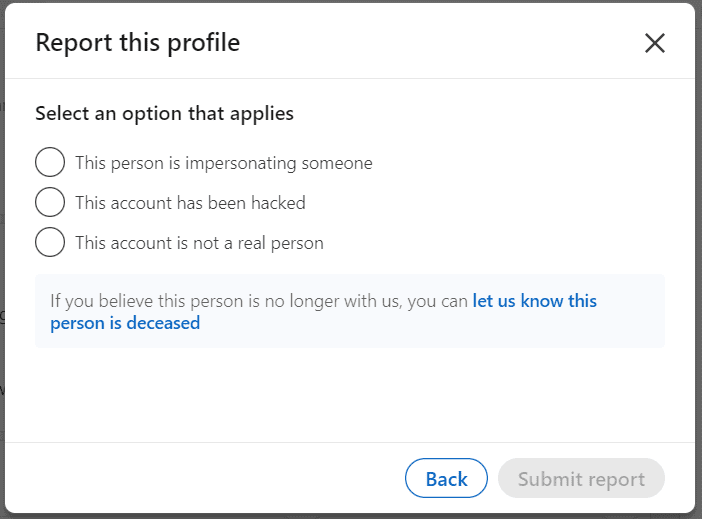
Lastly state the Reason for reporting, such as “This is not a real person," and submit your report.
LinkedIn takes such reports seriously and investigates them promptly.
By reporting suspected fake accounts, you not only protect your network but also contribute to maintaining the platform's authenticity.
3. Shortlist profiles that practice excessive promotion
LinkedIn is a professional networking platform, not a billboard for constant self-promotion. If a connection floods your feed with too much promotional content, it's time to reconsider your connection.
Indeed, self-promotion is acceptable to some extent. However, if you don’t find value in it, excessive promotion can detach your audience. Also, it can reduce the value of your network.
In this case, it might be best to remove the connection who follows this practice regularly. Remember, quality connections matter more than quantity on LinkedIn, so choose your network carefully for maximum benefits.
4. Identify profiles that cause reputational damage
If a connection consistently posts inappropriate or offensive content, engages in unethical behavior, or tarnishes your professional reputation by association. It's best to remove them from your network to protect your own brand.
Moreover, negative ties can hold back your career and block opportunities, whether due to unprofessional actions or unsuitable posts. Staying connected with such people can reflect poorly on you.
Deleting these connections protects your reputation and ensures you're linked only with those who share your professionalism.
By refining your network, you show you're serious about maintaining an excellent online image and securing your reputation.
5. Going through a career shift? Reorganize your LinkedIn connections
When you undergo a career shift, it's essential to reassess your LinkedIn connections. As you transition to a new professional field, many of your current connections may not align with your new aspirations.
Therefore, it's necessary to surround yourself with individuals who can support and facilitate your success in your new role. By removing connections, you create space for new connections that can help you thrive in your chosen field.
Moreover, keeping your network to your evolving career path ensures that you're connected with the right people.
6. Check for professional misalignment in your LinkedIn connections
Your LinkedIn network should consist of professionals who align with your career goals and values. Suppose you find that a connection's professional interests or behaviors are not in line with yours. Consider it may be beneficial to remove them from your network.
Moreover, you should not maintain connections with individuals irrelevant to your professional journey, as it can dilute your network's effectiveness. Whether it's differing ethical standards, conflicting business practices, or simply a lack of collaboration.
What happens when you remove a connection from your LinkedIn network?
When you remove a connection from your LinkedIn network, several consequential actions ensue.
- First off, any endorsements or recommendations you received from that connection will disappear. If you reconnect later, those endorsements or recommendations won't come back automatically,
- Moreover, once you've hit the Remove connection button, that person's profile will no longer be accessible to you. This means no more peeking at their updates or checking out their latest achievements. It's a clean break, ensuring that your LinkedIn feed stays focused on what matters most to you.
Does LinkedIn notify the other person when you remove a connection?
LinkedIn does not notify the person when you remove them from your network. This means you can clean up your connections without worrying about alerting the other party.
Whether you're simplifying your network for better engagement or distancing yourself from irrelevant contacts, the process is discrete and straightforward. LinkedIn respects your privacy by not broadcasting these actions to others.
How can you cancel the pending LinkedIn invitations to connect?
Canceling pending LinkedIn invitations is important for managing your network well. If you leave these requests hanging, they can clutter your network and make it less effective.
For detailed instructions on how to cancel LinkedIn invitations, check out our blog post How to cancel pending LinkedIn invites & boost your acceptance rate?
How to block connections from your LinkedIn account?
Blocking a connection on LinkedIn is a decisive step, ensuring a complete cut-off from the individual's profile and interactions.
Here's a straightforward procedure to block someone from your LinkedIn account.
Navigate to the person’s LinkedIn profile and hit the More button, and then Report/Block from the dropdown menu that appears.
Then, in the pop-up window, confirm your decision by clicking the Block [name of the person]. Lastly, finalize the process and LinkedIn will block the individual from your account.
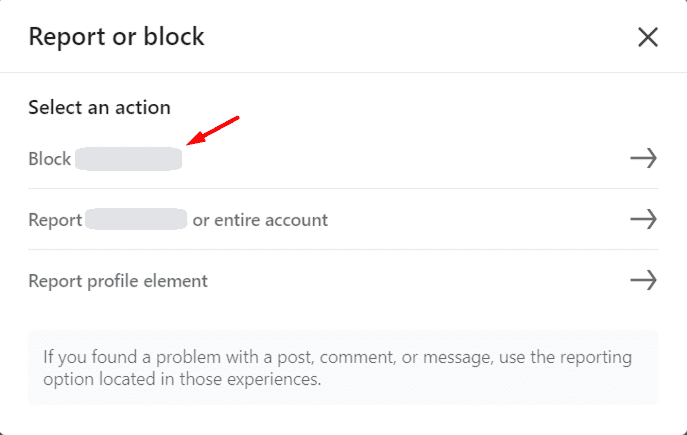
Moreover, they won't be notified about blocking, and they'll lose access to your profile, content, and messaging.
What’s the difference between blocking connections and removing connections on LinkedIn?
Let's identify the differences between blocking and removing connections. This can help you simplify your network and decide whether you need to block or just remove a connection altogether.
| Aspect | Blocking Connections | Removing Connections |
| Visibility of profiles | Both parties become invisible to each other on LinkedIn. | The removed person's profile disappears from your connections list. |
| Access to Shared Content | Any shared content between the two is inaccessible. | Shared content between the two remains accessible. |
| Messaging | Messaging each other through LinkedIn becomes impossible. | There is no impact on messaging unless you eventually actively reach out. |
| Notification | The blocked person won't receive a notification. | The removed person won't be notified but may notice the change if they explore your profile manually. |
| Profile Features | Their profile stops appearing in features like "People Also Viewed." | Their profile vanishes from specific LinkedIn suggestions. |
| Endorsements/Recommendations | Any endorsements or recommendations from that person disappear. | Endorsements and recommendations disappear. |
Can you have too many LinkedIn connections?
When it comes to your LinkedIn profile, quality is more important than quantity. More is not always better.
Moreover, when you reach 500+ connections on LinkedIn, your visibility increases a lot. With over 5,000 connections, you can significantly boost your growth.
Even though you can't keep adding connections forever, LinkedIn limits you to 30,000 1st-degree connections.
Your ideal LinkedIn connections might be a mix of,
- Clients/Customers
- Networking Partners
- Vendors
- Coworkers
- Family
This proportion helps to keep your network valuable and manageable.
However, too many connections can clutter your feed and make it difficult to see important updates. You might miss out on valuable information or opportunities because your network is too large and irrelevant.
Definitely, to decide if you need to trim your network, think about who adds value. Keep those who regularly share valuable insights or opportunities. If someone doesn't add value or no longer aligns with your goals, consider removing them.
How do you hide LinkedIn network connections?
Want to keep your LinkedIn connections private? Follow these simple steps to hide your LinkedIn network connections and maintain privacy.
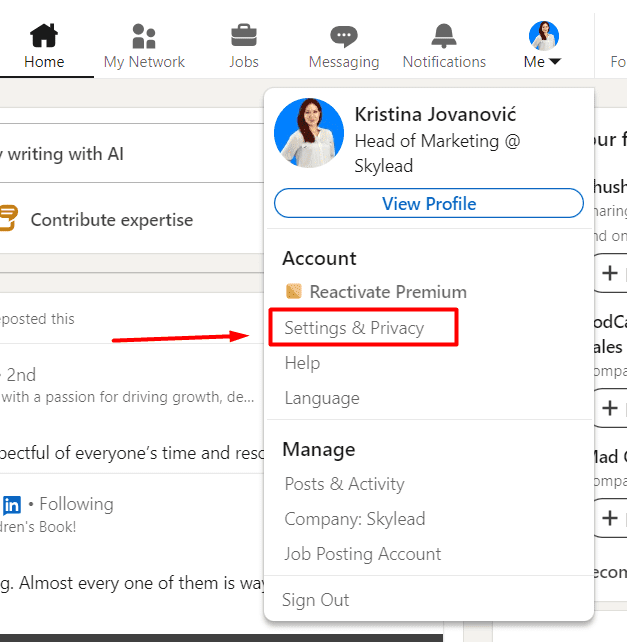
Firstly, open LinkedIn, navigate to your profile and hit the Me icon at the top of your LinkedIn homepage. Then, select Settings & Privacy from the dropdown menu.
Then, within the settings menu, navigate to the Visibility section and under Visibility of your profile & network choose Connections.
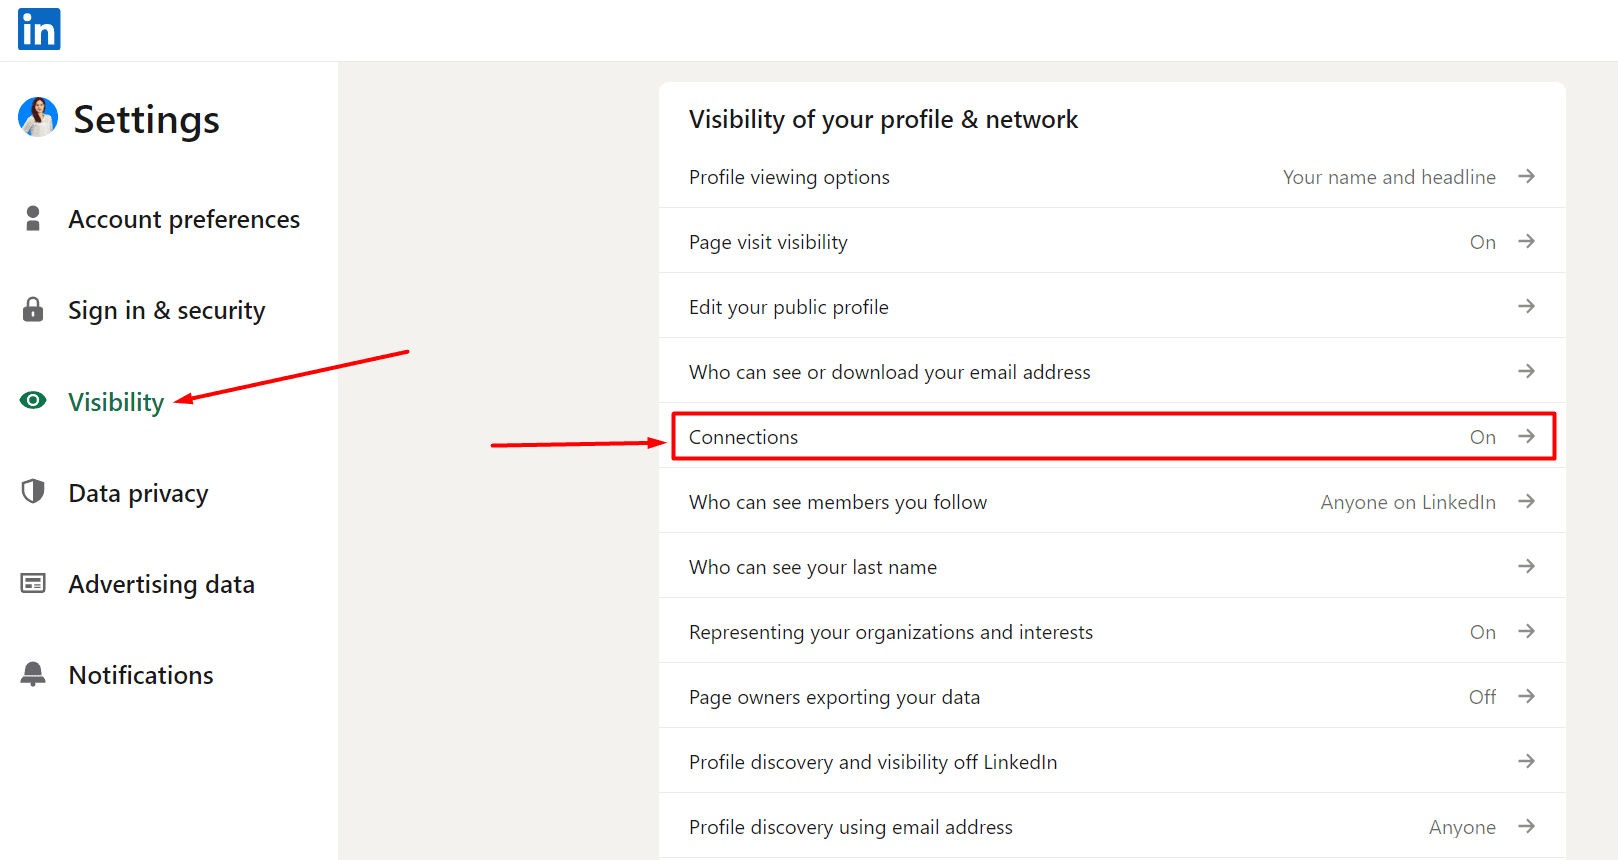
From there, you can either turn on or off the visibility of your connections if you want other people in your connections to view your network, and save changes.
By doing this, your LinkedIn network remains confidential, protecting your professional relationships from prying eyes.
Frequently Asked Questions (FAQs)
What is the difference between “unfollow” and “remove” connections on LinkedIn?
Choosing to 'unfollow' someone on LinkedIn hides their updates from your feed but maintains your connection and communication options. Conversely, 'removing' a connection completely cuts off updates and communication, and removes the individual from your connections list.
When and how do you unfollow people on LinkedIn?
Knowing when to unfollow someone is necessary to maintain field-relevant connections on LinkedIn. If their content is irrelevant to your business or industry, it might be time to unfollow them. Moreover, if they post too frequently and clog your feed, consider unfollowing to keep your feed manageable.
Similarly, if someone is consistently posting content that goes against your values, unfollowing them can help maintain a positive environment.
Here are simple steps you can follow to unfollow people on LinkedIn,
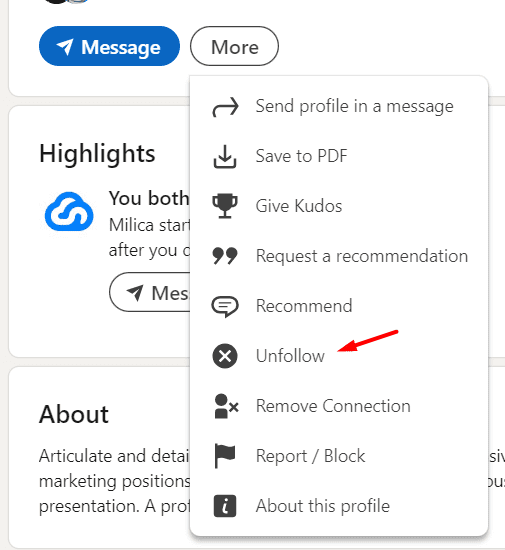
- “Go to the profile” of the person you want to unfollow.
- Click on the "More" button located on their profile.
- Select "Unfollow" from the dropdown menu.
Can I bulk unfollow people on LinkedIn?
Unfortunately, LinkedIn does not currently offer a feature to bulk unfollow or remove connections in one go. This means that if you wish to remove a large number of connections, you'll need to do so individually.
What are the types of restrictions for sending connections?
On LinkedIn, various restrictions ensure a smooth networking experience.
Connection Limits: You can send approximately 20-25 connection requests per day, totaling around 100 per week. If you have more than 700 unanswered invitations, LinkedIn may request that you cancel some of them.
However, there are strategies to bypass the LinkedIn connection limit. For more information, you can visit our blog post: Ways to bypass LinkedIn connection limit.
Profile Quality: Your ability to send connection requests may be restricted if your profile is incomplete or appears suspicious. LinkedIn may require you to enhance your profile's credibility before allowing you to send more requests.
Behavioral Restrictions: If you've been reported for spamming or sending too many connection requests without personalized messages. Then, LinkedIn may temporarily restrict your ability to connect with others.
Pending Invitations Limit: LinkedIn limits the number of pending invitations you can have to prevent spamming and overwhelming others with connection requests.
Overall Activity: LinkedIn may limit your connection capabilities if you've recently joined the platform or need to be more active. They may want to see more engagement from you before allowing more connection requests.
Prepared to compress your LinkedIn connections?
Cleaning up your LinkedIn connections is necessary for keeping your network relevant and healthy.
Moreover, by removing inactive or irrelevant connections, you make sure that you're connected with the right people. You can keep people who align with your professional goals to boost your credibility and open doors to meaningful opportunities.
Skylead makes this process effortless with its all-in-one tool. You can identify and remove unwanted connections based on your outreach history, saving you time and energy.
Disclaimer: Skylead is not affiliated, endorsed by, or connected with LinkedIn in any way.
Alongside your profile picture and LinkedIn headline, your LinkedIn cover photo plays a crucial part in your LinkedIn identity.
Not only does it contribute to your overall professional image, but it represents an important element in forming the first impression for your LinkedIn profile visitors.
As such, a LinkedIn background photo requires an equal amount of attention you would dedicate to any of the other sections of your LinkedIn header.
Therefore, in this blog, you’ll learn:
- How to change your LinkedIn cover photo for personal & company pages on desktop and mobile;
- The size of a LinkedIn background photo for personal & company pages;
- What online tools to use to craft a perfect LinkedIn cover photo;
- Top 17 LinkedIn cover photo ideas with real-life examples for any profession to make your profile stand out on the platform.
How do I change a LinkedIn cover photo?
Change LinkedIn background photo for LinkedIn personal profiles
On desktop
This is your LinkedIn background photo.
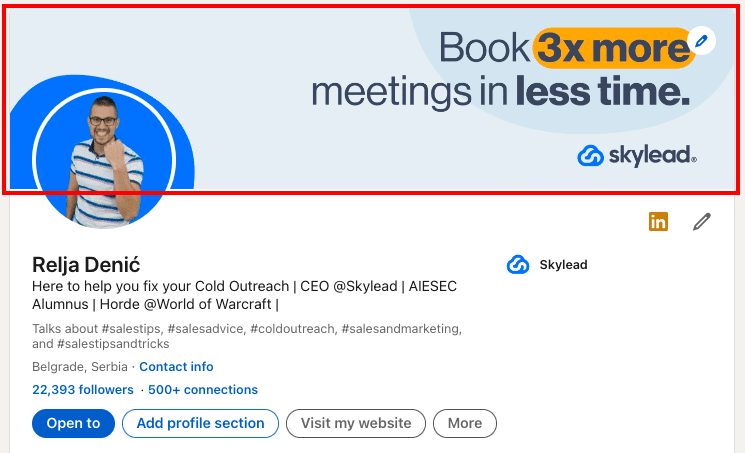
You can change it anytime and as many times as you wish.
#1 Click on the pencil icon in the top right corner of your LinkedIn profile’s header.
You will see two pencil icons, the lower one takes you to change your name, last name, headline, locations, etc., while the upper one takes you to change your LinkedIn cover photo.

#2 Click on the Pen icon to access the LinkedIn background photo editor.
Here you can:
- Upload a new cover photo,
- Crop it,
- Apply filters,
- Adjust brightness,
- Rotate it,
- Zoom it, etc.
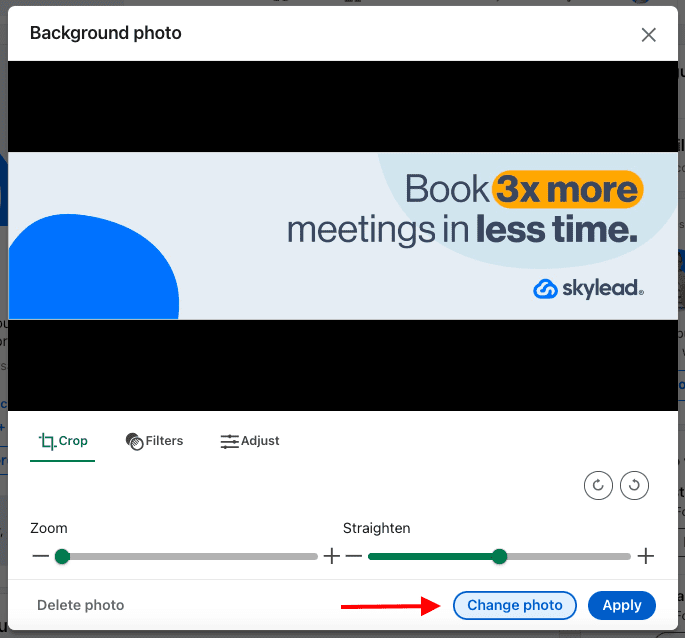
By clicking the Adjust icon you can make additional corrections to your image, such as
- Brightness
- Contrast
- Saturation
- Vignette
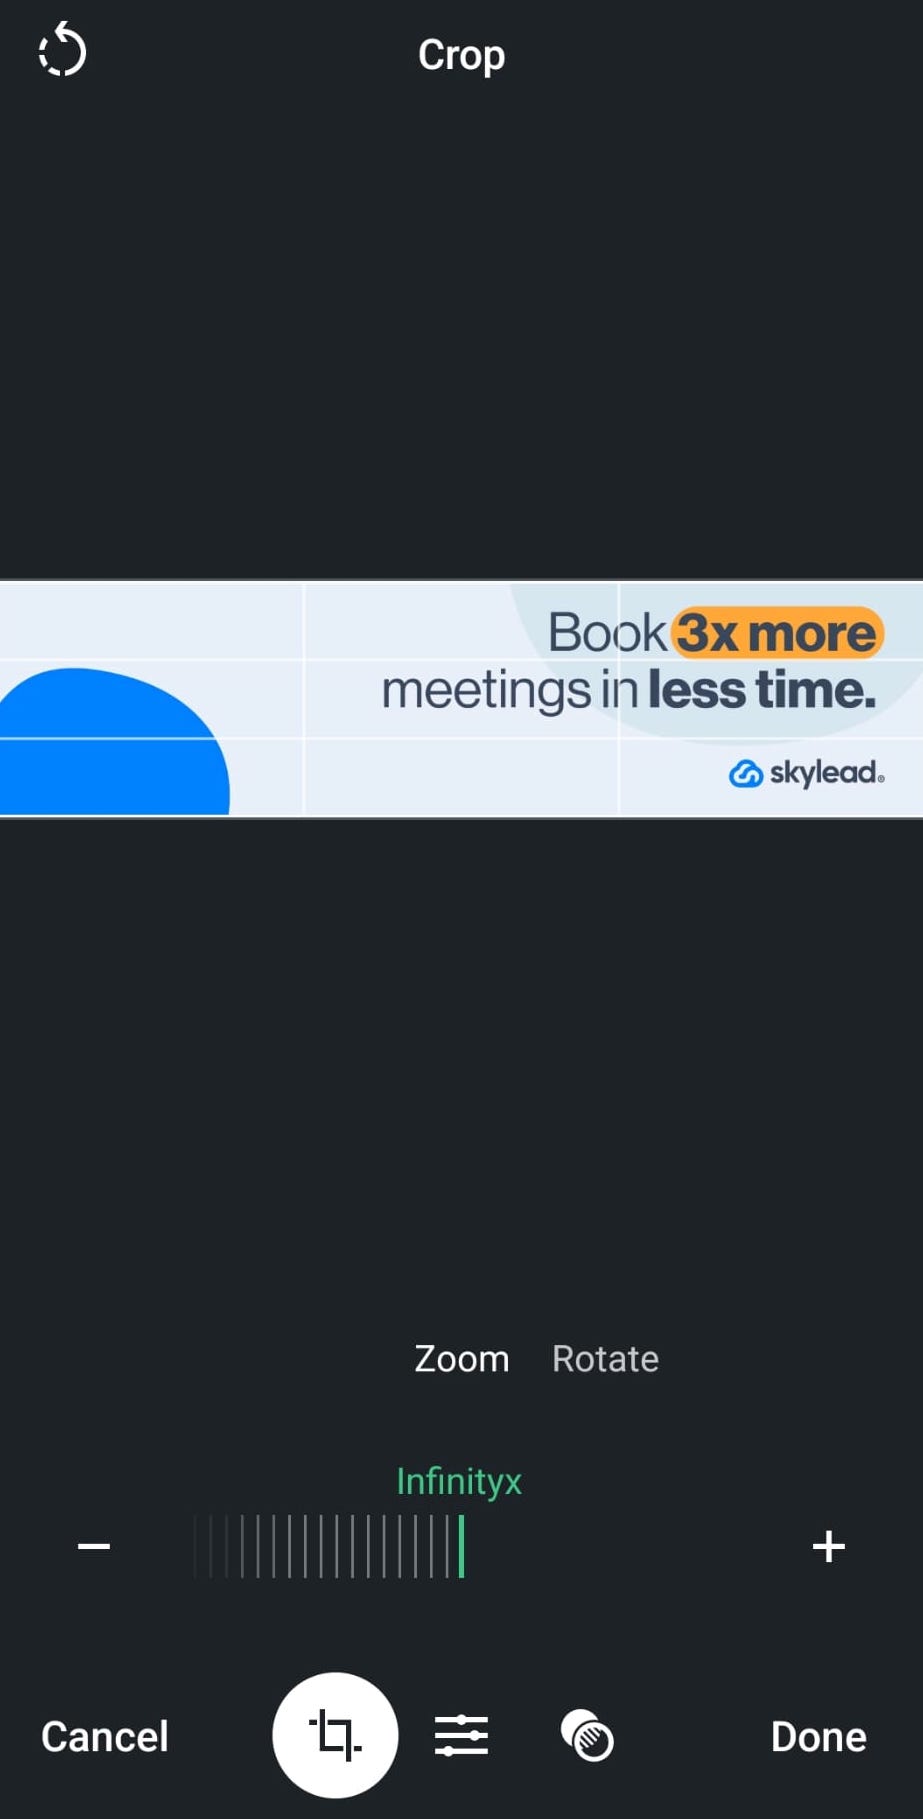
On mobile
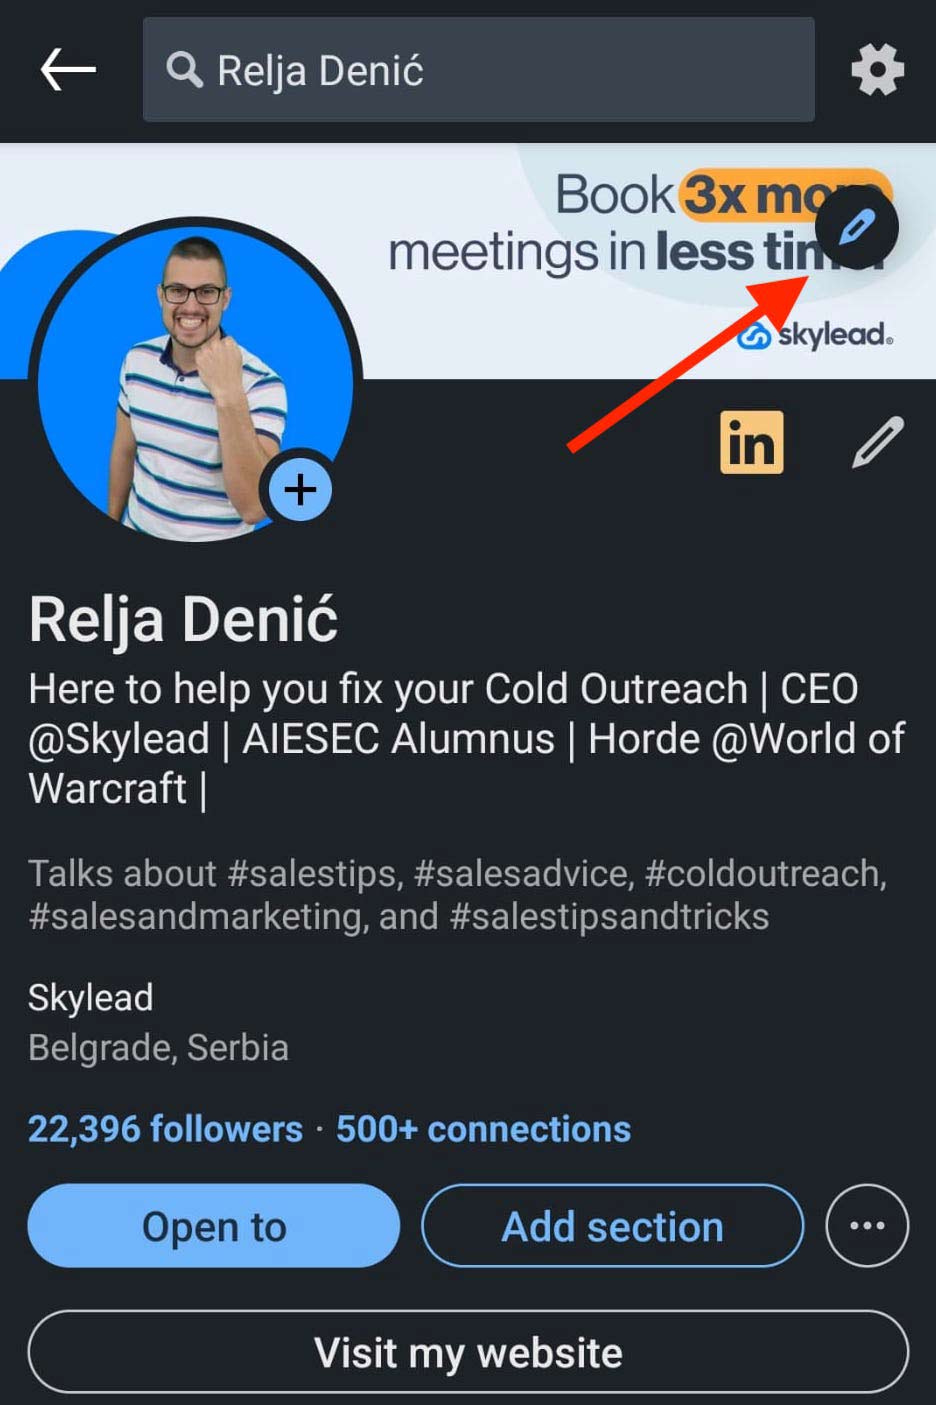
To change your LinkedIn background photo on mobile, go to your LinkedIn profile page and click the Pencil icon in the top right corner.
#2 In the bottom, you’ll find the options to edit, add a photo, or delete the existing one.
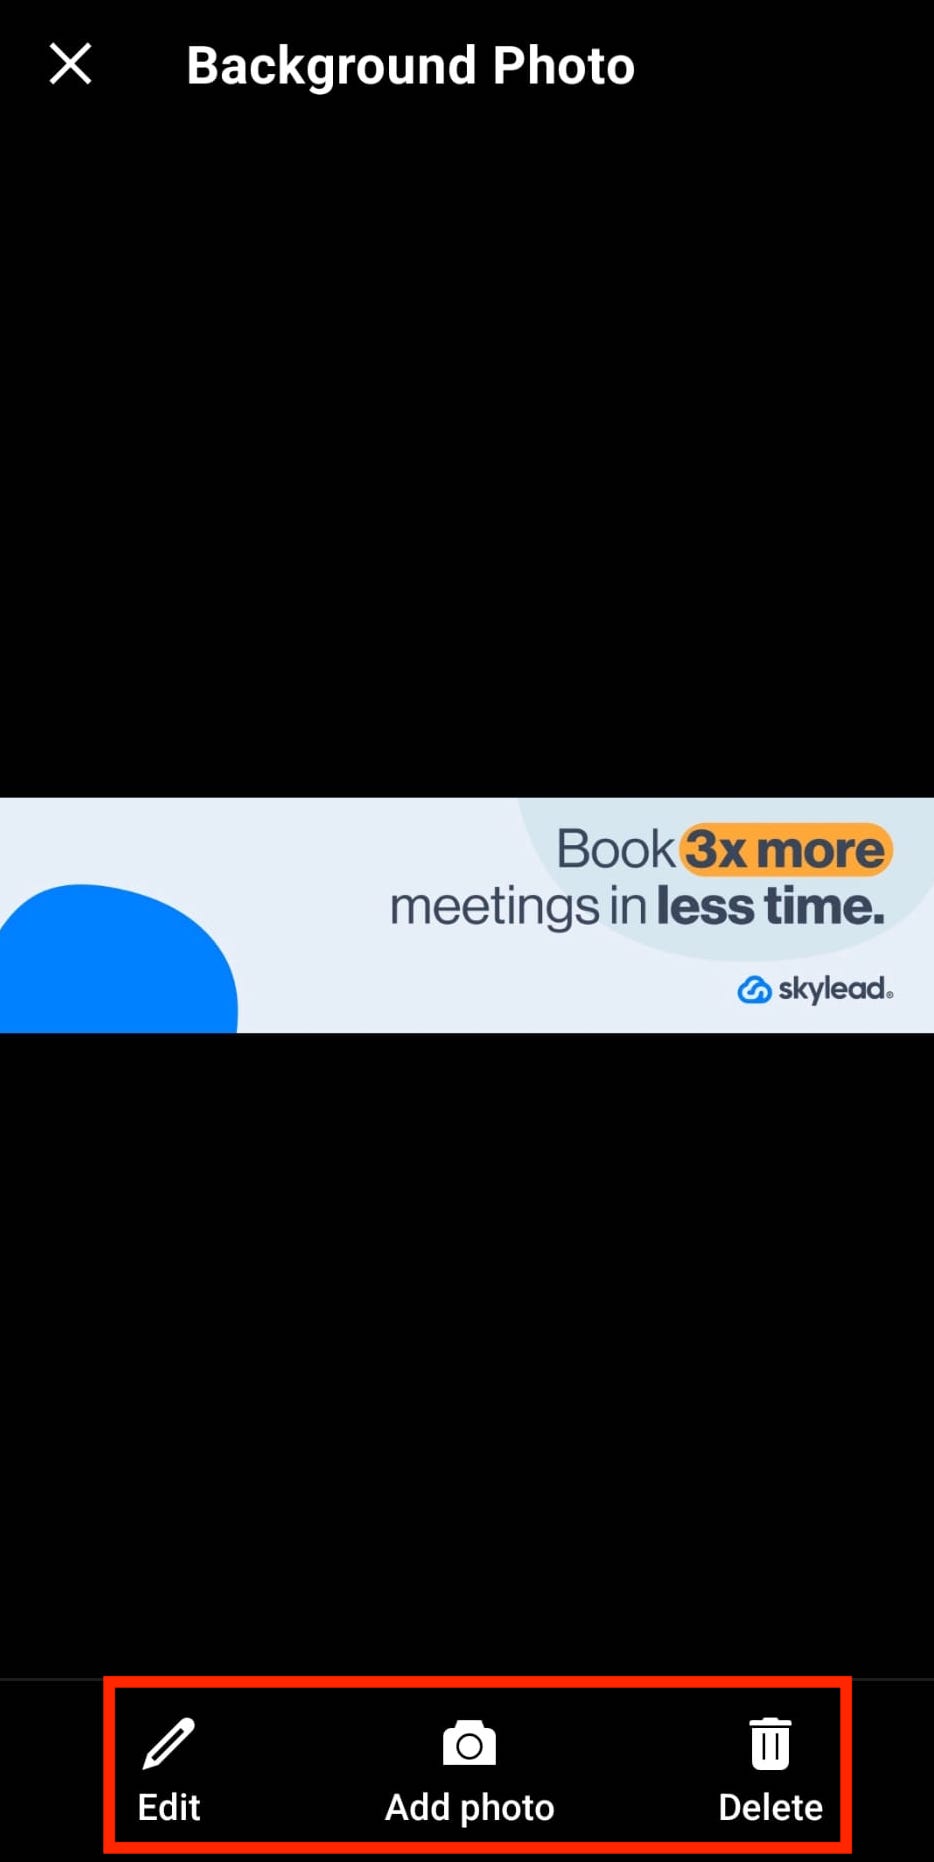
#4 Once you’ve uploaded the photo, you’ll get the same editing options as on the desktop.
Change LinkedIn background photo for LinkedIn company pages
On desktop
To change the LinkedIn background photo on your LinkedIn company page, you must either be the page’s admin or be given access to the page with editing permissions.
Then, go to the LinkedIn company page you’re managing, and click the Pen icon here.
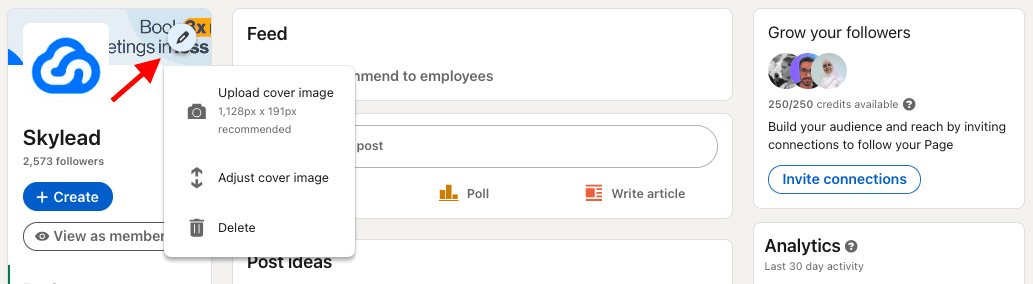
You will get a dropdown menu to:
- Upload a new cover image (check out LinkedIn cover photo size recommendations in this blog’s next section)
- Adjust the current cover image;
- Or, delete the current cover image.
Once you upload a new LinkedIn banner for your company page, or if you click to adjust the current one, the LinkedIn cover image editor will give you options to:
- Upload a new cover photo,
- Crop it,
- Apply filters,
- Adjust brightness,
- Rotate it,
- Zoom it, etc.
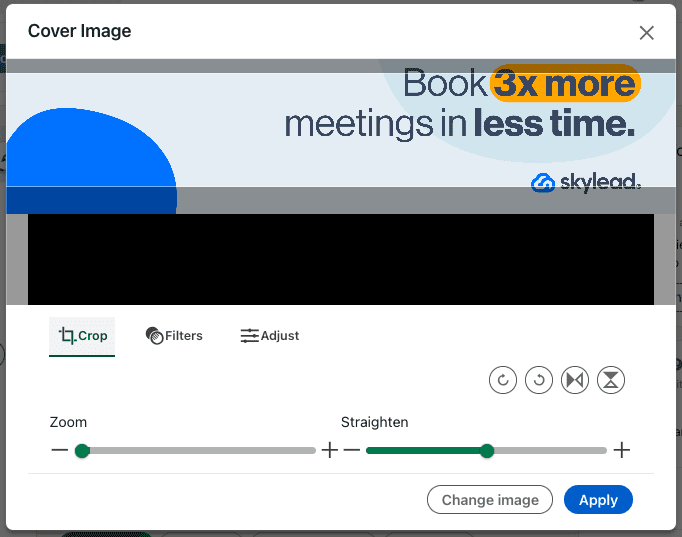
Also, by clicking the Adjust icon you can make additional corrections to your image, such as
- Brightness
- Contrast
- Saturation
- Vignette
What is the size of a LinkedIn cover photo?
In 2025, a LinkedIn cover photo size for personal profiles should be a maximum of 1584 x 396 px and a minimum of 1192 × 220 px, up to 8MB, and in JPEG, GIF, or PNG file formats.
When it comes to LinkedIn cover photo size for company pages, LinkedIn recommends a size of 1128 x 191 px, which is at the same time the minimum size, up to 8MB, and in JPEG, GIF, or PNG file formats.
Also, another thing to bear in mind is that LinkedIn cover photos are cropped differently on mobile and desktop devices. So, make sure to view your profile on both kinds of displays when setting up a new LinkedIn background photo. You don’t want important parts of your banner to be hidden or simply look bad.
Luckily, there are many online tools to help you make an ideal LinkedIn cover photo, and you don’t even need to be design-savvy.
Where can I find LinkedIn cover photo templates?
Nowadays, many online design tools have templates specifically for LinkedIn - such as posts, profile images, and background photos that require very little editing to look good.
Otherwise, if you wish to put in more effort, there are websites with free or paid stock images, or you can consider hiring a designer or someone design-savvy to do it for you.
Start with these.
| paid stock image websites | free stock image websites | online graphic design platforms |
| iStockphoto.com | Vecteezy | Canva |
| Shutterstock.com | Freepik | Fotor |
| Envato.com | Morguefile | VistaCreate |
| Depositphotos.com | Pixabay | Freepick |
| StockAdobe.com | Stockvault | |
| Pexels | ||
| Picjumbo | ||
| Pikwizard | ||
| Rawpixel | ||
| Reshot |
In our next section, you will find 10 ideas on different types of LinkedIn cover photos depending on the message you wish to get across with it.
Top 17 LinkedIn Cover Photo Ideas For Any Profession
As mentioned above, your LinkedIn background photo should complement your profile picture and headline and offer clarity on what your business is all about to your profile visitors already through the LinkedIn header section.
However, this doesn’t mean that you have one solution only.
Here’s a list of 17 LinkedIn cover photos that represent good practices with real-life examples.
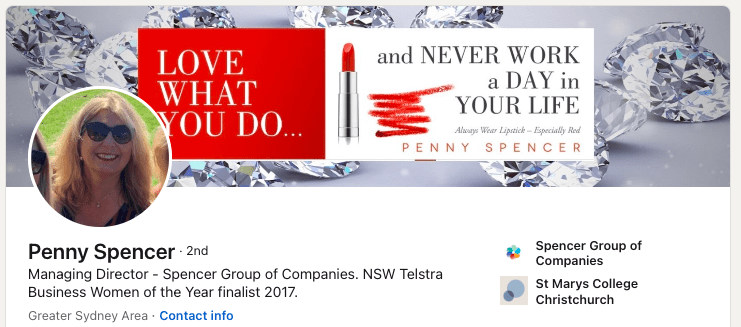
Highlight your customers’ goals on your LinkedIn background photo
An excellent way to draw attention to yourself is to highlight your client’s most common pain point or ask a question that you know they’ll answer affirmatively.
Of course, it should relate to your service and a pain point your product or service can solve.
Make sure you communicate these messages clearly and include an important award or some kind of social proof (if any).
Showcase the people you serve on your LinkedIn cover photo
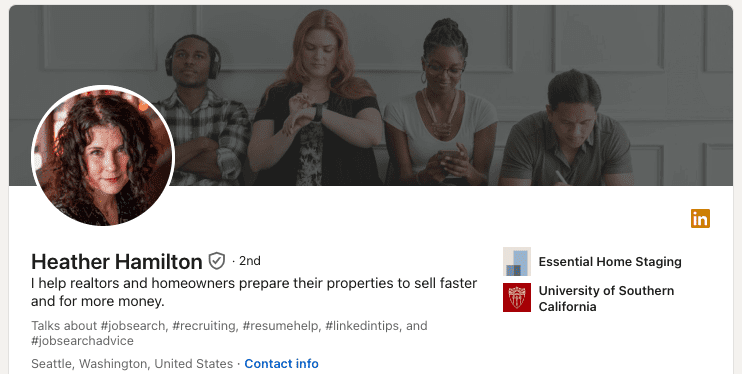
Featuring your customers is beneficial because people who visit your LinkedIn profile know right away if they potentially fall into that category.
Additionally, people are more drawn to images of real people, faces, and their expressions, so a LinkedIn cover photo of this kind will make them want to investigate further.
A LinkedIn background photo that showcases your clientele or your target clients doesn’t need to be their actual photo, of course. You can get a stock image that features people who are good examples of the types of people you serve.
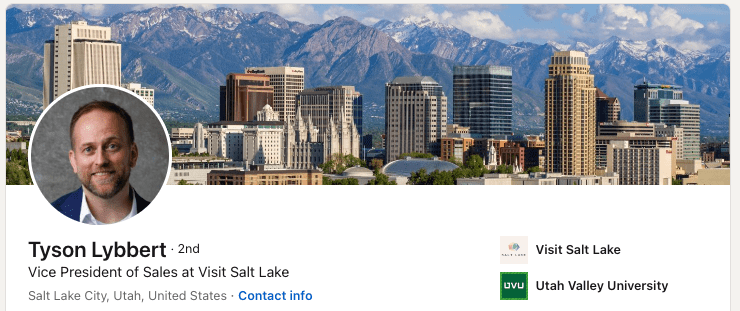
Use the location or the location of your business on your LinkedIn banner
OR

Highlighting the location of your business makes sense if what you do is restricted to a specific area or it’s particularly significant for it.
These types of LinkedIn cover photos don’t have to be necessarily limited to industries such as tourism for example. Still, they can be applied to any business or industry that acts locally.
On the other hand, displaying the city where you work or where you came from or that is particularly dear to your heart independently from the location of your business can ‘humanize’ your LinkedIn profile a bit.
Just because LinkedIn is a professional network whose members are encouraged to connect, network, and chat in the name of business, that doesn’t mean you should hide that you are a human before anything else. People are more likely to work with those whom they can connect with, rather than robots.
Put your hobbies or interests on your LinkedIn cover photo
Speaking of ‘humanizing’ your LinkedIn profile, there’s no better way to do it than sharing something that interests you outside of your work schedule.
You could use your LinkedIn background photo to tell others about your hobbies, volunteering activities, or any kind of extracurricular activities. Opinions on sharing personal pictures on LinkedIn vary, given the platform’s professional nature. However, if the sharing is genuine, not excessive, and comes from a desire to build authentic connections, we say go for it.
No matter if you’re on LinkedIn to network, get clients, or find a job, everyone likes to see there’s more to you than just your professional, online self.
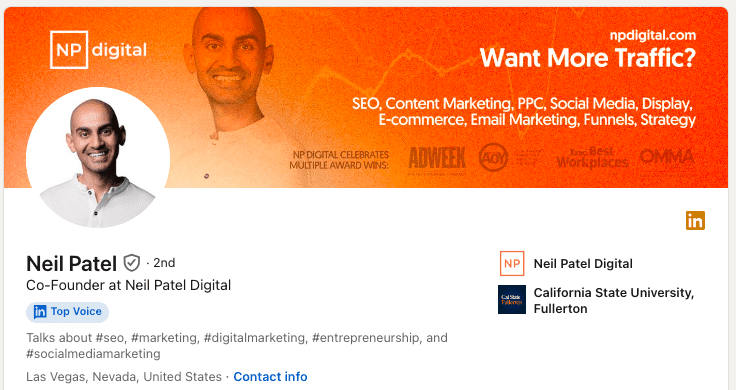
Display objects or tools relevant to your job on your LinkedIn background photo
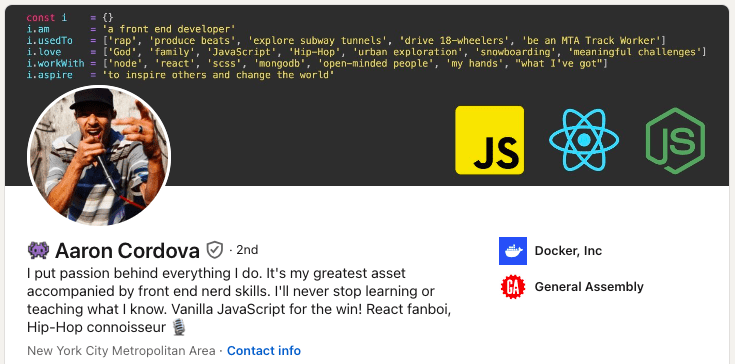
Featuring an object such as a photo camera if you are a photographer can seem a bit ‘unsurprising’ but it doesn’t need to be! Just look at how creative, yet informative the above LinkedIn cover photo is.
Without even reading through this LinkedIn user’s profile, you can understand what he does for a living and what technologies he knows (JavaScript, React, NodeJS).
Furthermore, he adds a personal touch to his LinkedIn background photo by mentioning the things he loves, believes in, and does outside his regular working hours.
This type of LinkedIn cover photo is excellent for freelancers and people who are searching for a job, as it says straight off the bat what your professional strengths are.
Use a LinkedIn cover photo of you doing your work
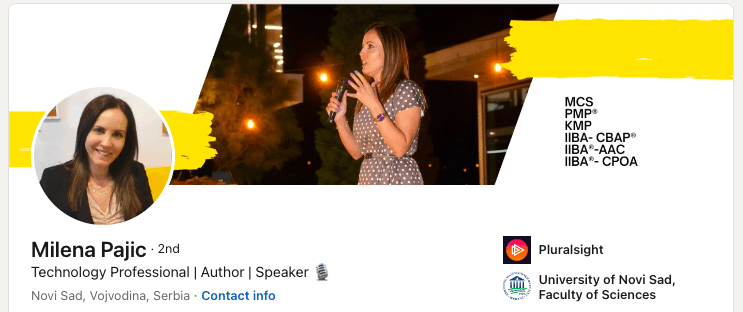
A picture of yourself doing your work can be a great choice if your job is actually some kind of service that can be presented clearly in a photo.
On LinkedIn, usually, these types of LinkedIn cover photos are typical for motivational and public speakers, or for those who want to highlight them speaking in front of larger audiences.
It doesn’t mean that it will not work for other industries as well, just put your creativity to use and make sure you have someone to take a good shot of it.
Clearly state what your job is on your LinkedIn banner
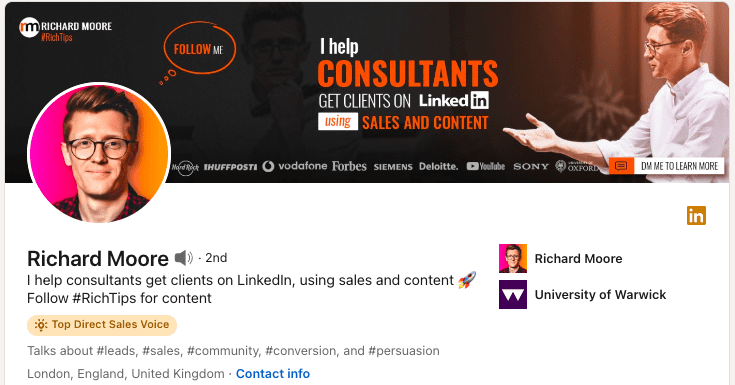
OR
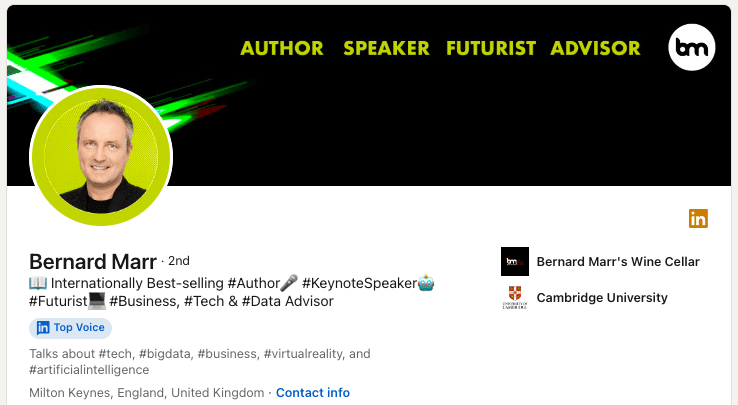
This is a pretty straightforward, nothing-too-crazy yet effective way to make it very clear to your LinkedIn profile visitors what you do for work.
As you may see from the above examples, you can describe what you do (example #1) and how you do it, or simply list your professional roles (example #2).
This way, it is very clear what your business is about to whoever lands on your LinkedIn profile.
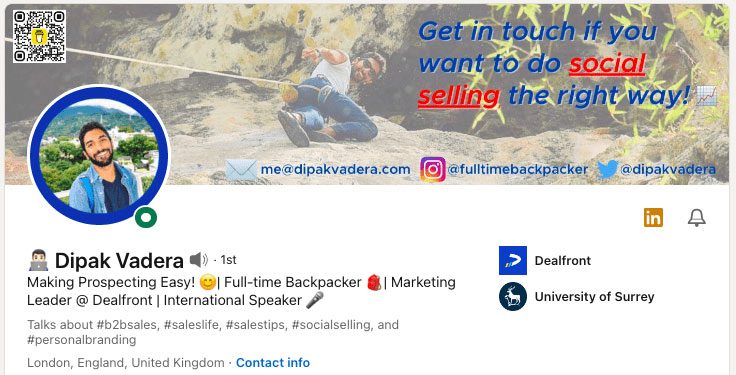
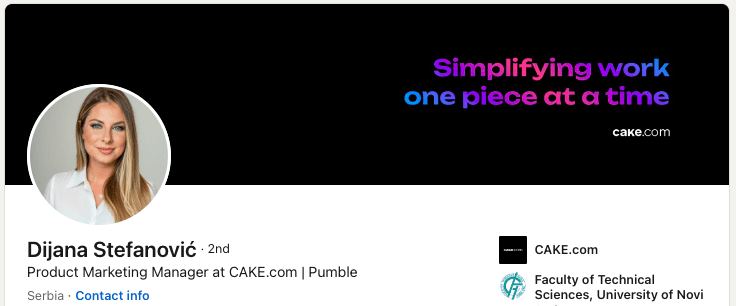
Showcase your product or service on your LinkedIn background photo
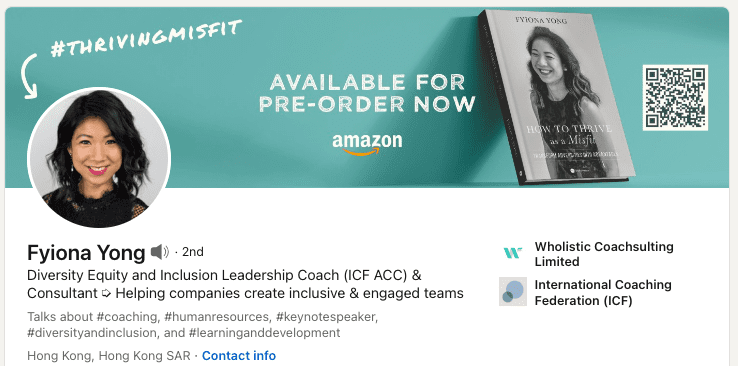
This is a pretty straightforward, yet effective way to tell your profile visitors what you are all about in general or at the moment. Furthermore, it is a great way to promote a book, podcast, service, you name it.
As you may see from our examples, displaying your product or service could be accompanied by a catchy Call-To-Action.
Display your career path on your LinkedIn cover photo
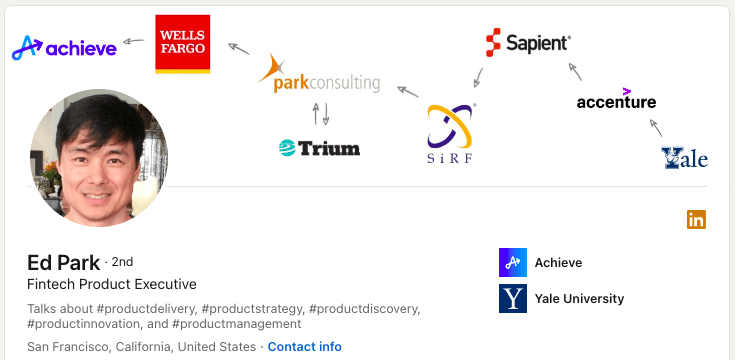
If you find your career path to be the most valuable part of your curriculum or your valuable unique selling point, here’s a creative and smart idea of how your LinkedIn profile visitors can learn all about it.
This LinkedIn member decided to display his path from a college to the company for which he currently works. However, this creative idea can be applied in many ways depending on what you wish to highlight in your LinkedIn background photo.
Use your company’s LinkedIn cover photo for your personal LinkedIn background photo
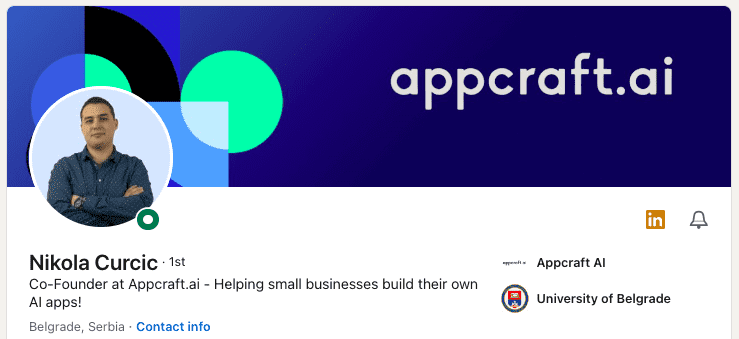
OR
Some companies have LinkedIn cover photos designed specifically for their employees. This can be the simplest way to tell your profile visitors where you work right off the bat.
Featuring a LinkedIn background photo with just your company’s logo or some other kind of visual representation of your company can be a good choice if you feel strongly about the brand.
Furthermore, your company’s LinkedIn cover photo can contain a mission statement, values, or any message that your brand wants to get across.
Put an inspiring quote on your LinkedIn banner
An inspirational quote on your LinkedIn background photo can refer to something you personally believe in, or it can have to do with your brand.
If combined with an attractive design, this type of LinkedIn cover photo can be pretty effective and inspiring to people visiting your LinkedIn profile to investigate your services further.
Put a picture of an office space or a building for corporate, executives, legal, & similar to your LinkedIn cover photo
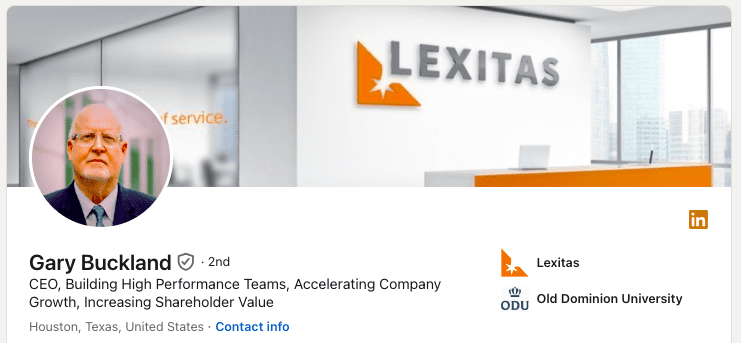
OR
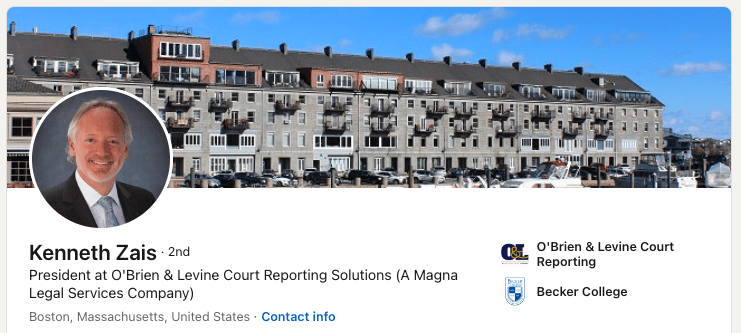
The above example is a good LinkedIn cover photo of people working in corporate, upper management, legal, and anyone who finds their business space to give off the impression of professionalism, a specific status symbol, high-level service, or similar.
Furthermore, if your office is a well-known building, or it has been there for ages so that it even become part of the city's history, displaying it in your background might give your LinkedIn profile visitors a sense of familiarity.
Make your LinkedIn banner a collage
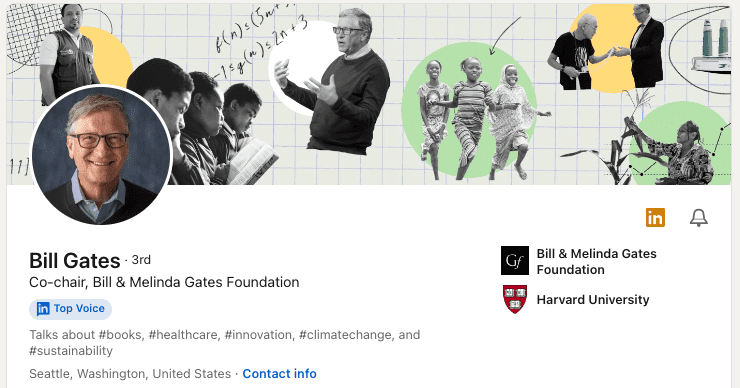
Finally, you can make a collage visually representing your interests, product or service, target audience, yourself while doing your work, or pretty much anything you wish to showcase on your LinkedIn cover photo.
However, keep in mind that crafting appealing collages is not as easy as it might seem – they should be informative without becoming cluttered or chaotic. Therefore, unless you are a skilled visual artist, you might want to hire a designer to do it for you. Collages are pretty effective, so it could totally be worth it.
Summary
Before diving into choosing your ideal LinkedIn cover photo, consider your focus — clients, yourself, workspace, or tools.
Which emotions do you wish to convey? Empowerment, trust, professionalism?
What kind of LinkedIn background photo would enhance your professional image while aligning seamlessly with your brand?
This strategic approach ensures your LinkedIn presence resonates effectively with your target audience while automating your LinkedIn lead generation activities through Skylead. All features are available for a 7-day FREE trial starting today! Don’t miss out!
Disclaimer: Skylead is not affiliated, endorsed by, or connected with LinkedIn in any way.
Attention is the real capital in this day and age. Being noticed in a sea of information in a distracted world is considered to be a privilege. To stand out, you must take what you have to the next level. The same rules apply to your LinkedIn headline.
However, figuring out a LinkedIn headline can feel like navigating a maze for many folks, and let's be real, some platform members aren't even sure what it is or where to find it on their profile.
That's why we're here to break it down for you in plain language and give you some practical suggestions and LinkedIn headline examples that work from our own experience.
These tips have helped our sales team stand out on LinkedIn, improve rankings and visibility in LinkedIn search results, and ultimately gain more credibility and more quality leads for Skylead.
Let’s check it out how it’s done!
What is a LinkedIn headline?
A LinkedIn headline is the text below your name in your profile's introduction. It's a vital section of your profile because it impacts your ranking in LinkedIn searches and plays a crucial part in forming the first impression. When well-written, a LinkedIn headline is a prime eye-catcher in search results.
This is your LinkedIn headline.
How to edit a LinkedIn headline
You can edit your LinkedIn headline as many times as you want, although it is recommended to keep some consistency and not to change it too often.
The maximum length of your LinkedIn headline is 220 characters.
Edit your LinkedIn headline by clicking on the Pen icon right here.
Then, scroll down to the LinkedIn headline section.

As you may see, you can insert it manually, or use LinkedIn’s AI assistant to suggest LinkedIn headlines for you. This feature is available only for paid LinkedIn plans.
If you click on the Write with AI option, LinkedIn will suggest a LinkedIn headline for you based on the information on your LinkedIn profile.
You can ask it to generate a LinkedIn headline for you as many times as you want, or just click Revert to go back to the one you had before.
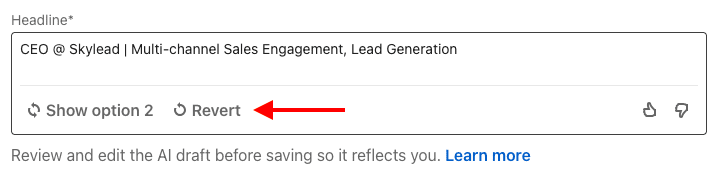
Click Save to save the changes to your LinkedIn profile.
Generally, we suggest using ChatGPT for sales to speed up certain processes. You can also independently brainstorm your LinkedIn headline in Chat GPT from LinkedIn’s AI assistant. In this blog, we gave you 13 LinkedIn headline examples considered to be a good practice. Use them to get inspired by them or as a prompt in Chat GPT to generate variations. It’s up to you!
What to put in a LinkedIn headline
The number one rule is not to make your LinkedIn headline misleading.
Rule number two is that there is no rule number two.
As long as your LinkedIn headline is informative, relevant, and catchy, you are on the right track. Yes, creativity is highly appreciated even on LinkedIn. Stay within the professional frames and you can still play with your LinkedIn headline as much as you want.
Easier said than done (we agree), but your LinkedIn headline should summarize your skills, ambitions, and experiences within the 220-character limit. As this is not as simple as it sounds, most LinkedIn members decide to leave their current job title and forget about it. Big mistake.
It is exactly your LinkedIn headline that sets you apart in the “sea of the same”. It is the first thing your prospects read when they visit your LinkedIn profile and it is one of the things that keeps them scrolling to get a deeper insight into your professional achievements through LinkedIn summary and other LinkedIn sections.
Formulas to write an effective LinkedIn profile
Here are 2 formulas to write an effective LinkedIn profile.
The first one is to imagine I know nothing about your industry and, with that in mind, to explain to me, in one simple sentence, what you do.
The second one is to imagine you have to create a billboard advertising yourself and think of a catchy slogan that would sell you the best.
If this doesn’t help you come up with an appealing LinkedIn headline, try using one of the following formulas where
- X represents your ideal prospect;
- Y represents your ideal outcome;
- Z represents the service you offer.
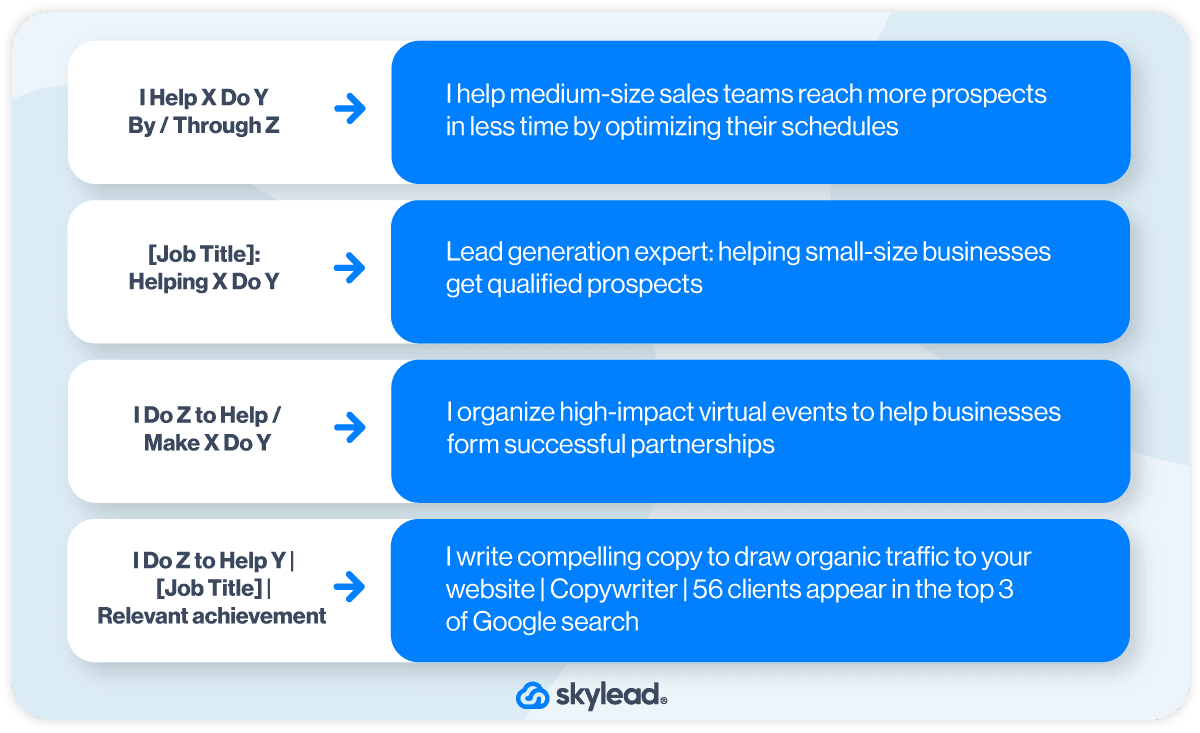
If these still seem too abstract to you, don’t worry, we’ve listed 13 real-life LinkedIn headline examples to illustrate what an effective headline is and to help you get inspired for yours.
Common mistakes in LinkedIn headlines
- Using codes or professional jargon that only people from your industry know such as “BDR”, “SDR”, “AE”, etc.
- Showing off by using words such as “expert”, “top-performing”, “superior”, “best” or mentioning any success without offering valid arguments that support it.
- Not using keywords that are relevant to your potential prospects. When writing your LinkedIn headline keep in mind that the most commonly used filter on LinkedIn is the “keyword” one. Make sure you show up in your prospect or recruiter’s search result.
- Writing a headline that reflects your former professional engagements that are not relevant to your current or future professional aspirations.
- Not including your unique selling point. Without it, you are just one more professional in a sea of others.
- Make your LinkedIn headline about how you can help others instead of how “awesome” you are.
The 6 common mistakes when writing a LinkedIn headline
On the other hand, here are the top 6 most common mistakes when writing a LinkedIn headline.
- Using codes or professional jargon that only people from your industry know such as “BDR”, “SDR”, “AE”, etc.
- Showing off by using words such as “expert”, “top-performing”, “superior”, “best” or mentioning any success without offering valid arguments that support it.
- Not using keywords that are relevant to your potential prospects. When writing your LinkedIn headline keep in mind that the most commonly used filter on LinkedIn is the “keyword” one. Make sure you show up in your prospect or recruiter’s search results.
- Writing a headline that reflects your former professional engagements that are not relevant to your current or future professional aspirations.
- Not including your unique selling point. Without it, you are just one more professional in a sea of others.
- Making your LinkedIn headline about how “awesome” you are instead of how you can help others succeed.
Top 13 LinkedIn headline examples [and why they work]
After all, there is no explicit rule for what you should put in your LinkedIn headline.
The examples below show what works in practice.
We’ve included the “why it works” section to understand why, from our experience, these LinkedIn headline examples are effective, and to inspire you to create yours accordingly.
LinkedIn headline example #1
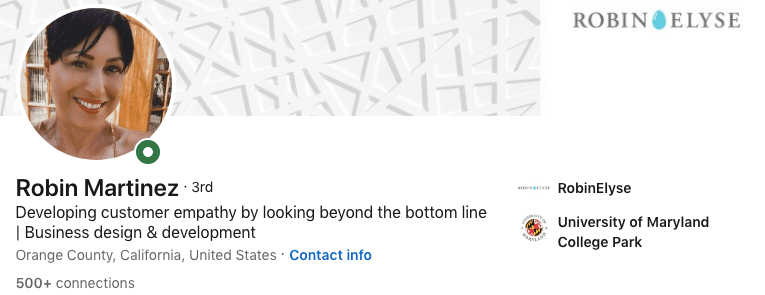
Why this LinkedIn headline works
- Explanation of the member's role and value proposition in simple words: The headline effectively communicates what the individual does and how they provide value to others in a clear and approachable manner.
- Excellent keyword choice for LinkedIn SEO: The chosen keywords “Business design & development” are not only relevant to understanding the industry but are also optimized for LinkedIn's search engine, increasing the likelihood of this member appearing in search results.
LinkedIn headline example #2
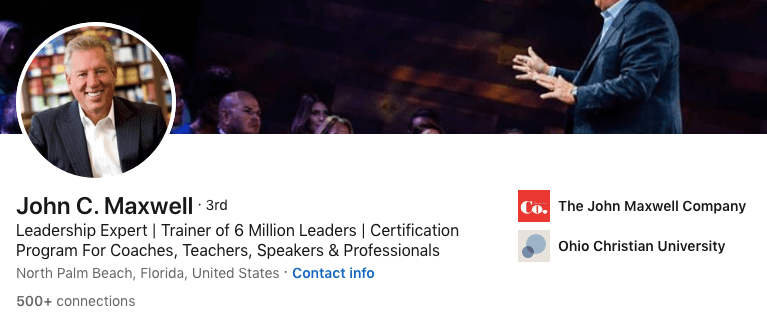
Why this LinkedIn headline works
- Communicates authority and strength of personal brand: The words “leadership expert” give out a sense of confidence and expertise, establishing a strong personal brand that commands respect and attention.
- Transparency of offered expertise and past results: By highlighting their past achievements of being the “trainer of 6 million leaders”, the LinkedIn headline instills trust and credibility.
- Searchable keywords for LinkedIn SEO: The keywords “Certification program for coaches, teachers, speakers, professionals” are not only relevant to the individual's expertise but also optimized for LinkedIn's search algorithm, increasing this member’s visibility in search results.
LinkedIn headline example #3
Why this LinkedIn headline works
- Clear insight into career highlights: The headline provides a concise overview of the individual's current and past career accomplishments, giving visitors a clear understanding of their professional journey and expertise.
- Detailed description of the company: It offers a straightforward explanation of the individual's business and its operations in plain language.
- Searchable keywords for LinkedIn SEO: This headline is optimized for LinkedIn's search engine, increasing the likelihood of the profile appearing in search results and attracting relevant connections.
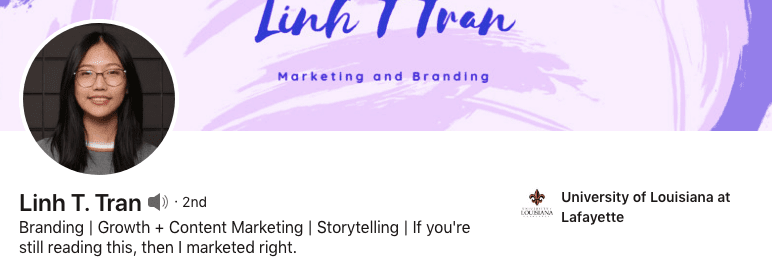
LinkedIn headline example #4
Why this LinkedIn headline works
- Searchable keywords for LinkedIn SEO: The headline includes keywords relevant to the individual's industry or profession such as “branding” and “growth, content marketing, storytelling”, optimizing their profile for search engine visibility within the LinkedIn platform.
- Uses humor: Utilizing industry-related humor can capture attention and leave a memorable impression. It adds personality to the profile while keeping it professional.
- Demonstrates creativity: The use of humor in the headline showcases the individual's creative thinking, which is, at the same time, an asset in their career path.
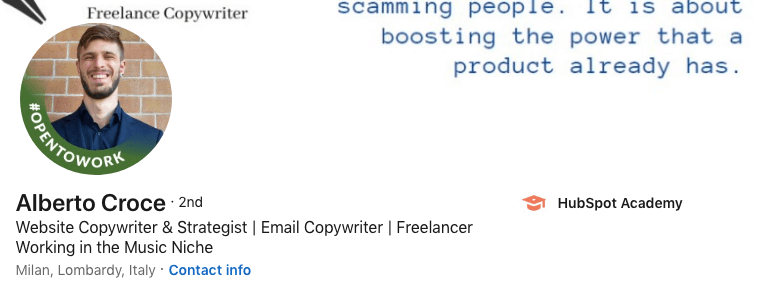
LinkedIn headline example #5
Why this LinkedIn headline works
- Clear description of copywriting format: By starting with the type of copywriting format they specialize in, the headline provides clarity to potential connections or clients.
- Searchable keywords for LinkedIn SEO: By incorporating relevant keywords, the headline is optimized for LinkedIn's search engine, increasing visibility in search results related to the individual's field.
- Highlights niche expertise: The headline effectively communicates the individual's specialized area of expertise, helping them attract connections and opportunities specific to their niche.
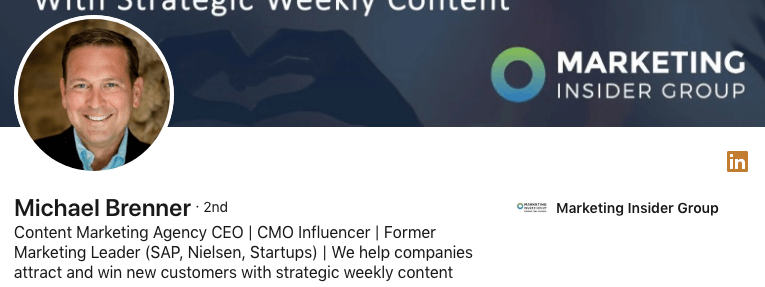
LinkedIn headline example #6

Why this LinkedIn headline works
- Demonstrates authority: By mentioning the number of readers, the headline establishes the individual as credible and authoritative in their field.
- Keywords for LinkedIn SEO: Incorporating relevant keywords such as “content marketing consultant” ensures that the profile is optimized for search engine visibility.
- Includes social proof: By mentioning “Forbes, Fast company, and 500 startups”, the headline provides social proof of the individual's expertise and success.
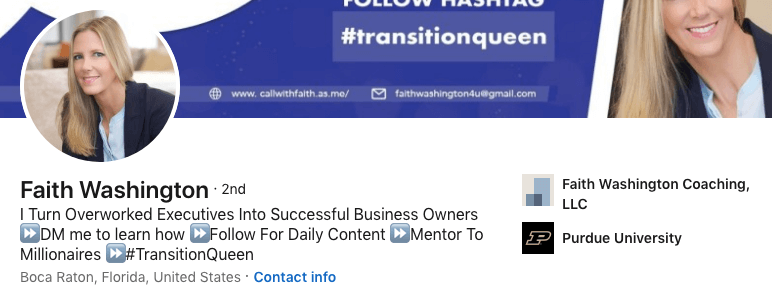
LinkedIn headline example #7
Why this LinkedIn headline works
- Explicit and clear value proposition: By stating that she “turns overworked executives into successful business owners”, the headline communicates the value she provides, and in simple language.
- Includes a call-to-action: By including "DM me to learn more" and "Follow for daily content," the headline encourages engagement and interaction with her profile.
- Achievements highlighted: The headline mentions her achievement of being “a mentor to millionaires”, showcasing her expertise and the benefits of her work.
- Utilizes humor but keeps it professional: The use of humor, if relevant and professional, can add personality to the headline and make it more memorable.
LinkedIn headline example #8
Why this LinkedIn headline works
- Keyword-rich content: By including a multitude of relevant keywords, the headline is optimized for LinkedIn's search algorithm, increasing the likelihood of appearing in search results related to the individual's expertise and field.
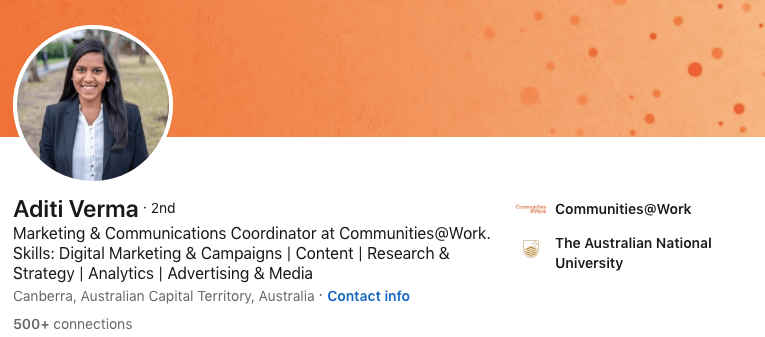
- Clarity of role and skills: The headline clearly and concisely outlines what the individual does, her skills, and her job description. This makes it easier for potential connections and customers to understand her value proposition.
LinkedIn headline example #9
Why this LinkedIn headline works
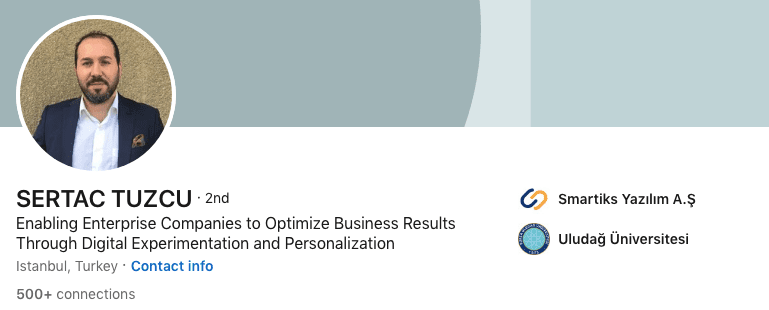
- Clear benefits of the service: It highlights the tangible benefits that the individual's service provides.
- Clarity of service delivery: The headline clearly outlines the methods or approach used by the individual to deliver their service.
LinkedIn headline example #10

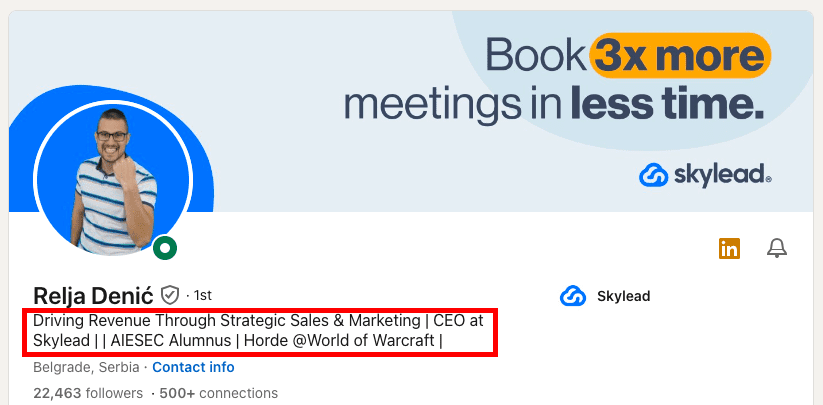
Why this LinkedIn headline works
- Keyword-rich content: Packed with relevant keywords including current occupation, company, additional titles, university, etc., increasing the individual's visibility in LinkedIn searches across various criteria.
- Personal touch: A bold and catchy personal note at the end adds a human touch to the headline, making it more memorable to viewers.
LinkedIn headline example #11
Why this LinkedIn headline works
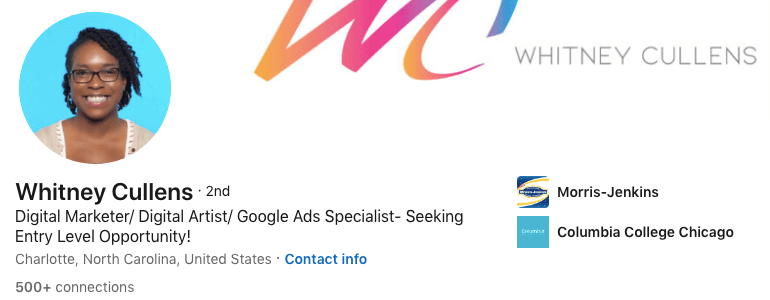
- Includes searchable keywords: Incorporates relevant keywords for LinkedIn SEO, increasing the likelihood of the profile appearing in search results for related job roles and criteria.
- Indicates readiness for opportunity: This headline communicates the individual's eagerness for their first opportunity and willingness to work their way up, which can resonate with potential employers or recruiters seeking ambitious candidates.
- Specifies qualified roles: It states the types of roles the individual is qualified for, helping to attract only relevant job opportunities.
LinkedIn headline example #12
Why this LinkedIn headline works
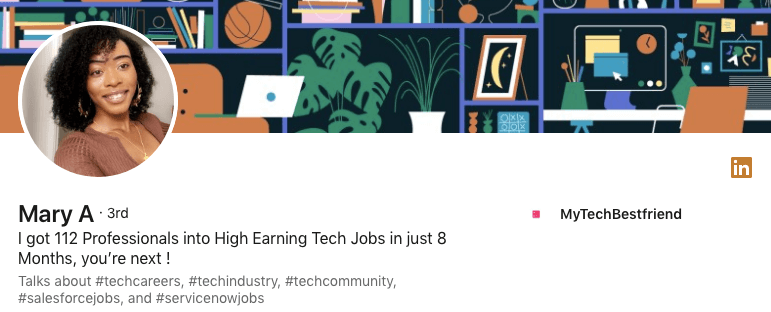
- Highlights business results straight off the gate: It showcases the individual's business achievements right away, demonstrating their value and credibility to potential connections or clients.
- Inspirational and inviting: The headline inspires curiosity and prompts viewers to connect to learn more about how the individual achieves their results.
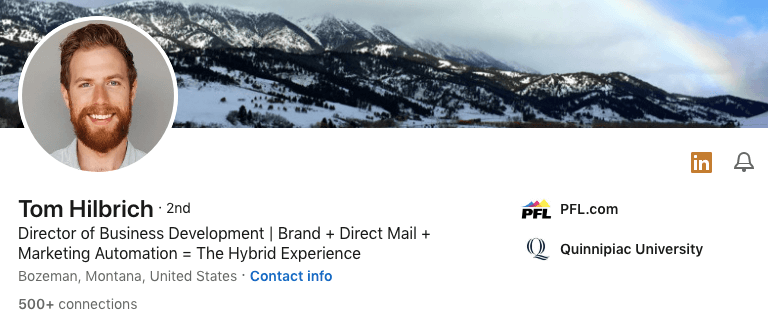
LinkedIn headline example #13
Why this LinkedIn headline works
- Clearly states the title: The headline provides a straightforward indication of the individual's occupation or title.
- Includes searchable keywords: Incorporating relevant keywords such as “brand, direct mail, marketing automation” ensures that the profile is optimized for LinkedIn's search engine, increasing visibility in search results related to the individual's expertise and field.
- Explains "Hybrid Experience": By explaining the term "Hybrid Experience," the headline removes ambiguity for those who may not be familiar with this industry niche-related field.
How to use a LinkedIn headline for lead generation
Using a LinkedIn headline to personalize your Connection requests, LinkedIn messages, or LinkedIn InMail messages is a powerful LinkedIn lead generation strategy.
Referring to something from the individual's headline can be incredibly effective because people enjoy discussing their achievements and interests. By complimenting them or showing genuine interest in something highlighted in their headline, you can increase the likelihood of starting a conversation.
We'll take inspiration from this member's LinkedIn headline to showcase different ways you can personalize your messages on LinkedIn.
By incorporating different elements from their headline, we'll illustrate the full range of possibilities for crafting a personalized outreach approach.
All examples below are inspired by the way our Head of sales, Andrea, utilizes Skylead’s ideal lead’s LinkedIn headline to connect and start sales-oriented conversations.

Example #1: Use the lead's current position to personalize your approach
Hello Thamina,
It’s nice to meet someone who’s working on creating growth opportunities for businesses on LinkedIn! I love this platform, it helped scale up my business in a matter of months.
I would love to add you to my network.
Example #2 Use an interest/career-related activity to personalize your approach
Hello Thamina,
I checked out Femme Hive Podcast! Helping female professionals feel less overwhelmed in their 20s is outstanding. I wish I had someone to encourage me back then. It sure was a bumpy ride.
I would love to have you in my network!
Example #3 Use industry/background to personalize your approach
Hello Thamina,
I am searching to connect with professionals that have a finance background, and I loved yours very much!
Let’s connect!
Example #4 Use something that your lead advocates for to personalize your approach
Hey,
I love to meet professionals who advocate for women’s rights and make them feel more confident on their career paths!
I would love to have a person like you in my network, Thamina!
Example #5 Use your lead's university to personalize your approach
Hello fellow-alumna!
I also graduated from Duke University! It was such a great experience, wasn’t it?
Let’s get in touch and exchange experiences!
Example #6 Use the part of the headline that caught your attention
Hello Thamina,
Sharp headline! Love the last sentence!
Would love to have such a go-getter in my network. Let’s connect!
Summary
Yes, we always encourage our clients to take advantage of AI, but no platform beats human creativity and wittiness so far! Use Chat GPT as a tool to speed up and perfect some of the ideas you come up with.
In the meantime, follow the above instructions and LinkedIn headline examples we listed for you, and you might find yourself brainstorming your ideal LinkedIn headline much quicker than expected.
At the end of the day, no one knows you better than you!
And, speaking of quicker, if you want to make your entire lead generation and outreach significantly faster while booking 3x more meetings than before, you should check out Skylead and its 7-day FREE trial to learn how its groundbreaking solutions could get you faster to your business goals.
Disclaimer: Skylead is not affiliated, endorsed by, or connected with LinkedIn in any way.
To improve the platform's efficiency, protect members from spamming, and increase personalization, LinkedIn developed a series of features, such as LinkedIn InMail.
However, as it turns out, this feature poses challenges for some LinkedIn users, whether newcomers or seasoned members, as discrepancies and inconsistencies among the LinkedIn plans can create confusion.
Our comprehensive guide aims to demystify InMail and empower you to maximize the effectiveness of your outreach efforts by incorporating this LinkedIn premium feature, too.
Our sales team uses LinkedIn InMail in their everyday outreach, not only because it is a powerful channel to reach leads but because Skylead is currently the only tool on the market that can automate both paid & free InMails in a click.
So, let’s check out what InMail is all about!
What is InMail on LinkedIn?
LinkedIn InMail is a LinkedIn premium feature that allows you to exchange free or paid direct messages on the platform with members who are not part of your network (2nd and 3rd-degree connections), unlike ‘regular’ LinkedIn messages that can only be exchanged with members part of your network (1st-degree connections).
Think of InMails as LinkedIn's version of an email, as they are structured in a way to have a subject line and higher character limits than a LinkedIn connection request or a regular LinkedIn message.
However, according to the platform's official Learning course, InMail messages have an average response rate of 18 to 25% compared to cold emails' 3% average response rate.
So, let's explore the types of this LinkedIn premium feature to help you better understand its purpose.
3 types of LinkedIn InMails
There are 3 types of LinkedIn InMails:
- Free InMails
- Paid InMails
- Sponsored InMails (message ads).
Free LinkedIn InMail
Every LinkedIn subscription plan comes with 800 free InMails per month. So, even if you are on LinkedIn’s basic (free) plan, you can send free InMails to people who set their profiles to Open profile status.
Specifically, you can generally send free InMails only to users who set their profile to Open profile status. To set your profile to Open profile status, you must have one of the LinkedIn paid plans - LinkedIn Premium, Sales Navigator, or LinkedIn Recruiter.
To sum up, ALL LinkedIn members can receive paid InMails, but only paid LinkedIn subscribers can send them. Also, ALL LinkedIn members can send free InMails, but only to members who set their profiles to Open profile status.
LinkedIn open profile status
There are 2 ways to set up your account to receive free InMails, that is, to set your profile to Open profile status.
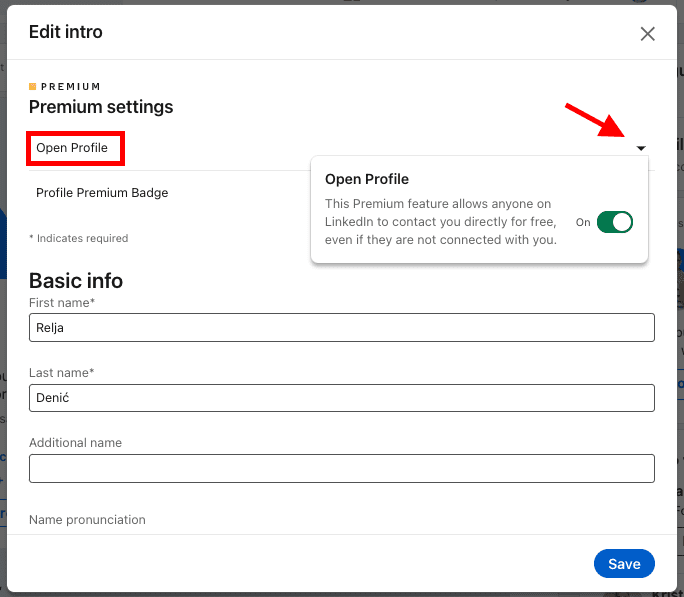
#1 Go to your LinkedIn home page and click the Pen icon.
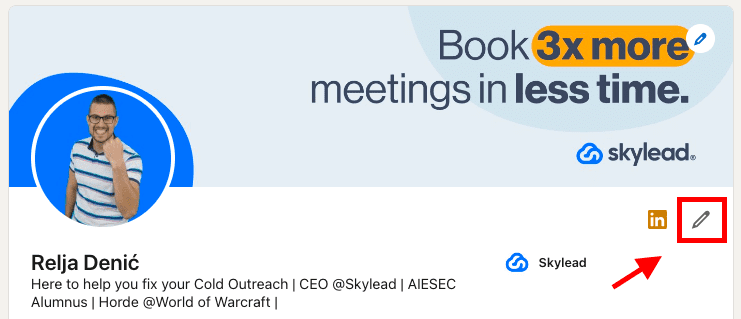
Then, click the Dropdown menu icon next to the Open profile feature and move the toggle button to turn the Open profile status on or off.
Here’s option number 2 to set your LinkedIn profile to Open profile status.
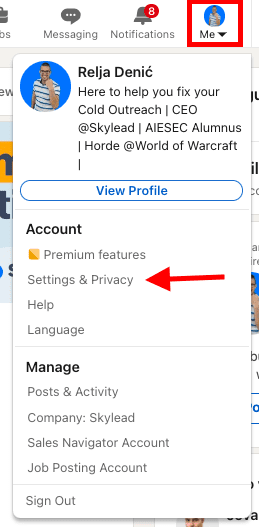
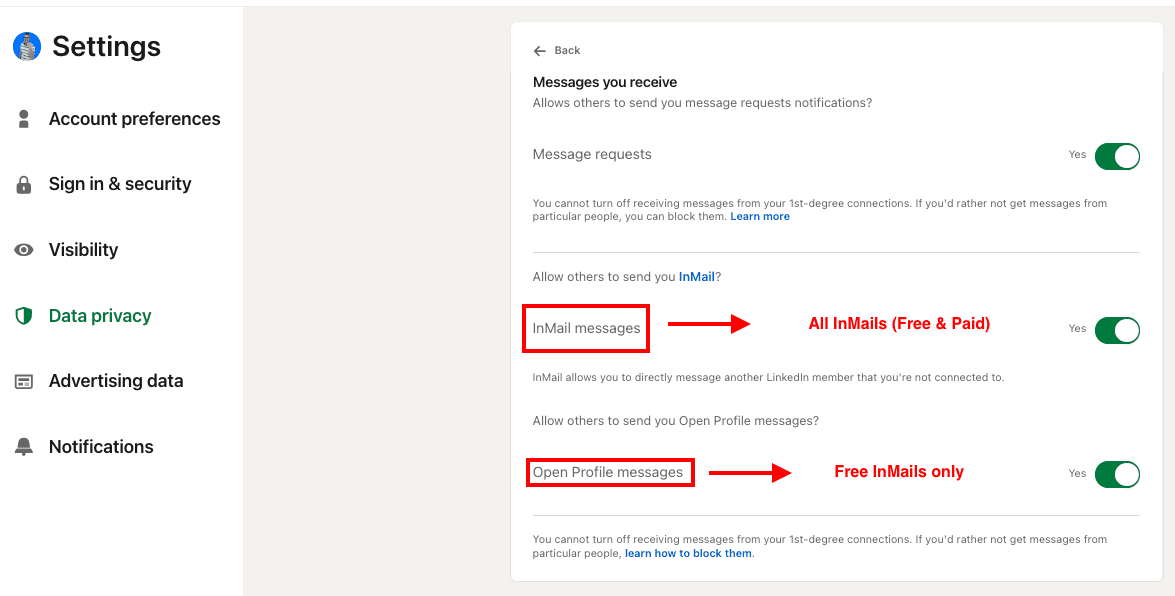
#2 Click the Me icon. Then, Settings & Privacy.
Check out the left sidebar. Click Data Privacy, then Messages.
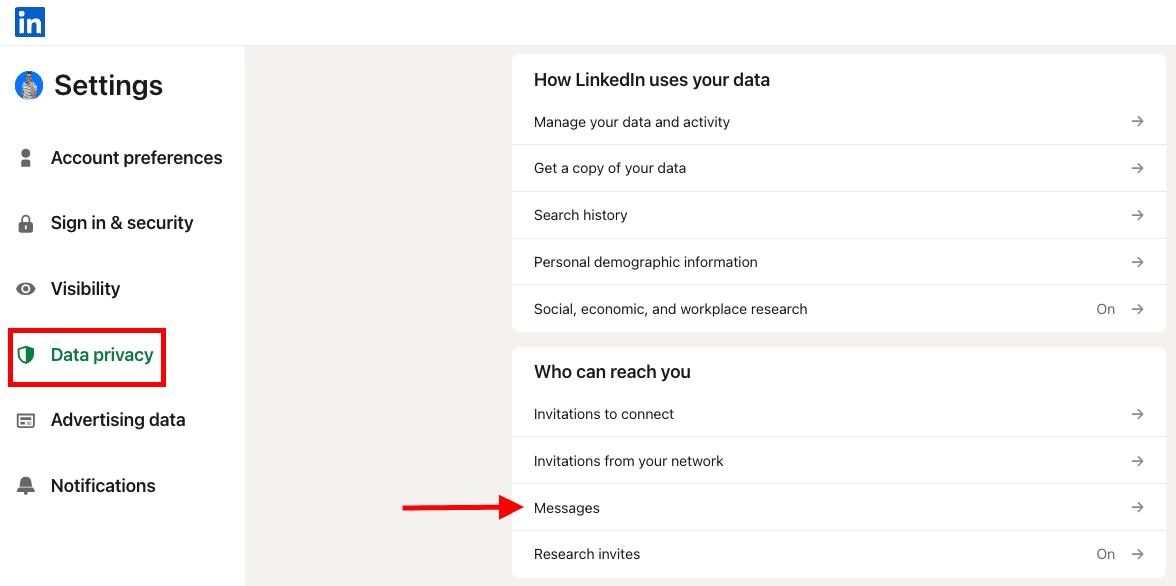
As you may see, you can opt out of receiving InMails overall, or just free InMails.
Paid LinkedIn InMail
Paid InMails are a premium feature. Therefore, they are included in any paid LinkedIn subscription - LinkedIn Premium, Sales Navigator, and LinkedIn Recruiter.
With each paid LinkedIn subscription comes a number of paid InMail credits you can send to any LinkedIn member except those who opted out of receiving InMails overall.
Therefore, every LinkedIn member can receive paid InMails, but those who switched that option off.
Check out the InMail credits section of this blog to see how many credits are included in your subscription plan and how to check that number.
Sponsored InMail on LinkedIn
A sponsored InMail is a LinkedIn product that lets you utilize the LinkedIn InMail ads platform to reach specific users in bulk. That is, a sponsored InMail is a message ad that can be used for digital marketing, sales, and any other type of promotion or sales.
LinkedIn ads platform is mainly used (but not limited to) by digital marketers who wish to promote their brands in different ways and establish relationships with their target audience.
Like with other ad platforms, you cannot precisely choose the recipients of your InMails; you can only set up the target audience. Also, the recipients cannot answer your InMails but respond to one or more call-to-actions you preset.
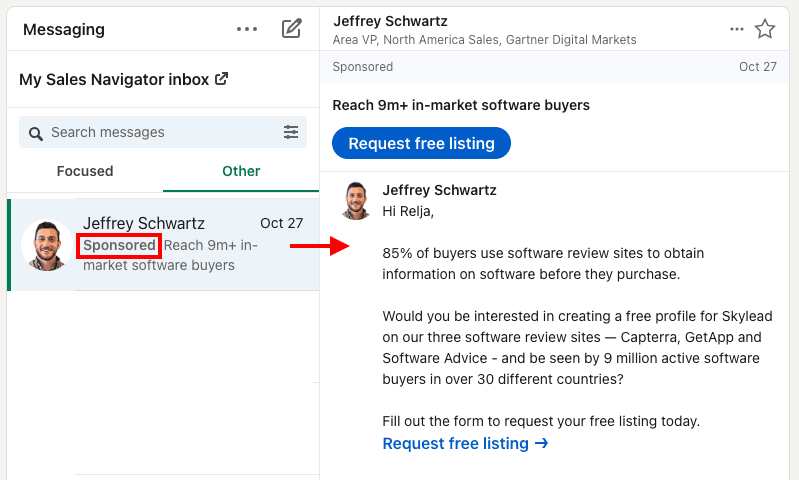
Sponsored InMails are easily distinguished in the lead's Inbox because they are clearly labeled as ‘Sponsored’.
Here's an example of a Messaging Ad on LinkedIn and how it’s shown in your Inbox.
LinkedIn InMail ads cost depending on your target audience, budget, bidding strategy, and other advertisers from the same or similar industry. LinkedIn will recommend the initial bid based on similar bidding per ad from the same or similar industries.
Sponsored InMails only show in your LinkedIn inbox, in the Other tab, independently from which plan you're subscribed to. Sales Navigator and Recruiter inboxes block any messaging ads to ensure their users a more focused professional environment.
InMail character limit
InMail character limit depends on your LinkedIn subscription.
LinkedIn InMail character limit
InMail subject line: unlimited (recommended up to 200 characters)
InMail body copy: up to 8000 characters (recommended up to 2000 characters)
Sales Navigator InMail character limit
InMail subject line: unlimited (recommended up to 200 characters)
InMail body copy: up to 1900
Recruiter InMail character limit
InMail subject line: unlimited (recommended up to 200 characters)
InMail body copy: up to 1900
LinkedIn InMail vs. LinkedIn messages
Usually, people new to LinkedIn are confused about the difference between LinkedIn InMails vs. LinkedIn messages.
You can send ‘regular’ LinkedIn messages only to your 1st-degree connections, that is, LinkedIn members part of your LinkedIn network. They are free of charge, available to all LinkedIn users, and land directly in the recipient's LinkedIn Inbox.
LinkedIn messages are unlimited; you can send as many 'regular' LinkedIn messages to your 1st-degree connections as you want. They are cost-effective and pretty convenient for LinkedIn cold message outreach.
On the other hand, LinkedIn InMails can be sent to members who are not part of your network, that is, your 2nd and 3rd-degree connections. They are LinkedIn's premium feature, and their number depends on your LinkedIn subscription plan.
InMails land directly in your recipient's LinkedIn inbox, even if you’re not connected. They also have a LinkedIn inMail subject line, which is why they are often referred to as LinkedIn’s version of email. It is why they are such a valuable communication channel on the platform.
Why should you use LinkedIn InMail for lead generation?
InMail messages are a powerful LinkedIn prospecting tool because:
- InMails have a subject line.
Firstly, LinkedIn InMail has a subject line; if well-written, it helps your messages stand out in your lead's Inbox compared to a regular LinkedIn message.
Therefore, busy decision-makers (or CXOs, influencers, or simply members who are harder to reach) who receive many messages and invites to connect daily are more likely to see your InMail message and reply.
By sending an InMail first, they will have an idea of what you and your company are all about and will be more eager to have you as part of their network.
- InMails have a higher character limit.
InMails have a higher character limit than LinkedIn connection requests. Although we always encourage our users to keep InMails on a shorter end, they undoubtedly give you more room to interest your recipients in what you have to say.
Therefore, you are decreasing the chances of your connection request being rejected and marked as I don't know this person, risking ending up in LinkedIn jail.
- The better you write an InMail, the more cost-effective it becomes.
When your lead answers your InMail, you get that credit back. This is LinkedIn’s way of awarding you for aiming to connect with leads relevant to your business, researching your target audience thoroughly, and writing highly personalized, relevant InMail messages.
Furthermore, InMails can also be an excellent way to bypass LinkedIn's weekly connection limits and connect with a higher number of relevant leads.
2 ways to leverage LinkedIn InMail in lead generation
Here are 2 ways to leverage InMails in lead generation and prospecting to ensure they achieve their highest effectiveness:
- As the last resource.
Use InMails as the last resource to connect with busy decision makers (CXOs, influencers, people who are harder to reach on the platform, etc.) and your 3rd-degree connections.
If your lead hasn't accepted your connection request and hasn't replied to your email or returned any of your calls (depending on your outreach strategy), it's a good practice to use an InMail message to reach out.
Our Head of Sales, Andrea, used InMails as the last resource in her ‘Targeting specific group members’ approach and reported 53% acceptance rate, 27% reply rate, and 73% open rate.
- To connect with members who are ‘harder’ to reach.
Some LinkedIn members (CXOs, LinkedIn influencers, upper management, etc.) don't accept invites to connect from members with whom they don't have connections in common.
InMails can be an excellent way to make an introduction before sending a connection request and decreasing your chances of getting rejected or marked as spam.
For example, our account executive, Pavle, used it in his ‘Founder2Founder approach’ sequence, and his result was outstanding - 44% acceptance rate, 29% response rate, and 82% open rate.
How to write a good LinkedIn InMail [best practices]
If you're new to InMail messages or would like examples to inspire you on how to write LinkedIn InMails for prospecting and to stand out in your leads' Inboxes, we've listed the top InMail examples with an over 25% reply formula.
Or, follow these practices used by our sales team.
- Catchy and relevant subject line for a higher open rate.
Think of a LinkedIn InMail as a cold email. Your open rate will depend on the subject line. Make sure it's catchy but not misleading and that it shows that the content of that InMail message is relevant for the recipient. Open rate matters, but so does getting the reply.
- Personalizing messages for a higher response rate.
With each InMail message, you must show that you've researched and that the product or service you're offering is highly relevant to the recipient. Personalizing messages implies going far beyond calling your prospect by name.
- Keep it to a reasonable length also for a higher response rate.
LinkedIn InMails have a high character limit, but that doesn't mean you must use them all. Remember that busy decision-makers have little time to read a novel-like message. The sooner you reach the point, the higher your chances of getting an answer.
How many LinkedIn InMails credits do I get per month?
Free InMail credits
LinkedIn Premium Careers and Premium Business, Sales Navigator Core, and Recruiter have 800 free InMails by default, whereas Recruiter Lite has 100 free InMail credits. The designated credits are available as you upgrade your basic LinkedIn account to any LinkedIn premium subscription.
There's no way to check the number of free InMail credits you have left for any LinkedIn premium subscription.
Paid InMail credits
The number of InMail credits varies by the LinkedIn subscription plan, and they cannot be transferred when changed to another LinkedIn subscription.
Here's the visual representation of the number of paid InMail credits according to your subscription plan.
We put the plus sign next to LinkedIn Recruiter plans because these are the only LinkedIn plan subscribers who can make an additional purchase of InMail credits. The other 2 LinkedIn Recruiter plans can make a deal to purchase additional paid InMail credits while upgrading their plan.
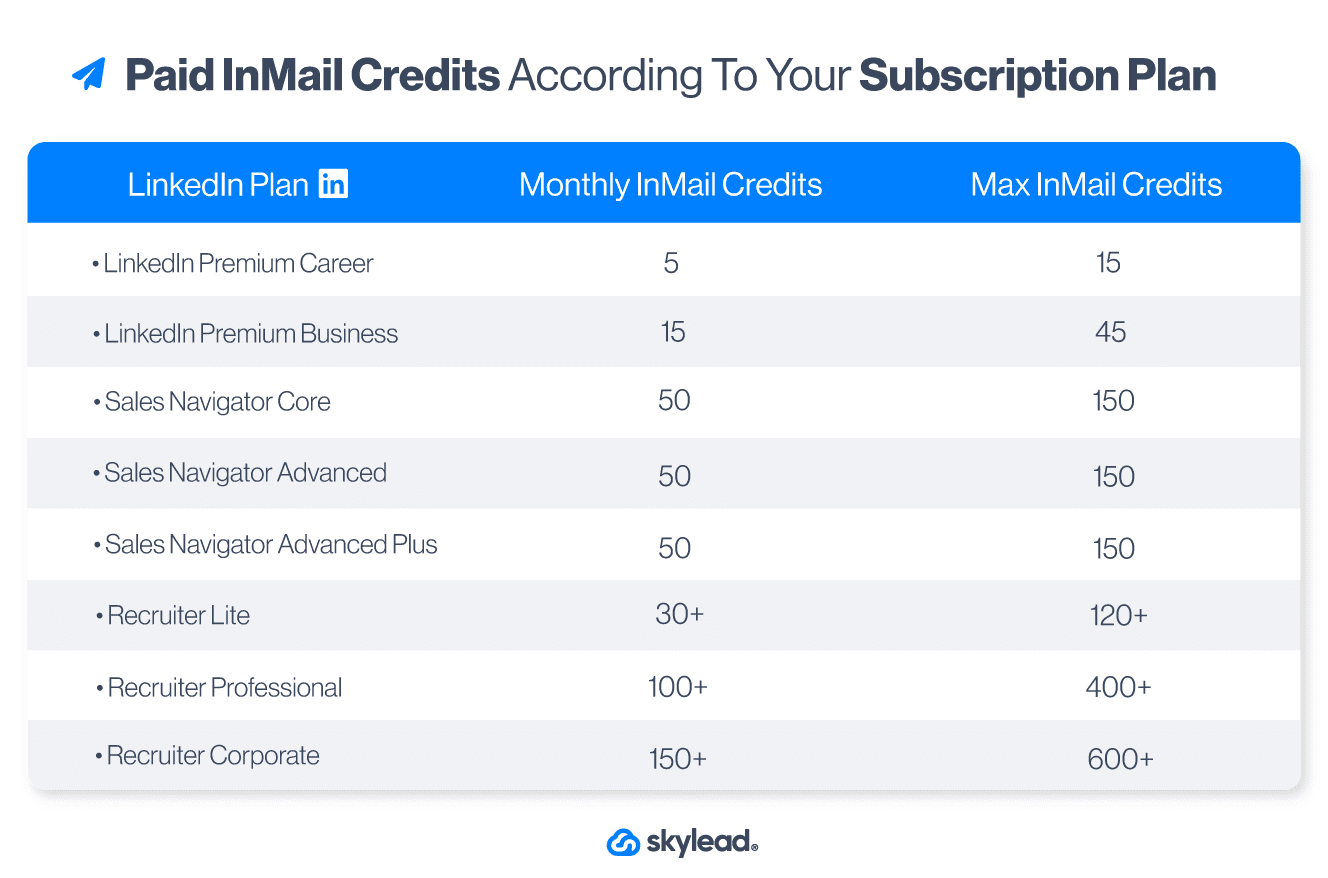
How do I get InMail credits back?
If a LinkedIn member answers your InMail within 90 days for LinkedIn Premium and Sales Navigator and within 120 for LinkedIn Recruiter plans of the send date, you get that credit back.
By ‘answered’, LinkedIn counts every InMail that is either accepted, declined, or actually responded to.
If the person doesn't answer your InMail within 3 days, LinkedIn will send them an automatic reminder. You can get that credit back even if your recipient answers with LinkedIn auto-response options.
If you are a LinkedIn Premium Career or Premium Business user, you can only send another free or paid InMail once that LinkedIn user replies to your InMail. On the other hand, users of Sales Navigator premium accounts and Recruiter premium accounts can send a follow-up InMail, which will cost them another InMail credit.
You can edit or delete a message that has been sent. However, if you delete an InMail before it receives a reply, you will not get that credit back.
Recruiter subscribers have additional limitations. According to LinkedIn, they must keep their response rate at or above 13% on 100 or more InMail messages sent within 14 days. If you send more than 100 InMail messages over 14 days and have a response rate of less than 13%, you'll receive a warning notification and tips to improve your response rate.
Recruiter premium account subscribers can also send up to 1000 InMails per day, per seat. Newly created or upgraded accounts have an InMail limit of 200 for the first calendar week.
These are LinkedIn's ways to encourage its users to make meaningful connections on the platform and to compose compelling, relevant messages when reaching out to other members.
When do LinkedIn InMail credits renew?
The credits renew for every subscription differently.
LinkedIn Premium and LinkedIn Navigator InMail credits will roll over for 90 days. All Recruiter plans' InMail credits roll over for 120 days. The renewal of free and paid InMails is not on the first of the month but on the first day of your billing cycle.
Free InMail credits renew every month.
How to check InMail credits according to your LinkedIn subscription
This is how you check the paid LinkedIn InMail limit for LinkedIn Premium, Sales Navigator, and Recruiter Lite users.
LinkedIn Premium accounts
Choose Premium features.
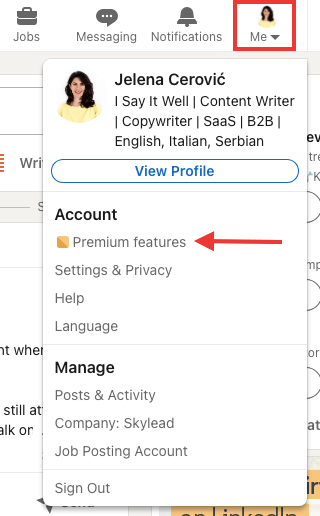
Below are all the details regarding the number of InMails (paid) remaining.
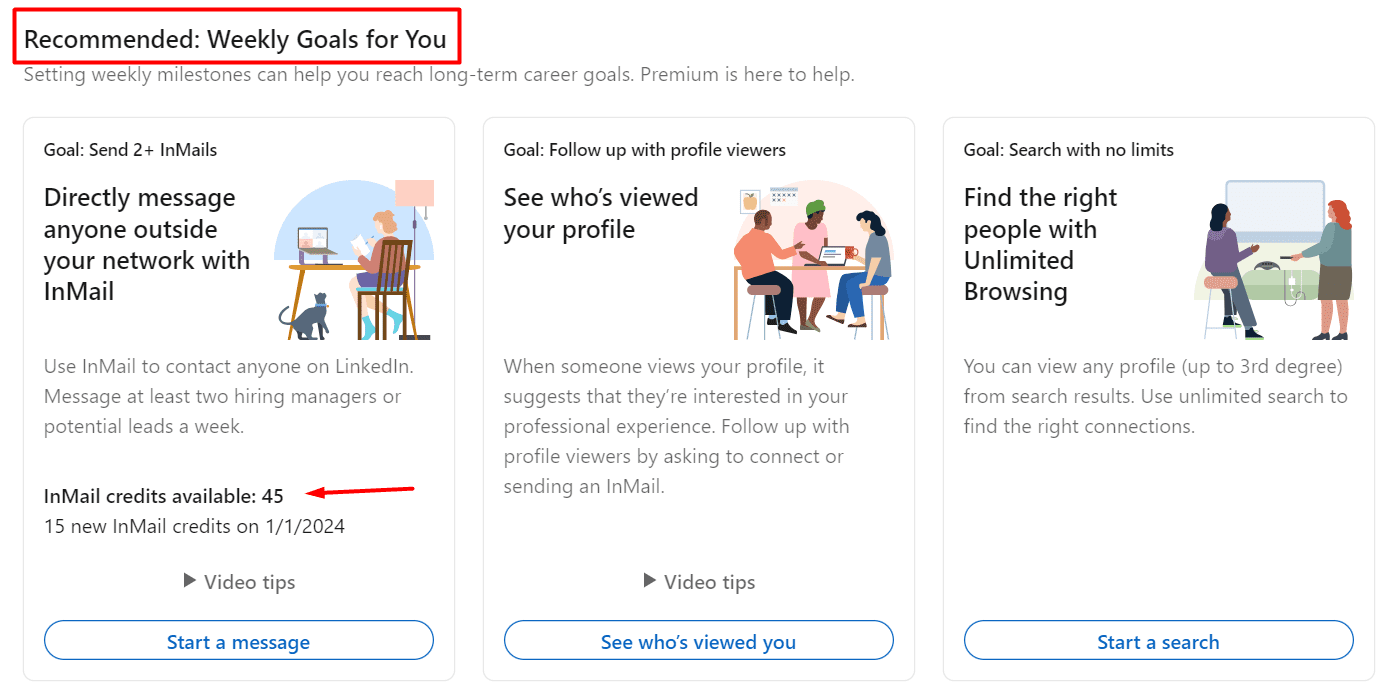
Sales Navigator accounts
Click the Sales Navigator icon on your right.

Click on your profile image, then Settings.
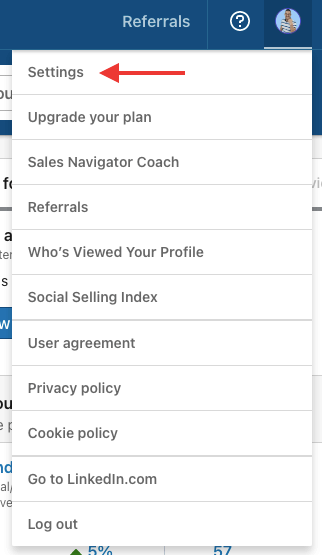
These are your available paid InMail credits.
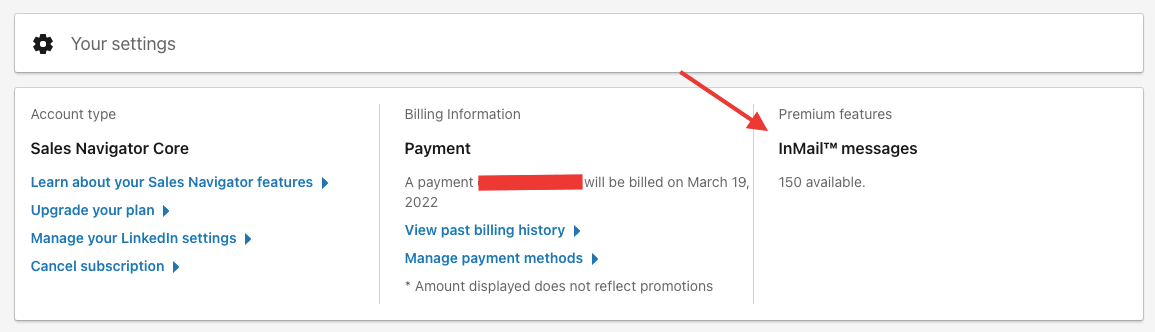
Recruiter Lite accounts
Click on the Recruiter icon on your right.

Click on your profile picture and then choose Product Settings.
Check the Usage Overview section.

How do I purchase additional InMails? [+ credit cost]
Each plan has a certain number of Paid InMails included in the package. Unfortunately, if it says that there are no InMail credits left - there's not much you can do about it unless you're a Recruiter Lite subscriber.
LinkedIn Premium and Sales Navigator users cannot buy any more InMails outside of what's offered within the plan.
Namely, Recruiter Lite is the only plan whose users can purchase additional InMails. However, that number is also limited.
Each additional LinkedIn InMail costs around $10, depending on your geographic area.
If you are a Recruiter Lite user and wish to buy more InMail credits, here is how you do it.
Click the Recruiter icon.

On the right, click on your profile picture and then choose Product Settings.
Check out the Purchase monthly InMails Credits section.
The cost of a LinkedIn InMail depends on your area.
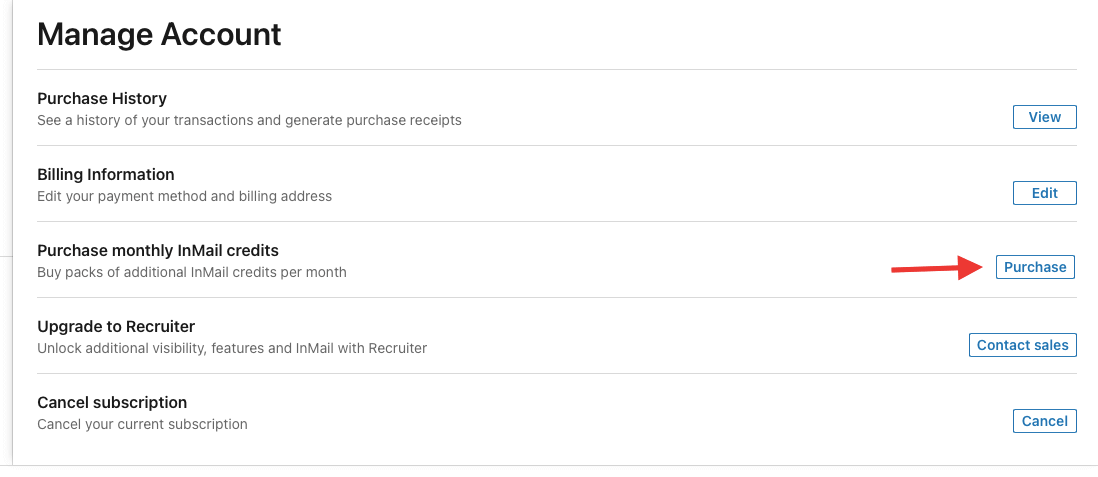
You can purchase 10, 20, 30, 40, 50, 60, or 70 InMail credits.
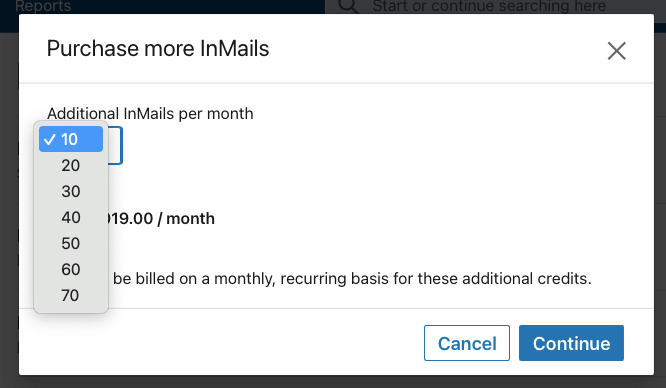
How do I send an InMail on LinkedIn?
There are two ways to send an InMail on LinkedIn:
#1 Navigate to the profile of a LinkedIn member. Sometimes, the Message button will be visible as you land on the member’s profile, and sometimes, you must click More > Message.
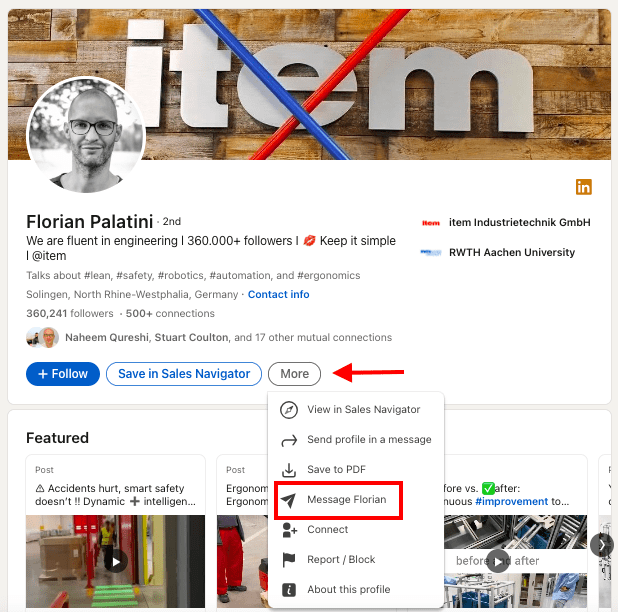
If the LinkedIn member has their profile set to Open profile status and can receive free InMails, it will say Free message in the bottom right corner.
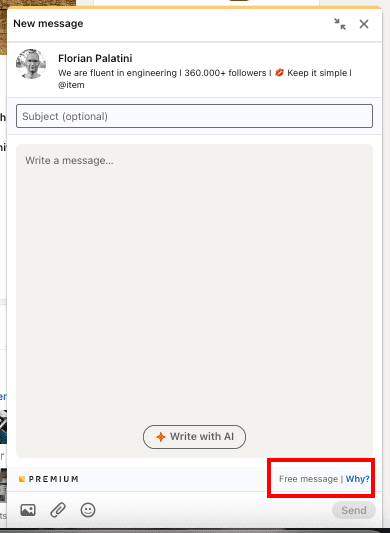
If this LinkedIn member didn’t set their profile to Open profile status, you will see how many InMail credits you have left in the bottom right corner.

#2 You can do the same from your LinkedIn Inbox. Click Messaging.

Then Create a New Message.

Type in the full name of the lead.
If you pick a member you are not connected with, LinkedIn will automatically redirect you to send them an InMail.
Just like in the above example, you will be able to see if you will be using your free or paid LinkedIn InMails.
How to put InMails on auto-pilot to reach more leads faster
Skylead is currently the only tool on the market that automates both free and paid InMails in one click!
Briefly, Skylead is a sales engagement tool and cold email software that helps you leverage both LinkedIn and email to reach a higher number of leads in less time.
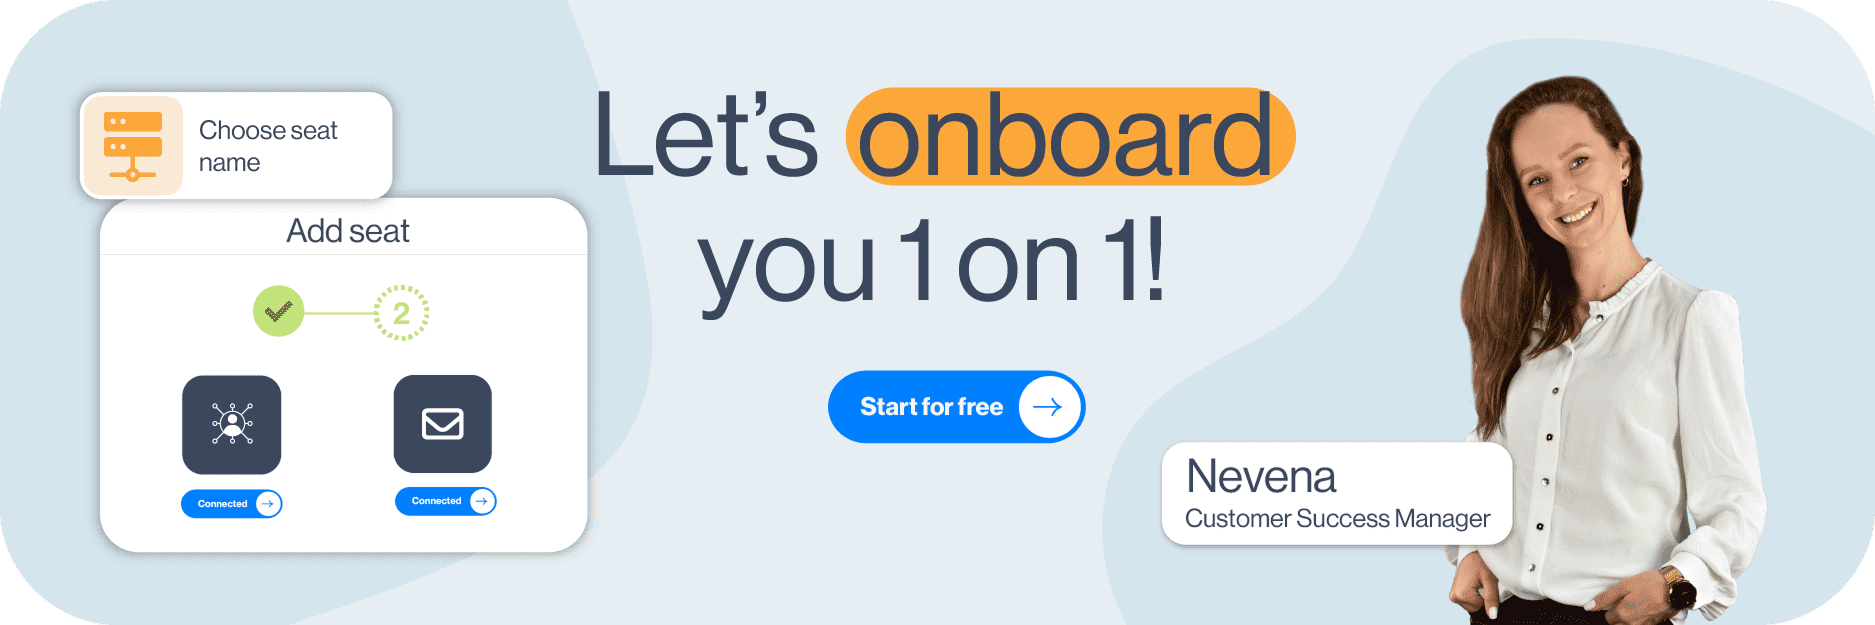
By combining its groundbreaking features, such as - multichannel outreach, unlimited Email automation, Email verification & discovery, and Image & GIF personalization into Smart sequences, Skylead allows you to book 3x more meetings than before.
When talking about automating LinkedIn InMails, the main benefit of Skylead’s Smart sequences is the algorithm being able to recognize whether a lead has set its profile to Open profile status or not and decide whether to use a paid or free InMail credit to reach them out without interrupting your outreach flow.
All you need to do is move the toggle button to the right and allow Skylead to use paid InMail credits if necessary.

Here’s an example of what Skylead’s Smart Sequence looks like.
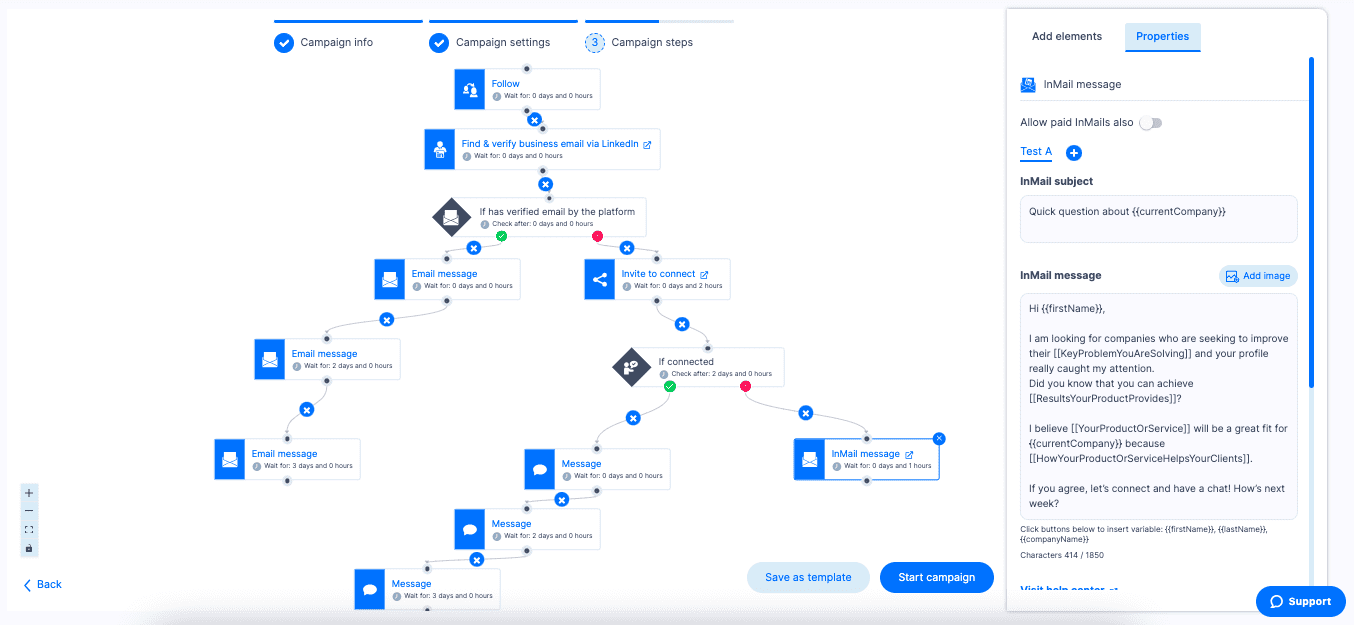
Frequently Asked Questions
What specific personalization techniques make InMails more engaging to recipients?
Personalization techniques for InMail that increase engagement include using the recipient's name, referencing specific details from their profile such as the post they published, and mentioning mutual connections or interests. This approach makes the message feel tailored and relevant.
How does the effectiveness of InMail compare to other LinkedIn outreach methods, such as connection requests or regular messages?
InMail's effectiveness compared to other LinkedIn outreach methods lies in its direct access to users outside one's network. It also offers a higher chance of being noticed and read, especially for premium accounts.
Are there any updated best practices for InMail subject lines to maximize open rates?
For InMail subject lines, best practices include being clear, concise, and compelling. Using a question or mentioning a mutual interest can significantly increase the open rate by sparking curiosity or providing immediate value.
Does LinkedIn InMail go to email?
No, InMail is a LinkedIn feature. Therefore, LinkedIn InMail goes to your LinkedIn Inbox, or if you initiated an InMail conversation through your Sales Navigator or Recruiter account, that correspondence will be visible only in your Sales Navigator Inbox or Recruiter Inbox.
Do recruiters respond to InMail?
Usually yes. Recruiter users must keep their response rate at or above 13% on 100 or more InMails sent within 14 days. If they send more than 100 InMails over the same period and have a response rate of less than 13%, they'll receive a warning notification.
Is there a LinkedIn InMail read receipt?
No, there are no read receipts for InMails. However, Sales Navigator and Recruiter Inboxes display under your or your recipient's name one of the following 3 statuses for InMails - awaiting response, accepted, declined and it allows you to filter InMails by these statuses.
How do you know if someone read your InMail on LinkedIn? (awaiting response)
LinkedIn users cannot know if someone has read their InMails. However, Sales Navigator and Recruiter Inboxes display under your or your recipient's name one of the following 3 statuses for InMails - awaiting a response, accepted, or declined and it allows you to filter InMails by these statuses.
What happens when someone declines your InMail?
Every InMail message accepted/declined or responded to directly within 90 days of being sent is credited back. Sales Navigator and Recruiter users can filter InMails by awaiting a response, accepted, or declined, while LinkedIn users cannot know the status of their InMail.
How do you know if someone declines your InMail?
It will say {{RecipientsName}} declined to continue this conversation for now in your LinkedIn Inbox, or it will say under the recipient's name Declined your InMail in your Sales Navigator or Recruiter Inboxes. Every LinkedIn InMail that is declined is credited back.
What is the average InMail response rate?
According to an official LinkedIn Learning course, InMail messages have an average response rate of between 18 and 25%. Compared to cold emails' 3% average response rate, LinkedIn InMail seems much more effective, and people tend to reply to them more often than to cold emails.
Is it better to send an InMail or connect on LinkedIn?
It depends. It is better to use InMail to reach your 3rd-degree connections or members who haven't answered any of your messages on any other communication channel, such as - email or calls, or accepted your LinkedIn connection request. LinkedIn InMail is an excellent last resource.
How to reply when a recruiter sends an InMail on LinkedIn?
When you open an InMail message sent from a LinkedIn Recruiter subscriber, you can respond with a custom response or use the smart reply (combined or not with a custom response), which is Yes, interested, or No thanks (decline with or without a custom message).
When do LinkedIn InMail credits renew?
LinkedIn emails, or LinkedIn InMails, renew depending on your subscription plan. LinkedIn premium accounts and all LinkedIn Sales Navigator accounts reset the number of InMail credits after 90 days, while all Recruiter accounts to reset the number of InMail credits after 120 days.
To Sum Up
LinkedIn's features, including the impactful LinkedIn InMail, are designed to enhance platform efficiency, protect against spam, and boost the building of meaningful professional relationships on the platform.
You can test out automating free & paid InMails on Skylead, as well as ALL other Skylead features mentioned in this article for 7 days for FREE, and see for yourself how you can leverage LinkedIn’s full potential in only one click.
So, are you ready to automate LinkedIn InMails and other outreach actions?
Disclaimer: Skylead is not affiliated, endorsed by, or connected with LinkedIn in any way.
LinkedIn private mode or LinkedIn incognito mode is a LinkedIn feature that allows you to browse other people’s LinkedIn profiles without sharing any or some of your LinkedIn profile information with the owners of the profiles you’ve viewed.
As you may already know (or not?), every time you visit someone’s profile, LinkedIn notifies the profile’s owner via the Who’s Viewed Your Profile feature, providing an opportunity to check you out on LinkedIn.
So, suppose you don’t want people whose profiles you’re viewing to know you took a sneak peek at their professional activities.
In that case, the platform allows you to go incognito partially (LinkedIn semi-private mode) or completely (LinkedIn private mode).
LinkedIn incognito mode is available to ALL members, independent of their LinkedIn subscription type.
Therefore, continue reading if you wish to know the following:
- What LinkedIn private mode is;
- How to make your LinkedIn private;
- Ways to customize your private mode on LinkedIn;
- How to know if someone else viewed your profile in the incognito mode;
- A few lesser-known hacks on LinkedIn private mode, and much more.
Ready?
Let’s get started!
[Mission Impossible Theme Song Playing]
What is a LinkedIn private mode?
LinkedIn private mode or LinkedIn incognito mode is a LinkedIn feature that allows you to browse other people’s LinkedIn profiles without sharing any or some of your LinkedIn profile information with the owners of the profiles you’ve browsed.
There are 3 visibility modes on LinkedIn according to the platform’s Visibility settings:
- LinkedIn public mode (or ‘Name and headline’) shows your picture, full name, headline, geographical location, and industry to people whose profiles you’ve viewed.
- Semi-private mode shows specific profile information, such as - either only the company you work at or your job position and the company you work at.
- (Full) private mode doesn’t show any profile information.
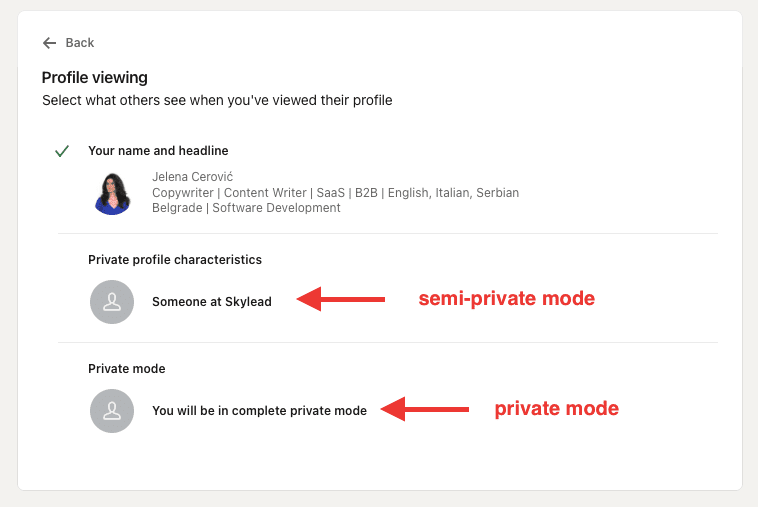
Do I have to pay for LinkedIn incognito mode?
LinkedIn private mode is available to ALL LinkedIn subscribers free of charge.
However, if you have a free (basic) LinkedIn plan, switching to private or semi-private mode will turn off the Who’s viewed your profile feature and erase your viewer history.
We’ve tested it ourselves, and we can confirm you will lose all previously collected data and can only see who's viewed your profile after switching to one of the private modes on LinkedIn.
Once you turn off the LinkedIn incognito mode, the feature Who’s viewed your profile will be back in a maximum of 24 hours and will show only those members who viewed your profile after turning off the private mode.
Also, you won’t be able to retrieve information on who’s viewed your profile during the time spent in private mode on LinkedIn.
On the other hand, all other users on paid LinkedIn plans such as - LinkedIn Careers or Business, any Sales Navigator plan, and any Recruiter plan will still be able to see these analytics and statistics despite keeping their profiles in private mode.
Furthermore, no LinkedIn plan subscriber, free or paid, can ever know the profile information of members browsing in private or semi-private modes on LinkedIn. Also, no LinkedIn plan subscriber can block or prevent other members from viewing in private or semi-private mode.
How do I view profiles in private mode on LinkedIn?
Here are 2 ways to switch from browsing in public to browsing in private mode on LinkedIn, whether you’re accessing your profile on a desktop or mobile.
Private Mode on Desktop
Click the Me icon in the top right corner, then choose Settings & Privacy.
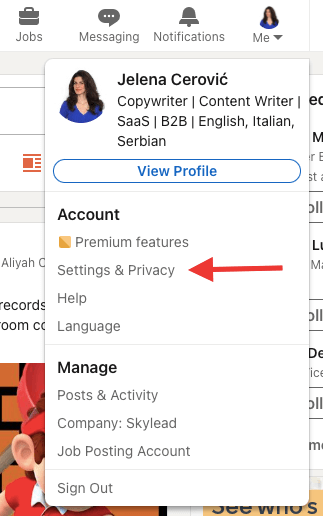
Then, choose Visibility on the left toolbar and click on Profile viewing options.
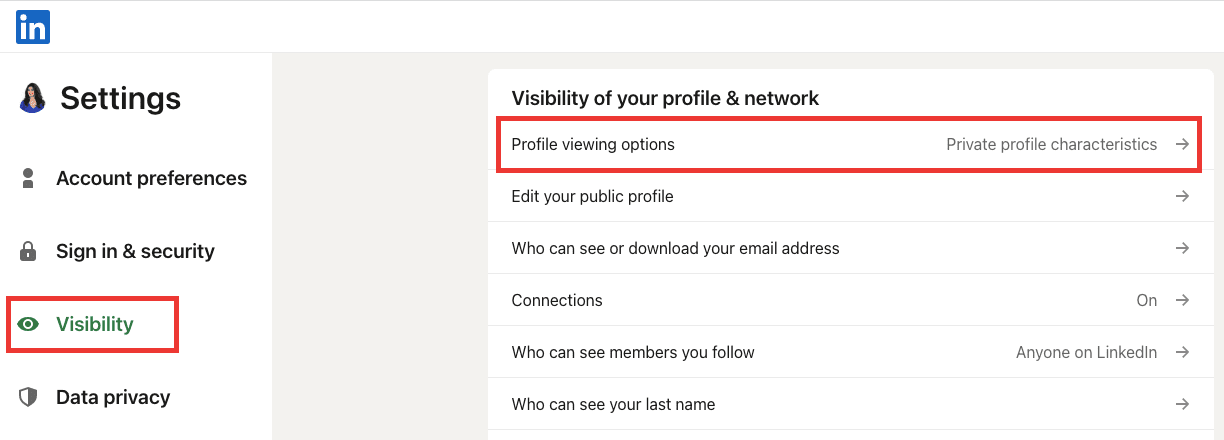
Finally, choose among the 3 visibility modes.
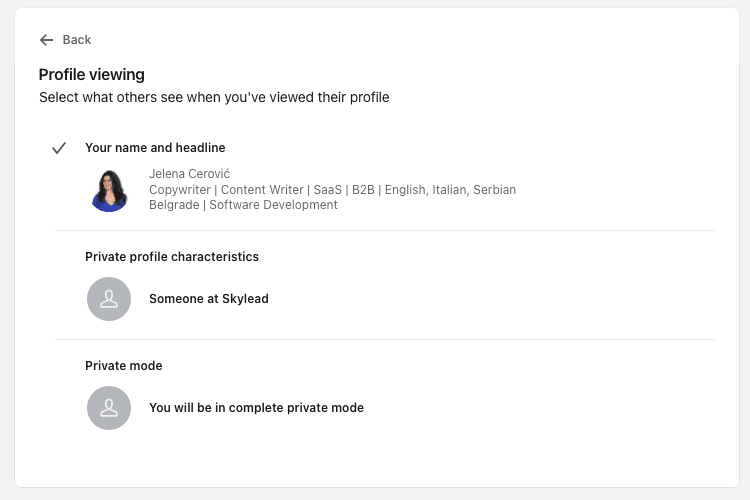
Private mode on mobile
Open your LinkedIn app, and click on your picture in the upper left corner.
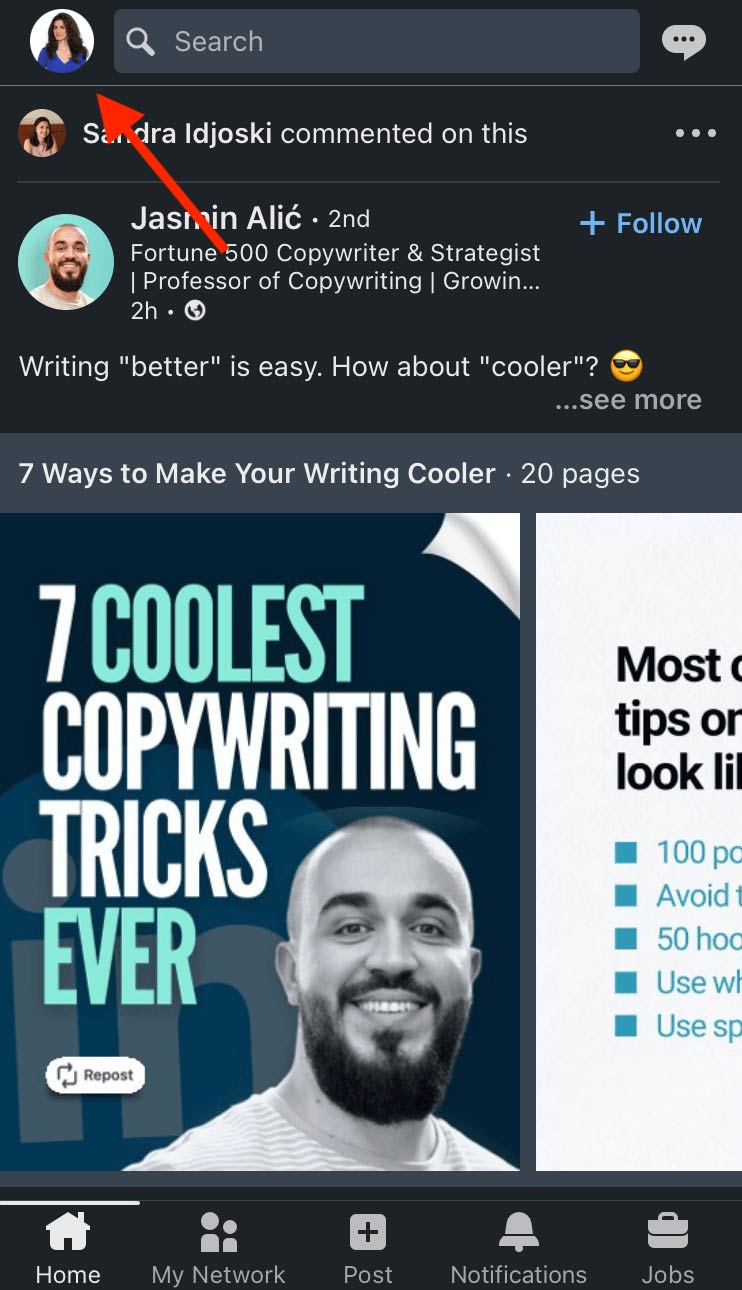
Then, choose Settings.
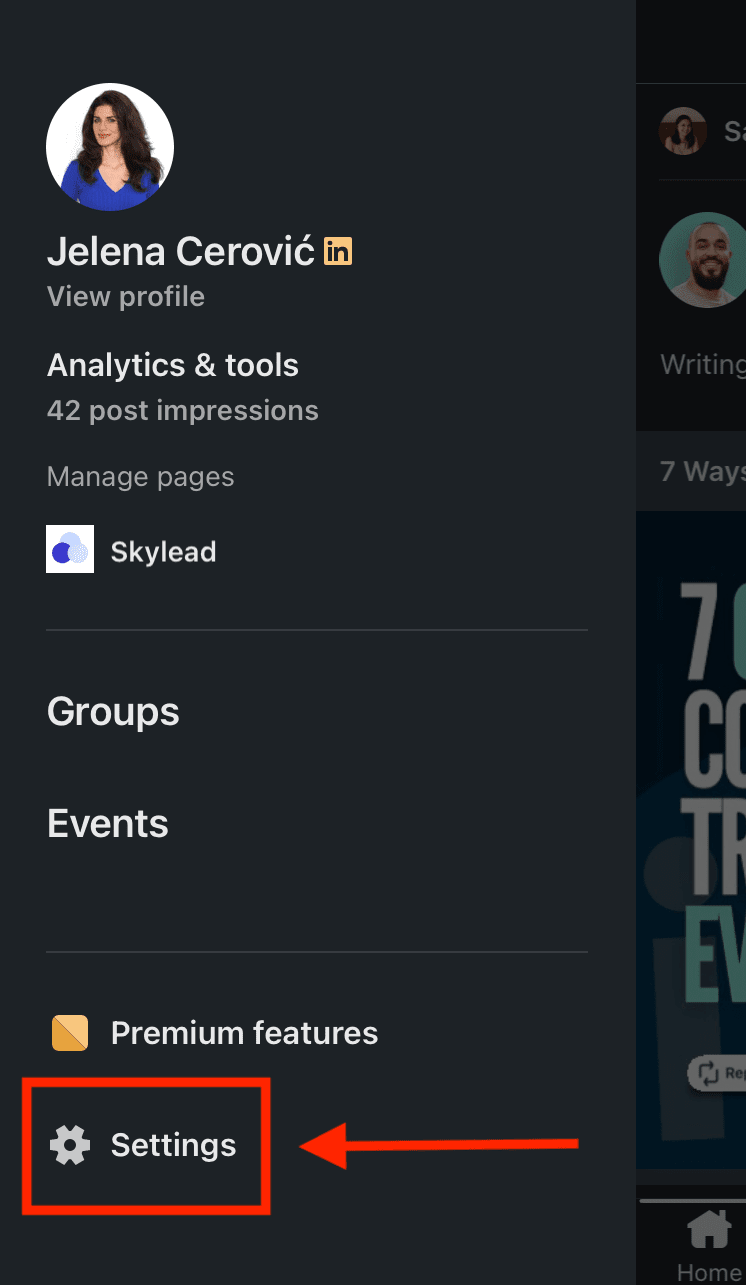
Click Visibility.
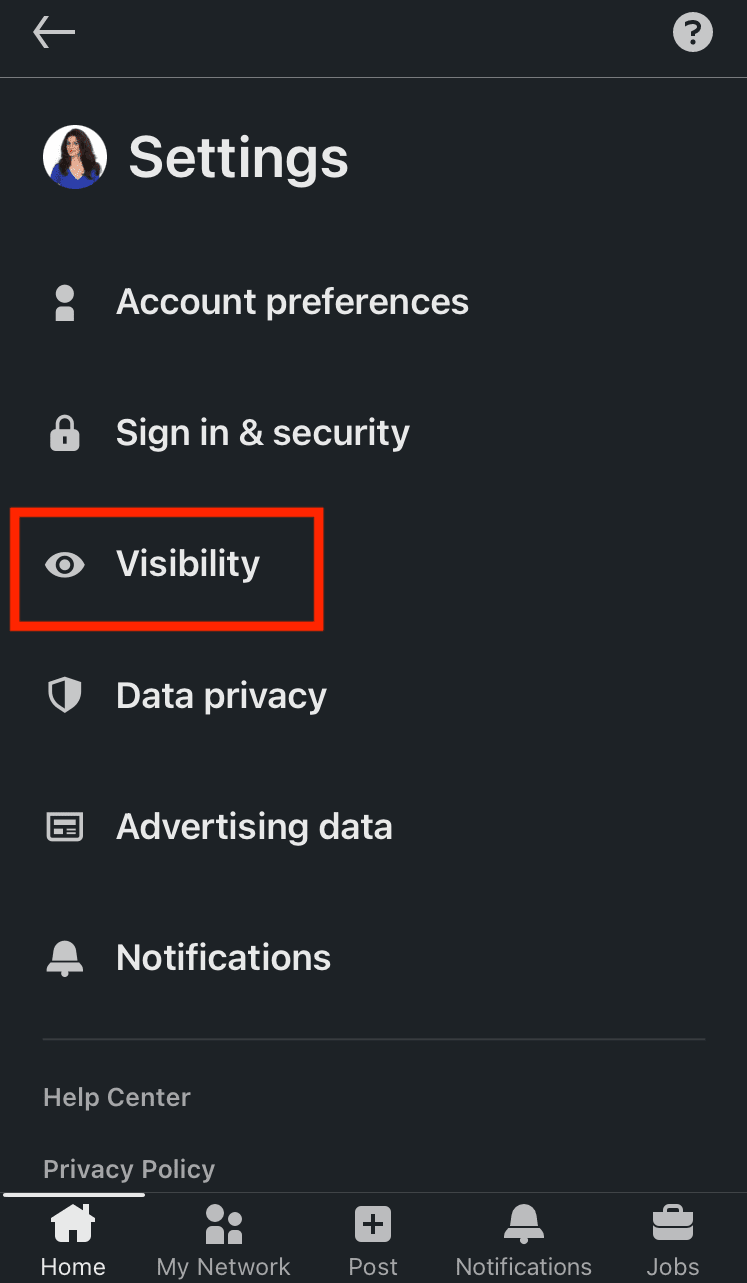
Then, choose Profile viewing options.
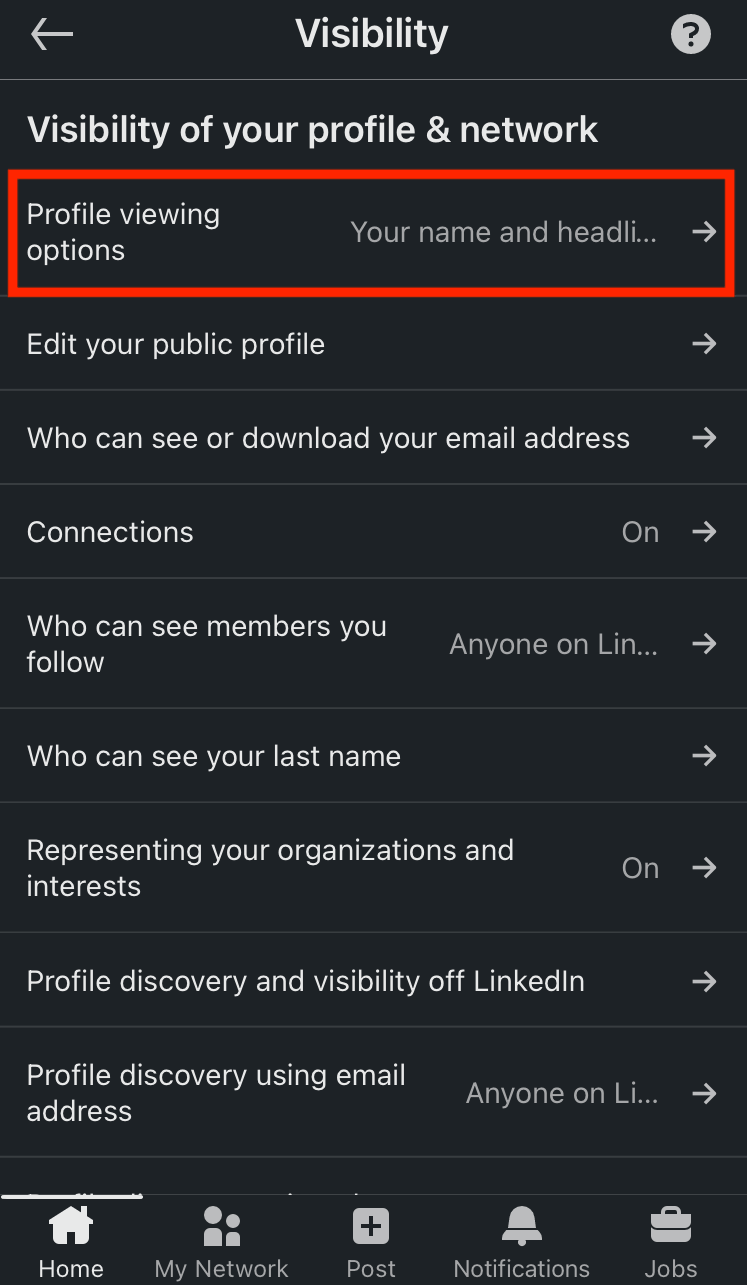
Choose in which mode you wish to browse other members on LinkedIn.
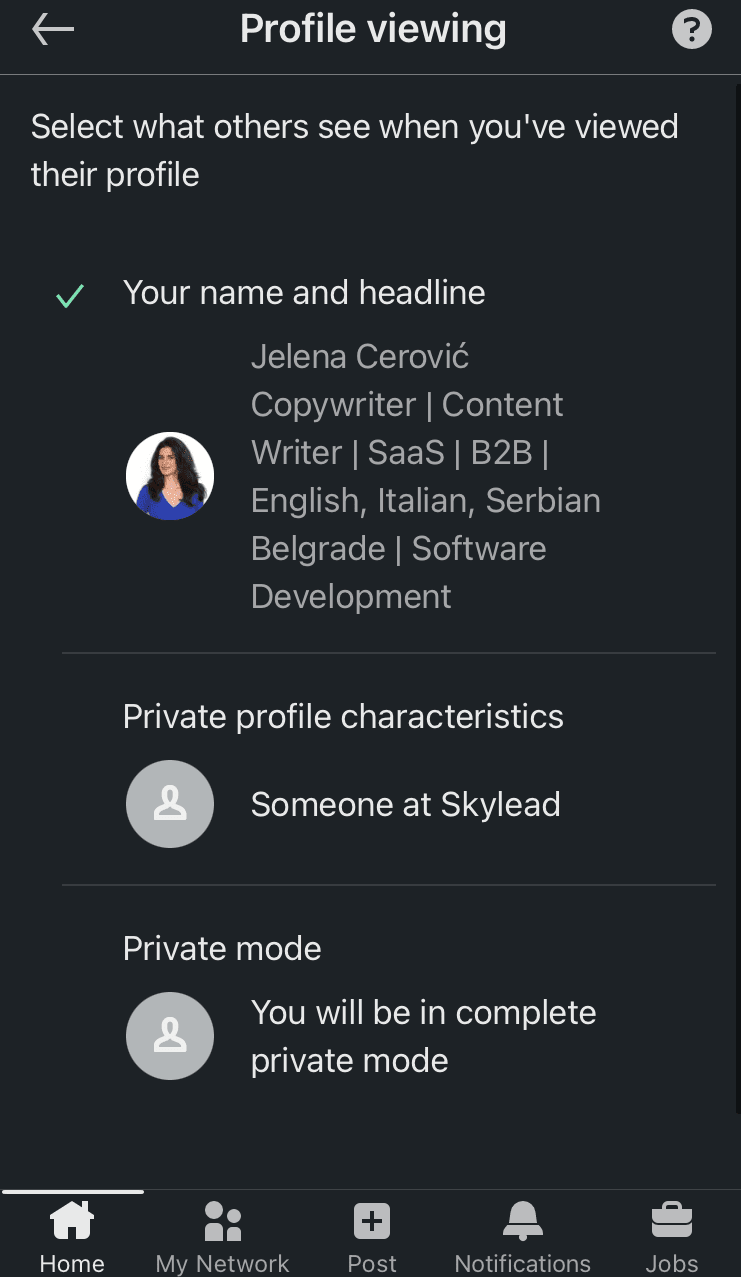
How do I customize my public mode on LinkedIn?
If you decide to browse in public mode on LinkedIn, you can still determine what information to make available to members not part of your network.
As you may already know, LinkedIn profiles rank on Google (and other search engines) based on the keywords used on your LinkedIn profile, such as name, profession, LinkedIn URL, LinkedIn headline, summary, etc.
Therefore, this option is advantageous if you don't want everyone to access your LinkedIn profile or wish to keep specific information to your 1st-degree connections only.
Go to Settings & Privacy.

Go to Visibility, and then choose Edit public profile.

Scroll down the right sidebar and move the toggle buttons depending on what parts of your profile you wish to make available to anyone on LinkedIn and which ones should be reserved for your 1st-degree connections only.
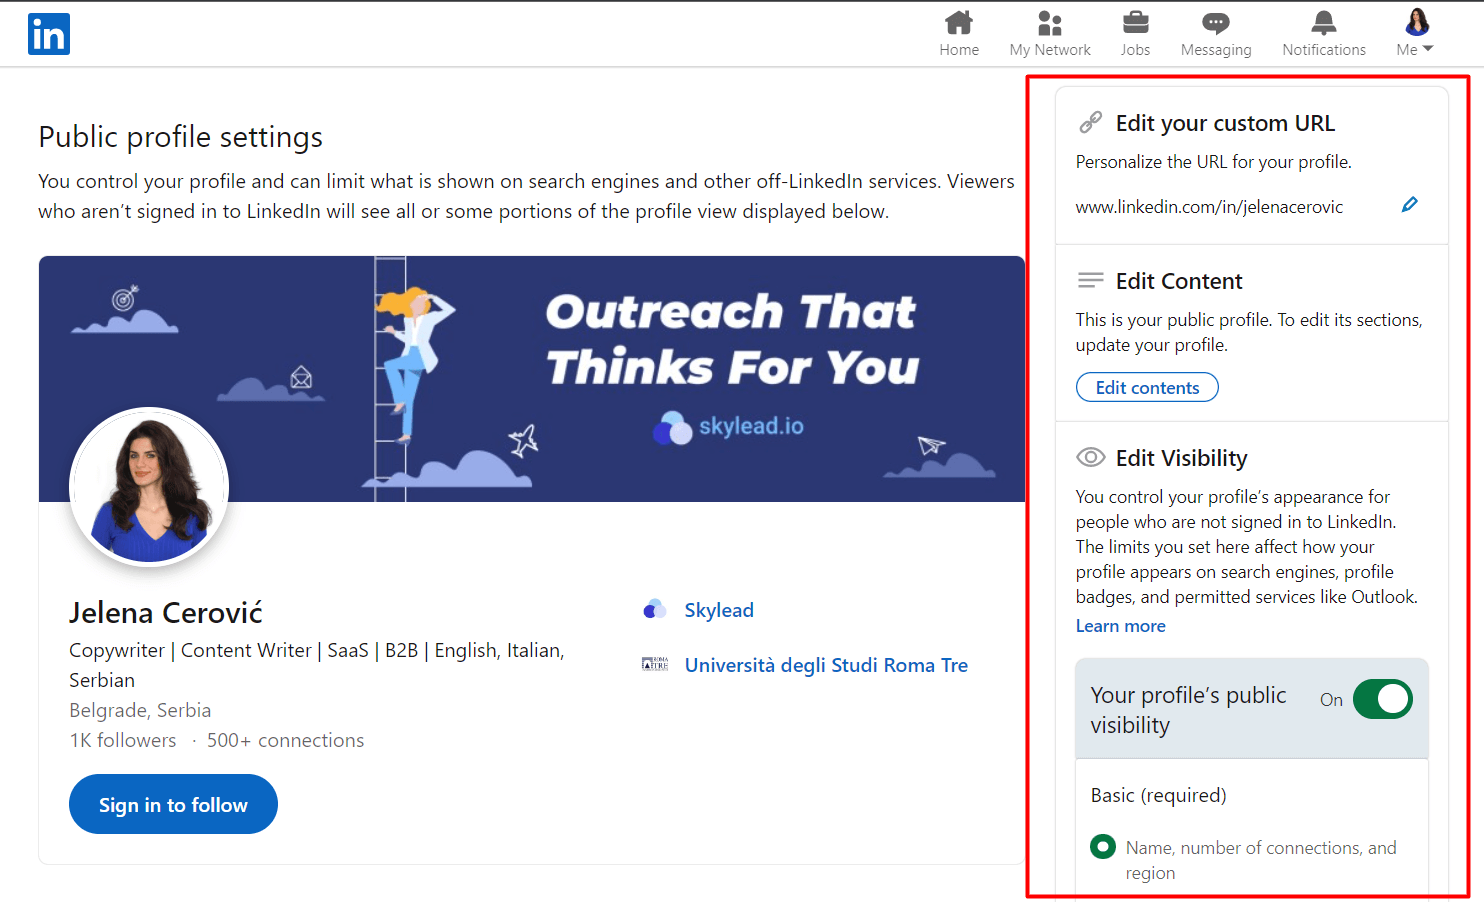
How do I know if someone viewed my LinkedIn in private mode?
LinkedIn subscribers get a notification each time someone views their profile.
If a member views your profile in semi-private or private mode on LinkedIn, it will appear in your notifications just like other alerts here (picture below).
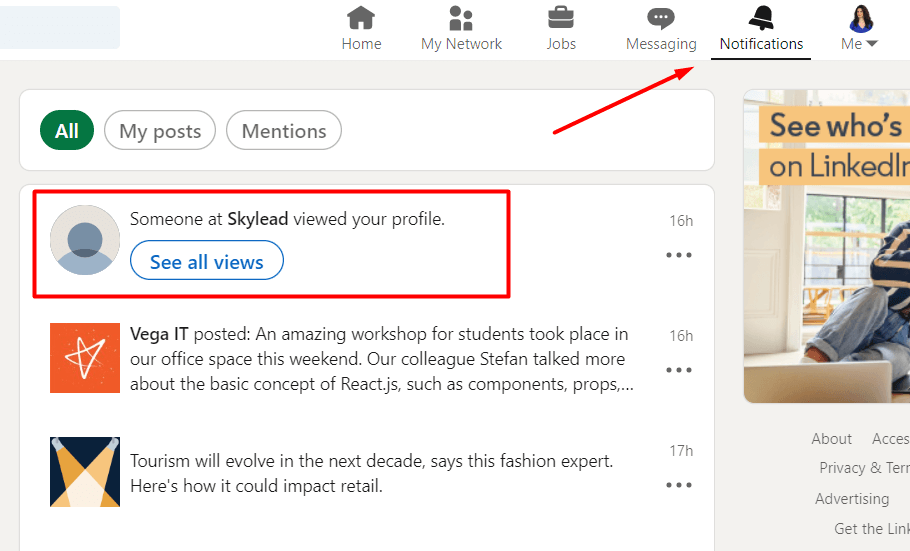
If you click on See all views right below the notification, it will take you to the Who’s viewed my profile LinkedIn page with the list of all viewers in the past 90 days, statistics, and additional filters.
Here are a few examples of what a notification regarding members browsing in semi-private mode on LinkedIn looks like.


Here are a few examples of what a notification about members browsing in private mode on LinkedIn looks like.


As you may have noticed, there’s a Search button next to members viewing your profile in semi-private mode.
Clicking on it will take you to LinkedIn search results of all people who work in that company and have LinkedIn profiles.
However, Recruiter subscribers don’t have the Who’s viewed your profile feature on their Recruiter pages. They must go to their LinkedIn profiles to check these types of notifications.
Sales Navigator subscribers will not see these notifications in the All alerts section because this is a purposely focused section that notifies about saved leads, saved accounts, and unsaved leads from saved accounts.
Sales Navigator subscribers can click on the profile picture in the top right corner of their Sales Navigator home page and choose Who’s viewed your profile.

This action will take them to the LinkedIn statistics page.
When should I use LinkedIn private mode?
From our experience, it’s better not to keep your profile in private mode when browsing on LinkedIn.
Why?
By viewing other people’s profiles, you are showing some kind of interest - whether for LinkedIn lead generation, finding ideal candidates for a company position, expanding your network, showing an interest in a job opening by viewing the hiring manager’s profile, etc.
Also, viewing someone's profile on LinkedIn can help you connect with them faster and even bypass LinkedIn weekly invitation limits.
However, there are a few scenarios in which keeping your profile in LinkedIn incognito mode makes sense.
#1 You’re researching your competitors.
This one is pretty straightforward.
If you want to see what your competitors are up to, what they are posting on LinkedIn, or to scrape their network, you should keep your profile in private mode.
However, it’s not just competitors.
You may wish to check something on your former employer’s profile, former or current customer, or anyone else to whom you don’t want to reveal your profile information.
#2 You still need to optimize your profile.
Here, you have 2 scenarios.
Scenario 1 implies you wish to browse relatively random profiles to identify good practices to optimize your profile.
These members are not necessarily the ones you wish to connect with on LinkedIn or relevant to your business, but they've done an excellent job earning the all-star status.
Scenario 2 implies you wish to browse people who are relevant to why you joined LinkedIn, but you don’t want them to know because your profile is still not optimized.
If they check you out, they might lose interest or ignore your LinkedIn connection request because incomplete profiles on LinkedIn seem scammy.
#3 You’re a recruiter shortlisting candidates.
If you don't want all potential candidates to think they are being considered for a job opening at your company, you can view their profiles using LinkedIn incognito mode.
That way, you will avoid people not matching the requirements approaching you on LinkedIn and not get someone's hopes up.
LinkedIn Incognito Mode FAQ
Is private mode on LinkedIn really private?
Yes, LinkedIn private mode is really private. The platform cares about keeping its members' privacy, and there is no way to see members' profile information browsing in private mode on LinkedIn. Also, no member can block or prevent other members from viewing in private mode.
Should I be private or public on LinkedIn?
Staying private or going public on LinkedIn will depend majorly on your goal on the platform. It’s better not to keep your profile in incognito mode because showing interest in other members’ profiles can help you connect with them and even bypass LinkedIn weekly connection limits.
LinkedIn private mode vs. private profile on LinkedIn
LinkedIn private mode or LinkedIn incognito mode lets you browse other LinkedIn members' profiles anonymously. On the other hand, when you set your LinkedIn profile to 'private profile status, ' it means no one can find you on the platform or in any search results (e.g., Google search results).
How do I stay private on LinkedIn (private profile status)?
To switch your profile to private profile status and not even appear in the platform’s search results at all, go to Settings & Privacy > Visibility > Edit your public profile > Your profile’s public visibility (push the toggle button to the left in the right rail).
Does LinkedIn show who viewed your profile?
Yes, LinkedIn notifies members who have viewed their profiles. However, if you set your profile to browse in incognito mode, members whose profiles you’ve viewed won’t be able to see your profile information partially or at all, depending on the visibility mode of your choice.
Do I have to pay for LinkedIn private mode?
No, LinkedIn’s semi-private and private modes are FREE of charge and available to all members. However, when free LinkedIn members switch to private mode, they lose access to the Who’s viewed my profile in the past 90 days feature, unlike paid LinkedIn members who can still see these statistics.
Why would someone use private mode on LinkedIn?
Reasons to use private mode are infinite, but members usually browse LinkedIn in incognito mode if they are researching their competitors, checking out former or current customers or employers, shortlisting candidates for open positions, or don't feel their LinkedIn profiles are optimized enough to reveal their identity.
Who can see my private LinkedIn profile?
A private profile on LinkedIn means that you've set your entire profile to 'private profile status' and that it won't appear in LinkedIn or any other search results (e.g., Google search results). If your LinkedIn is set to private, no one can find your profile on the platform or online.
Can people see if I viewed their LinkedIn?
Unless you are browsing in semi-private or private mode on LinkedIn, other LinkedIn members will get notified once you’ve viewed their profile and can check out your LinkedIn profile to see who you are.
Can LinkedIn Pro see private viewers?
LinkedIn cares very much about keeping the privacy of those members who browse in semi-private or private mode on LinkedIn, and there is no way to see their profile information, no matter what LinkedIn subscription plan you have. Also, you cannot prevent anyone from browsing your profile in incognito mode.
What is the disadvantage of private mode on LinkedIn?
If you have a free LinkedIn plan and switch to private mode, it will turn off the Who's viewed your profile feature and erase your viewer history. You will lose all previously collected data and can only see who's viewed your profile after switching to incognito mode.
Why do people browse in private mode on LinkedIn?
People usually use the private mode on LinkedIn to research their competitors, check out former or current customers, former employers or employees, shortlist candidates for open positions, or simply because their LinkedIn profiles are incomplete and they don’t want to reveal their identity yet.
Can to hide your profile on LinkedIn?
You can either choose to browse in semi-private or private mode on LinkedIn, or you can switch your profile to private profile status and not even appear in the platform or other search engines' search results at all.
How can I view someone on LinkedIn without them knowing?
You can view someone’s profile on LinkedIn without them knowing by browsing in semi-private or private mode on LinkedIn. To turn one of these 2 modes on, go to Settings & Privacy > Visibility > Profile viewing options > Choose between Private profile characteristics (semi-private) and Private mode (fully private).
To Sum Up
While it's true that LinkedIn's private mode offers privacy, it can also compromise the transparency vital for building trust and credibility — the core of LinkedIn's purpose.
Balancing privacy and transparency is crucial for maximizing LinkedIn's effectiveness in lead generation. And, speaking of maximizing LinkedIn, test out Skylead for 7 days for free, and see how you can leverage the power of both LinkedIn and email to reach relevant leads faster.
Disclaimer: Skylead is not affiliated, endorsed by, or connected with LinkedIn in any way.
Have you ever wondered, "What is my LinkedIn URL?" or "Does it affect my professional experience and lead generation?" then, stay tuned. By the end of this blog, you'll learn:
- What is your LinkedIn URL
- Where to find it
- Why and how to change it on the desktop and in the mobile app
- How customizing it affects your experience and helps your LinkedIn lead generation
- 3 ways to customize your it if someone has already taken a specific URL
- What to watch out for
- Best tips and tricks from our experience so you can stand out from the crowd and make your profile accessible and searchable.
What is my LinkedIn URL?
LinkedIn URL is your profile’s unique URL address automatically assigned to every LinkedIn member. You can customize it for a more professional LinkedIn experience and share it with people to connect with them by going to your LinkedIn profile and copying the URL located in the browser address bar.
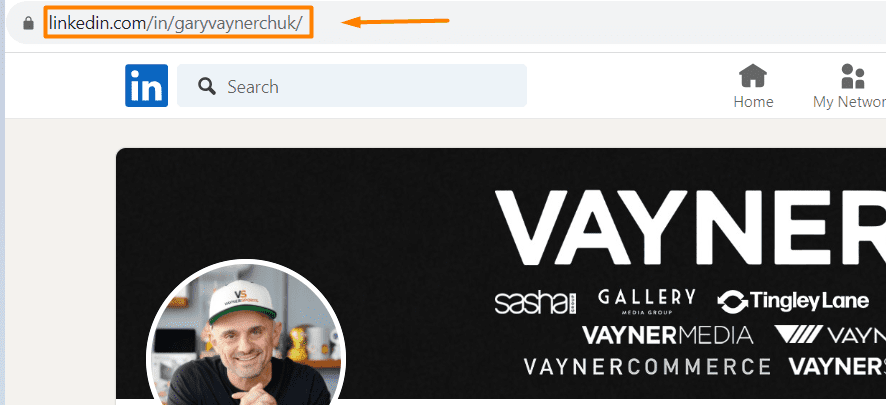
Every LinkedIn profile URL starts with https://www.linkedin.com/in/ followed by your name and some numbers (user ID) which you get by default when you open your LinkedIn profile for the first time. Here’s an example of a default profile URL https://www.linkedin.com/in/suzana-ristic-48a636207/. The part in bold of your profile’s address can be customized to look more neat and professional.
The same rule applies to any LinkedIn company page.
When shared, your LinkedIn profile URL is clickable, and it leads directly to your profile on the platform. You can send it in a message, hyperlink your email signature, or copy-paste it into your resume so that people can easily check what you're all about professionally.
How to find my LinkedIn URL?
There are two ways you can find your LinkedIn URL.
#1 Option - Go to your LinkedIn profile page and check out the address bar. This is your shareable LinkedIn profile URL.

#2 Option - Stay at your LinkedIn homepage. Click “Contact info”.
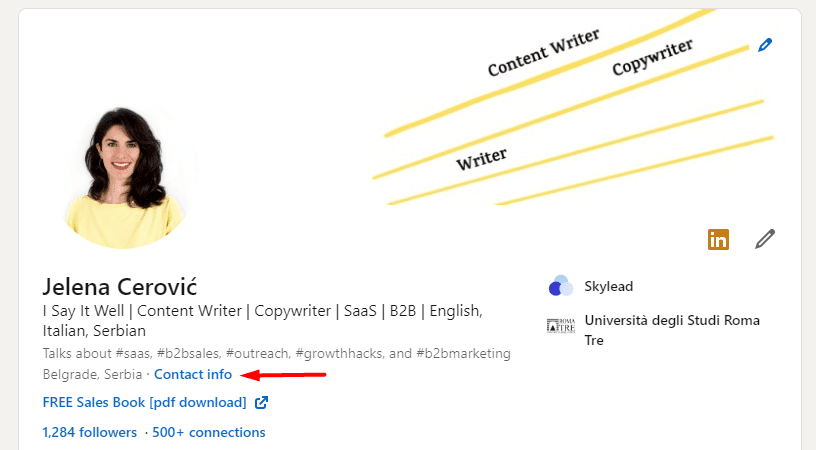
This is your LinkedIn URL.
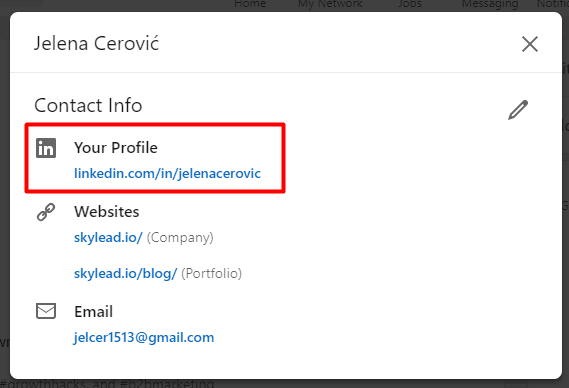
How do I copy my LinkedIn profile link?
You can use either method mentioned above to copy your LinkedIn profile link. In other words, go to your LinkedIn profile, find your LinkedIn profile link in your browser address bar, and copy it from there. Or you can copy it directly from your contact info on your LinkedIn profile page.
How to change your LinkedIn profile URL?
#1 Go to your LinkedIn homepage. In the top right corner, you’ll see the “Edit public profile & URL” section. Click on it.
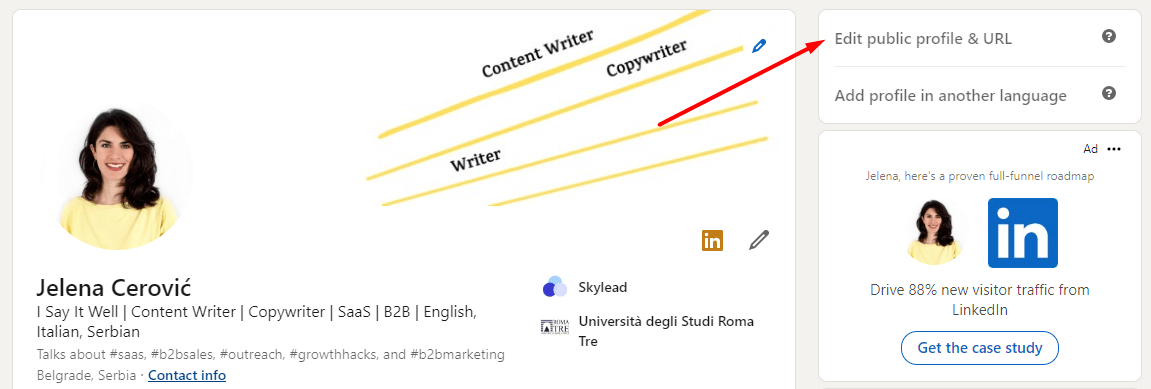
#2 This action will take you to a separate page. Again in the top right corner, click on the pencil icon to change the customizable section of your profile URL. After you’ve finished, click “Save”.
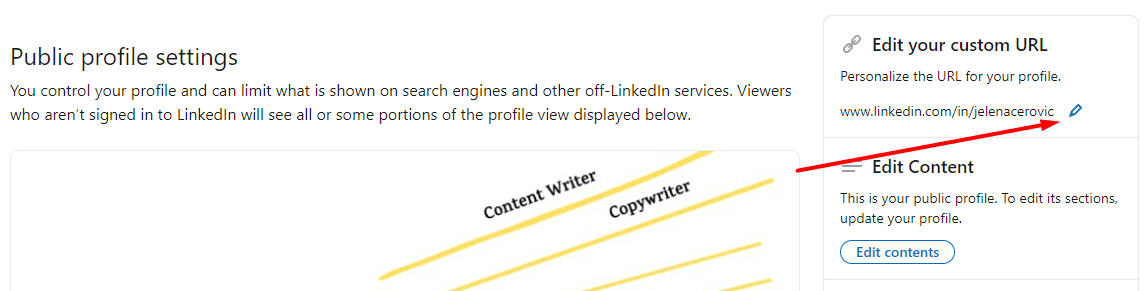
NOTE: Both LinkedIn and search engines will take some time to detect the URL changes. However, you should see the URL change right away in the Contact info section of your profile. Until the URL changes everywhere, make sure you copy-paste it from there.
How to change the URL for your LinkedIn company page?
You can and should customize your company's LinkedIn account URL as well. The same rules apply to LinkedIn accounts.
#1 Access your LinkedIn company page and click the “Edit page”.
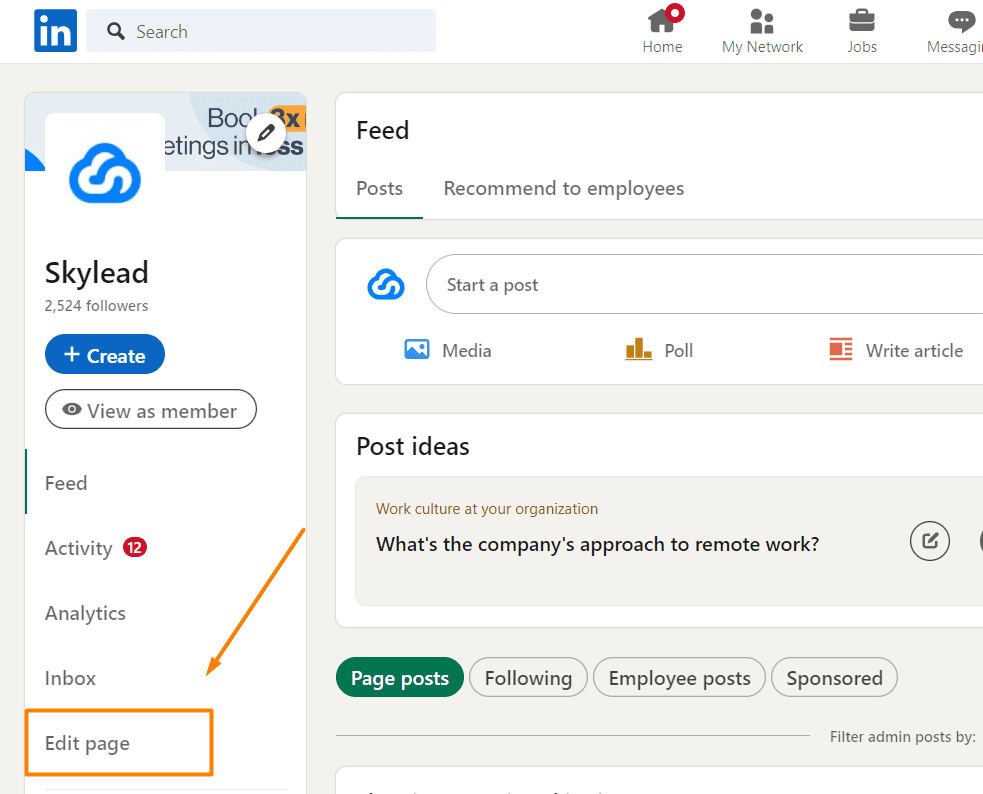
#2 Choose “Page info” and type in the custom URL for your company.
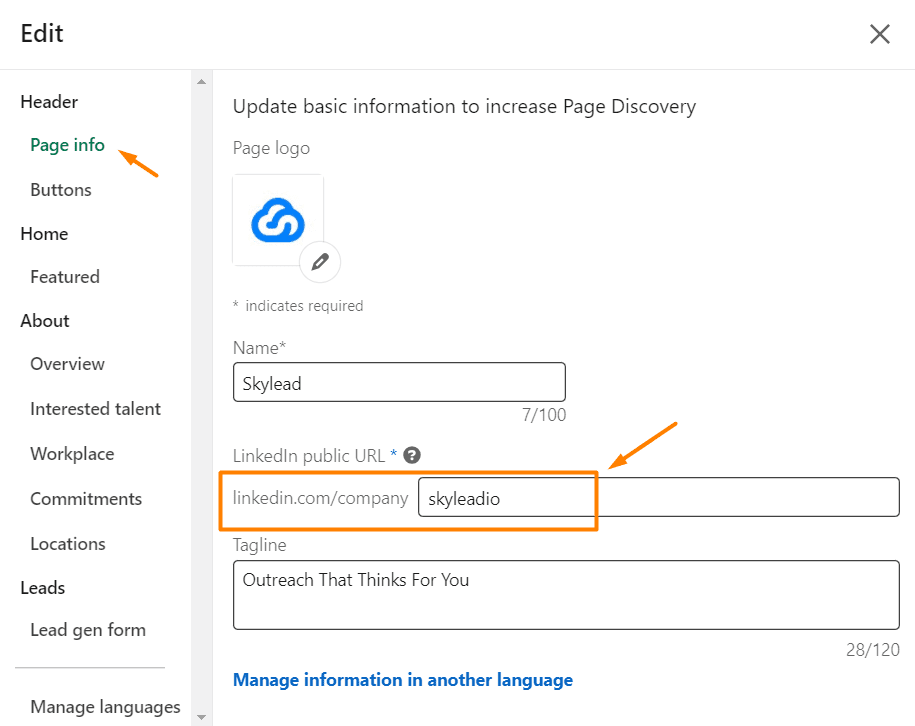
How to change my LinkedIn profile URL in the app?
This is how you change your profile URL on the LinkedIn app.
#1 Go to your profile home page. Click on the 3 dots.
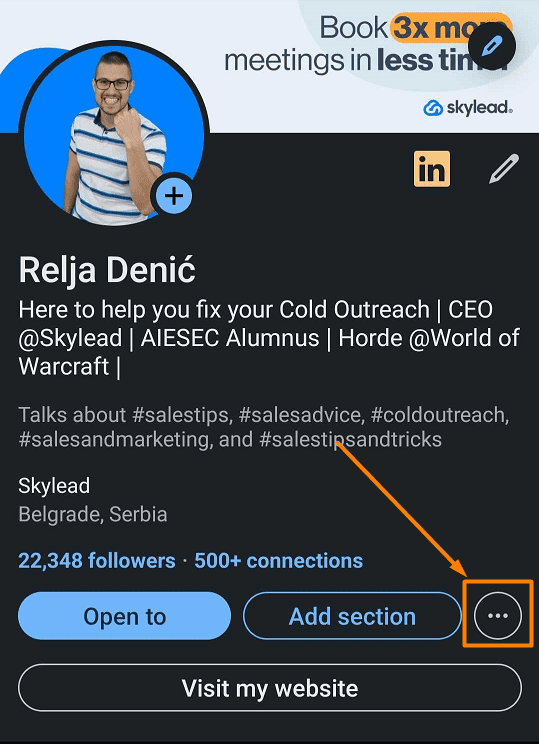
#2 Choose the Contact info option.
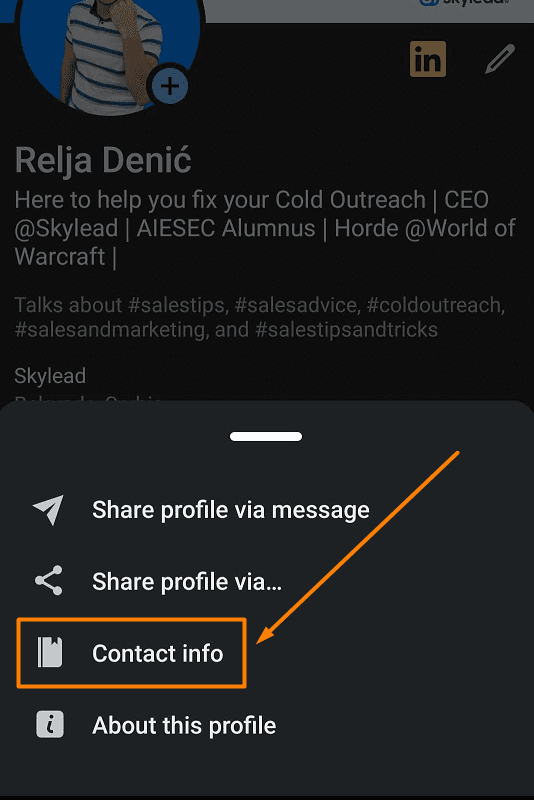
#3 Click the pencil icon to edit your contact info on the LinkedIn app.
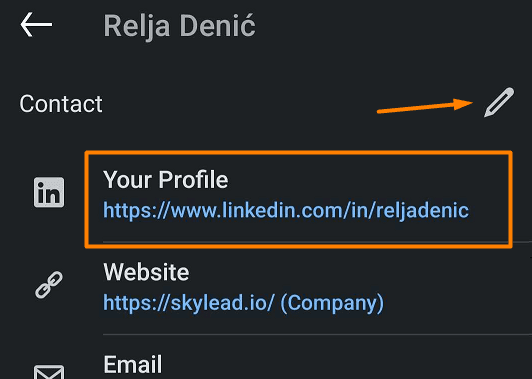
#4 Click here to go to a page where you will be able to change your LinkedIn profile URL.
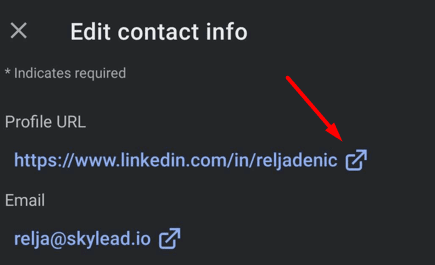
#5 Click here to edit the customizable part of your LinkedIn profile URL.
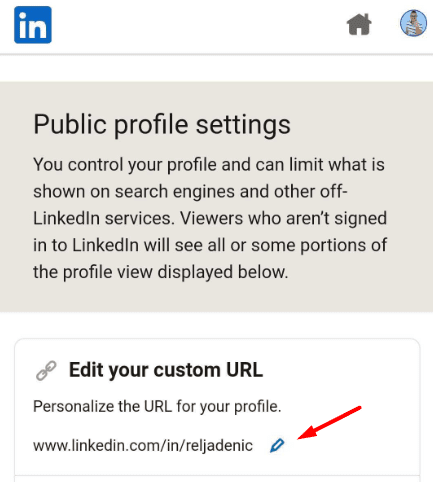
3 ideas on how to customize your LinkedIn profile URL
If your name is not particularly unusual, or you wish to optimize your LinkedIn URL to show up in LinkedIn and Google search results more often, here are 3 ideas we used and tested to do it.
#1 Use the combination of your full name and title
This is the combination we spoke about earlier, as it can work well for both LinkedIn and Google SEO, especially if you are holding a C-suite, upper management, or any decision-making decision that you know people will search for. You can combine it with your company name as well if you think that could help your lead generation.
www.linkedin.com/in/john-smith-head-of-sales
www.linkedin.com /in/john-smith-ceo-skylead
www.linkedin.com/in/john-smith-skylead
#2 Use your brand name, brand nickname, or a combination of your brand name or nickname plus your company name or a specific keyword.
This is particularly useful for people who have common names or whose brand is widely known under their nickname. For example, if your name is Daniel Bonatti, but you branded yourself as a marketing expert under Dan Bonatti or Dan Bon, this can be your LinkedIn profile URL go to.
www.linkedin.com/in/danbon
www.linkedin.com/in/dan-bonatti
www.linkedin.com/in/dan-bon
www.linkedin.com/in/dan-bon-creartive
www.linkedin.com/in/dan-bon-marketing-specialist
#3 It can be same as your website or a blog or a business page
If you are known for a specific brand or a website or a blog on a specific topic, you can use it for your LinkedIn profile URL as well. If that website name includes your personal name that’s even better, if not, that’s fine too. This way, you’ll get your brand out there even more, not just on Google but on LinkedIn too.
www.linkedin.com/in/marketing-with-john
www.linkedin.com/in/marketingwithjohn
www.linkedin.com/in/marketingformarketeers
Why should you change your LinkedIn URL?
#1 It looks more professional.
Customizing your profile URL looks more professional and gives you instantly more credibility. It shows that you know how to use the platform and that you indeed do utilize it for social selling strategy and other business purposes. Other LinkedIn members will feel more comfortable talking business with you online and you will close more deals in a shorter amount of time.
We have a full lesson dedicated to optimizing your LinkedIn URL as a part of our masterclass Set up your LinkedIn profile: Complete guide.
#2 You’ll show up in Google and LinkedIn search engine results more often.
If you optimize your LinkedIn URL and the way you optimize it can affect how often and how high your profile will rank in their search results.
Yes, a well-customized profile URL plays a significant role in LinkedIn SEO and LinkedIn Xray search.
LinkedIn SEO refers to the way you write and use your profile to increase its ranking in a search and therefore its visibility. The higher your profile is ranked when someone searches for a particular term, the more views your profile is likely to get.
LinkedIn X-ray search is a method used to do LinkedIn prospecting on Google. In other words, using the Google browser, you can search for the profiles without using LinkedIn internal filters.
Both search engines take into account the URL of your profile and rank you accordingly. That’s why, sometimes, it can be useful to put specific keywords in your LinkedIn URL as well.
We tested this thoroughly, and here are several examples we found of how to include specific keywords in your profile URL that can rank you better in search engines.
www.linkedin.com/in/john-smith-head-of-sales
www.linkedin.com/in/john-smith-vp
www.linkedin.com/in/john-smith-growth-specialist
www.linkedin.com/in/john-smith-saas
www.linkedin.com/in/john-smith-ceo
www.linkedin.com/in/john-smith-content-team-lead
Options are endless and their success majorly depends on how well you can predict your ideal lead’s search intent.
4 LinkedIn URL restrictions you should know about
Your custom URL can be 3-100 characters long. Also, you cannot use spaces, symbols, or special characters.
The customizable part of the LinkedIn profile URL is NOT case-sensitive. This means that you can’t use capital letters to try and differentiate your choice. LinkedIn recognizes www.linkedin.com/in/johnsmith and www.linkedin.com/in/JohnSmith as the same URL.
You can change your LinkedIn URL up to 5 times in 6 months. Unless you wish to be stuck with a URL you don’t like, we strongly advise you, before clicking that “Save” button, to make sure that your choice is good enough for the next 6 months.
Your original URL will be unavailable to other members for 6 months. LinkedIn thinks that reassigning your original URL to another member in less than 6 months would make plenty of confusion.
Frequently asked question
How does customizing your LinkedIn URL specifically impact your visibility on LinkedIn's own search engine compared to Google's?
Customizing your LinkedIn URL can enhance your profile's visibility on LinkedIn and Google searches by making it more recognizable and memorable. A personalized URL is easier to share and more likely to be clicked on.
What are the best practices for choosing a custom URL if your preferred name is already taken?
If your preferred name for a custom URL is taken, consider adding relevant professional identifiers like your job title, industry, or certifications. This maintains the URL's professional and personal relevance.
Can changing your LinkedIn URL frequently have a negative impact on your profile's online presence or SEO?
Frequently changing your LinkedIn URL could negatively affect your online presence. Links to your profile may become broken, and it could confuse connections. It's best to choose a URL you're satisfied with for long-term use.
Ready to showcase your new LinkedIn URL?
LinkedIn profile URL might seem like a less visible part of your LinkedIn branding, but as you may see, it’s not.
It affects the way people see the professional YOU and how high your LinkedIn profile ranks on the platform and on Google.
Whether you are on LinkedIn to network or for lead generation, a custom-made URL is your friend. And so is Skylead.
If you are in search of practical marketing and sales knowledge, you can check out our Outreach knowledge hub. On the other hand, if you are searching for a tool that can take over time-consuming sales processes and allow you to put more focus on closing the deal itself, sign up for a 7-day free trial and see how Skylead can be your trusted ally.
Disclaimer: Skylead is not affiliated, endorsed by, or connected with LinkedIn in any way.
Posting content on LinkedIn is an integral part of everyone’s professional life, especially for the ones doing B2B business. It has become somewhat of a norm to know how to post on LinkedIn, what to post, and when.
Thus, if you’re just starting out or wish to improve your LinkedIn posting skills, we’ve got you covered. In this article, we will cover:
- Why you should know how to post on LinkedIn;
- What type of posts are at your disposal;
- A step-by-step guide on how to post on LinkedIn;
- What to post on LinkedIn;
- And best-case practices and examples to help you get started.
Let’s go!
Why is it important to know how to post on LinkedIn?
Two words - Thought Leadership.
If you are working in the B2B market, then you must know about the meaningful role LinkedIn plays in it. Especially if you are a business owner, a sales representative or a recruiter.
In other words, whether they wish to sell products/services, or find the ideal candidate, both need to:
- Expand their network on LinkedIn;
- Become known in their industry;
- Build relationships;
- Close deals constantly.
And one way to do it is through thought leadership - the main ingredients of the best LinkedIn lead generation strategies.
In short, a thought leader is someone who offers valuable content to their network and shares trends, insights, and how-tos with actionable steps and results.
Thought leadership has proved to be very effective since you can reach more people organically, connect with your network on a deeper level, influence buying cycles, and gain the trust of your potential clients.
For example, a study shows that 54% of decision-makers bought a new product or service from a thought leader after engaging with their content. The thing is the decision-makers had not previously considered buying it! That is how powerful thought leadership can be.
LinkedIn post types
Before jumping to the process, let’s first see what post types you have at your disposal.
Basically, LinkedIn offers a variety of features you can add to your post. Here are your options:
- Text-only posts;
- Single or multiple image posts;
- Video posts;
- Document posts;
- LinkedIn Polls;
- Share that you’re hiring post;
- Event post;
- Offer help post;
- Find an expert post;
- Article posts (a bit different, but we will get to that later).
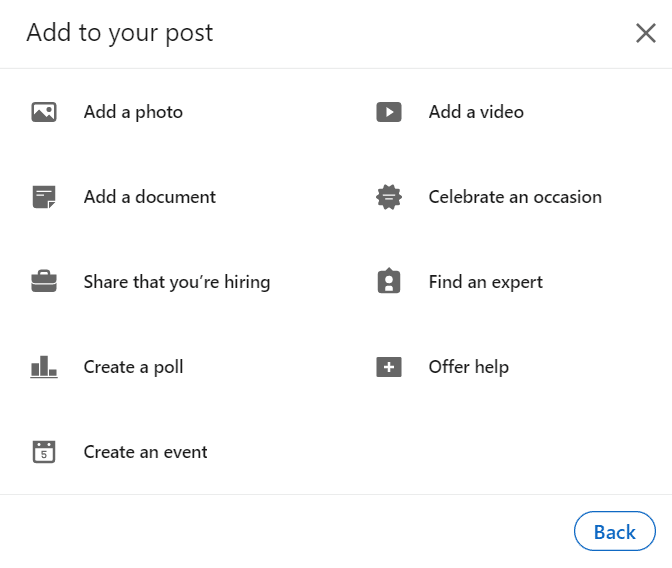
1. Text-only posts
These posts are perfect if you wish to share your story, tips, tricks, career advice, or similar topics that do not necessarily need a visual presentation. Text-only posts still hold value since they have a simple form, so your network can engage with them more naturally.
It is worth noting that LinkedIn won’t show your entire post in the feed, but only the first 3 lines, with the “See more” option. If a person is interested to read the story until the end, they can click the “See more” button and check it out.
This is one way LinkedIn checks for the relevancy of your post. In other words, the more people click the “See more” option, the higher reach your post will get.
In addition, LinkedIn limits text posts to 3000 characters, which is somewhere between 428 to 700 words.
2. Single or multiple image posts
If you wish to showcase your live event, statistics, a quote, or business tips, this would be a go-to format..
Image posts can be powerful simply because they offer the visual perception of some strategy or idea, but only if you provide value. As long as you provide value and offer high-quality images, you will definitely have a high reach and engagement to follow.
3. Video posts
It’s no secret that video formats are favorite on the internet, and LinkedIn is no exception. Videos offer another, more realistic angle of yourself and your company and show a real person behind the scenes.
In other words, you can connect with your network by sharing videos, such as career advice, what your company culture is all about, or your product or service review. Whatever you choose, the advice here is to keep your video under 60 seconds due to the average attention rate.
4. Document posts
Documents upload is a great way to share something that might interest your audience but cannot fit the image or video format.
You can share any document in the form of a PDF, Word file, or PowerPoint presentation. For example, if you are a guest lecturer at an event, you can share your presentation with others on LinkedIn. Or, if you wish to share interesting tips and tricks, a whitepaper, or a case study, you can do so using PDF format.
Whatever you decide to share, again, make sure that the document is high-quality and helpful to people who will see it. In addition, don’t forget to write a proper title of your document and create a short introduction.
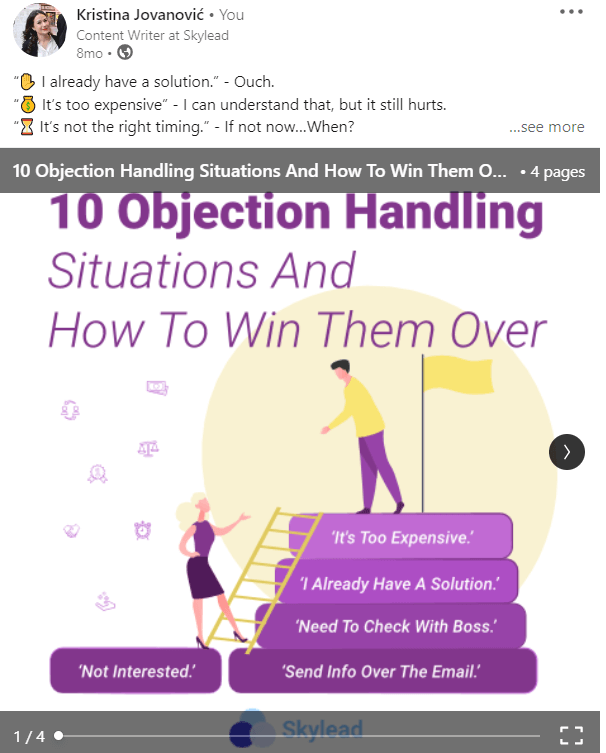
5. LinkedIn polls
This post type allows you to ask questions and get responses from your audience. A LinkedIn poll is the best to get engagement and can do wonders for your research and gain insight about relevant topics, the thoughts and opinions of others.
6. Share that you’re hiring Post
If your company has a job vacancy and you wish to generate candidates, then the “Share that you’re hiring” post is one option for you. In its essence, this post is a create-a-free-job-post that will be shown only to your network. Or you can share it within your other post using a share button.
If you wish your job to reach beyond your network, you will need to pay to promote it and ask your network to share it at least.
To find out more about this type of post, click here.
7. Event posts
In the last couple of years, webinars and online events have been the talk of the town, and posting an event on LinkedIn can be a nice shift in your content calendar. This is not a classic post, as you would need to share it within your regular post so your network can see it. Not to mention that it requires much more preparation since you need to organize an actual event.
Nonetheless, it is a perfect way to organize a meeting, offer valuable content, and connect with the people who attend it.
Don't miss our guide on How To Use LinkedIn Events For Lead Generation.
8. Offer help post
It can sound like the beginning of some legend, but little is known about the effectiveness of Offer Help posts. Not that it is some mysterious post, but that is still not common for people to use it, and therefore there are still not enough records.
Nonetheless, by using this feature, you are telling your network that you are offering career-related help. In other words, it is a perfect way of giving back to the community simply by providing the career guidance you once had.
Once you publish a post, a hashtag #OfferingHelp will appear at the bottom of your text, so it can let other people know you’re open to helping those who need it.
9. Find an expert post
Another not-so-much-familiar post is Find An Expert. This post allows you to find an expert for your projects or tasks. Once you insert details of what you need help with, your audience can tag their recommendation to your post or write to you directly.

Find An Expert is a specialized feature, like Post A Job or Offer A Help. In other words, you won’t use it unless you absolutely need to.
10. Celebrate occasion post
This type of post is perfect if you wish to share with your network:
- Milestones;
- Work anniversary;
- Starting new position;
- Welcoming a team member;
- Or Giving kudos to someone.
This is a nifty refreshment among LinkedIn post types and a nice way to celebrate anything.
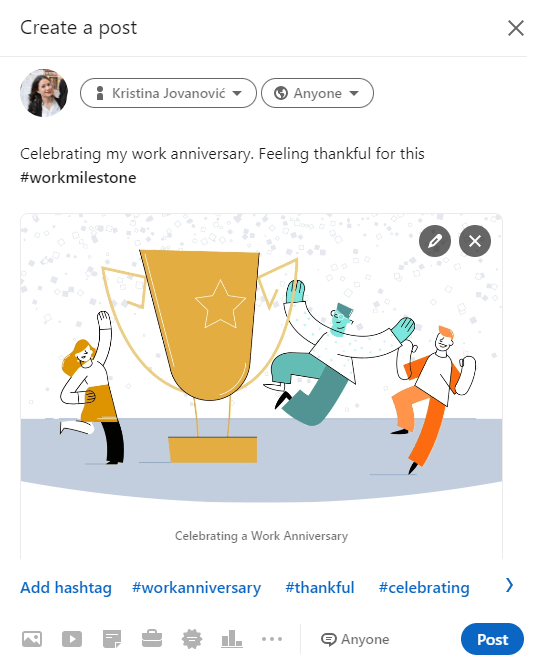
11. Share articles
This is not your typical LinkedIn post we mentioned in the beginning. LinkedIn articles are a blog form for your thoughts or knowledge and allow you to express them using up to 12,500 characters (1785 to 3125 words). Like Medium, for example.
You should know that once you publish an article, LinkedIn won’t show them to your network unless you share it with a link in your regular post. However, if you are careful with your keywords, it will show in Google search results.
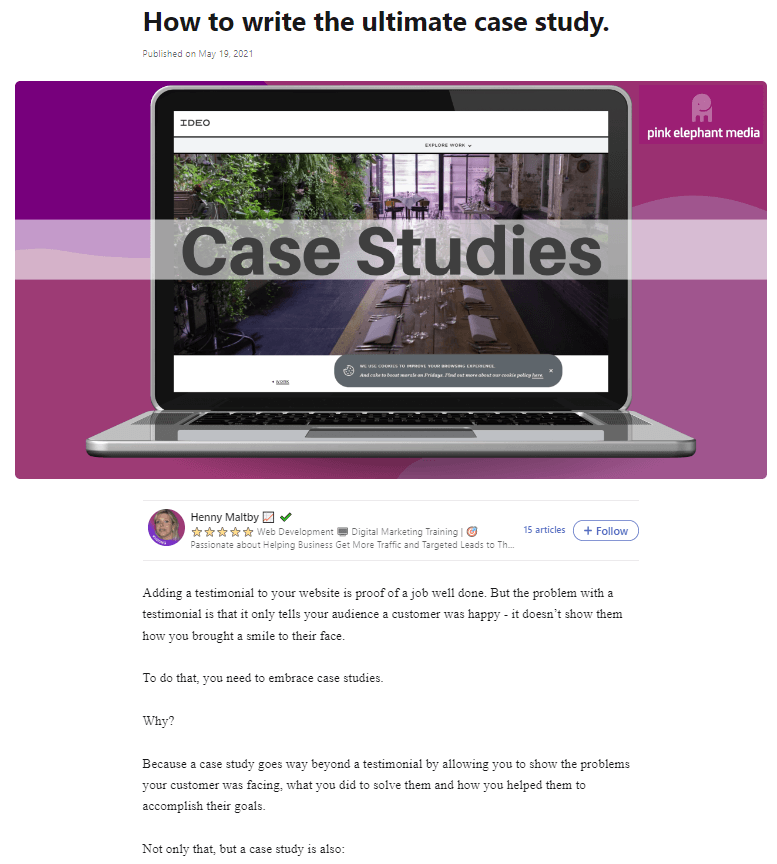
How to post on LinkedIn?
To start posting on LinkedIn, all you need to do is to go to your LinkedIn feed. From there, you can choose to either post a photo, video, event, article or click the Start a post field to access other post types.

If you previously clicked the Start a post field, a new popup will open up. On the bottom, you can see icons that represent post types. However, not every one of them is listed. If you wish to access them all, click the three dots button.
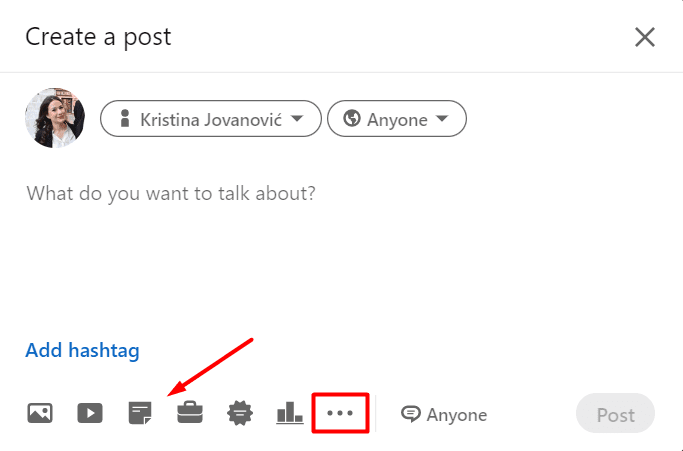
Next, go ahead and choose your post type. For example, we will pick to add a document and select one to upload.
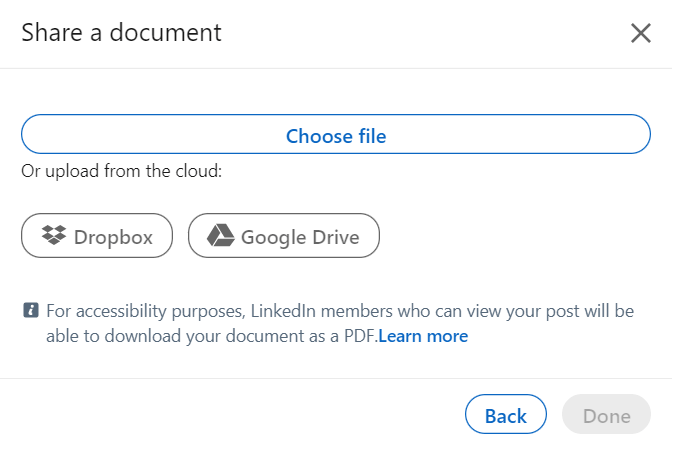
Then we will add a title as it helps your document get discovered more easily. As soon as you are satisfied with your title, click the Done button.
Lastly, add text to your post, add hashtags. Once done, click the Post button.

You’re done. Now you know how to post on LinkedIn. Easy enough.
What to post on LinkedIn?
Now that we’ve established how to post on LinkedIn, let's talk about what to post on LinkedIn. In other words, we will help you define what content you should post. Yes, the more difficult part.
Before we jump to it, you need to know two things.
As a thought leader, one of the first things you should do is discover your target audience and tailor your content around them. After all, thought leadership is a form of LinkedIn lead generation, and you will eventually outreach some of the people in your network.
You can check out our blogs on how to define your ICP and Buyer Persona to help you determine your LinkedIn target audience.
Secondly, as LinkedIn posting is quite a task, we suggest keeping a monthly or weekly content calendar. Keeping such a calendar can help you organize what to post, as consistency is key here. You just need to dedicate 1 or 2 days. To give you an idea of how it should look, we’ve prepared a document for you so you can get inspired. In addition, you can create it by yourself or use different tools such as Trello or Jira.
LinkedIn post ideas
To know how to post on LinkedIn and what to post, we need to establish the content type. In other words, what content type to post on LinkedIn, for example:
- Tips & tricks;
- Product update;
- Goals you completed with the strategy explanation, etc.
That being said, let’s go over 8 content types and examples to kick-start your thought leadership and teach you how to post on LinkedIn a proper way.
1. Tips & tricks
If you find that something improved your workflow or achieved a specific result, you can share it with your network. Simply describe what it is and why it helped you. In addition, you can always spark engagement by asking what their thoughts are about it or what other tips help them with the topic in question.
Post example
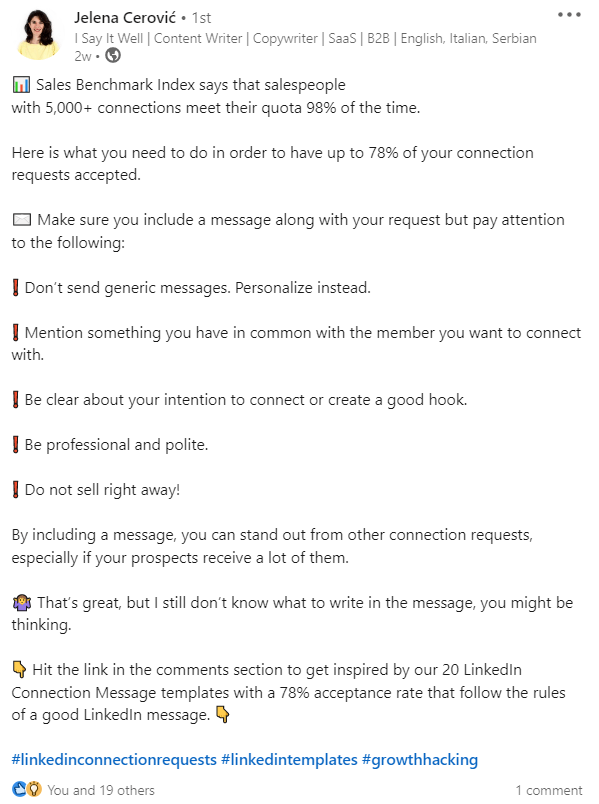
2. Share a moral of the story
If you read a story or business venture, feel free to share it with your network, adding your take on the matter. What’s more, you can write your own story or revelations.
Here is an additional idea - you can share a quote image and write about it, as well.
Post example
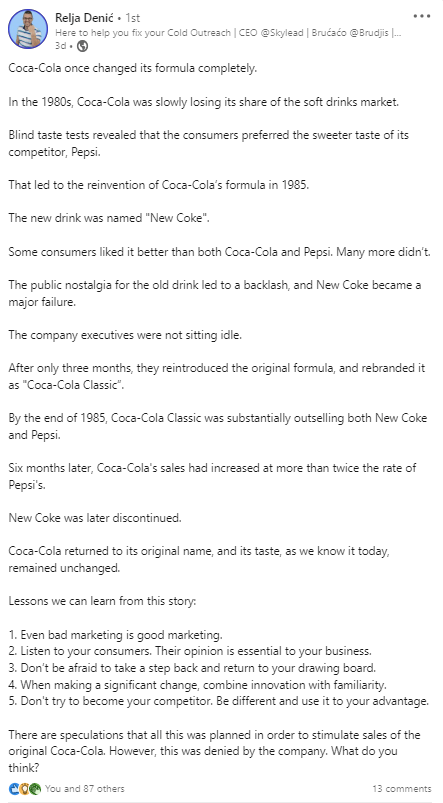
3. Share a strategy that works
If you implemented a strategy that turned out to be fruitful, share it with your target audience. In addition, bonus points to you if you show the exact result this strategy helped you achieve.
Post example
4. Share a case study
To show how effective your service is, share your case studies. You can include a link to your post or write it in text-only format - the choice is yours. However, please keep in mind that you need to be precise with the results, and break down the information so your target audience can read it effortlessly.
Post example
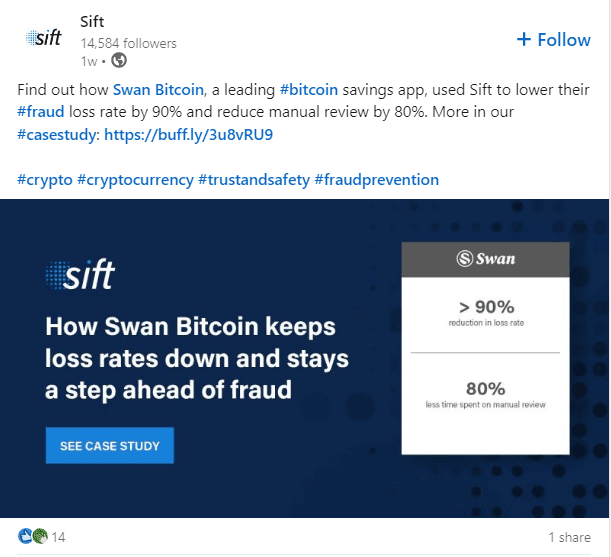
5. Share about your challenges
We are all humans, and sometimes we reach obstacles we do not know how to overcome. That is why you should post about your challenges and ask for help. Or, if you overcome the challenges by yourself, share your experience in a post. It might come in handy for someone who struggles with the topic you mention.
Post example
6. Create engaging polls
LinkedIn polls are a nifty way to discover what your connections think about the topics in question. So, don’t be afraid to ask them. You can ask anything from interesting questions and research you are doing to what your network would want to see you post next.
Post example
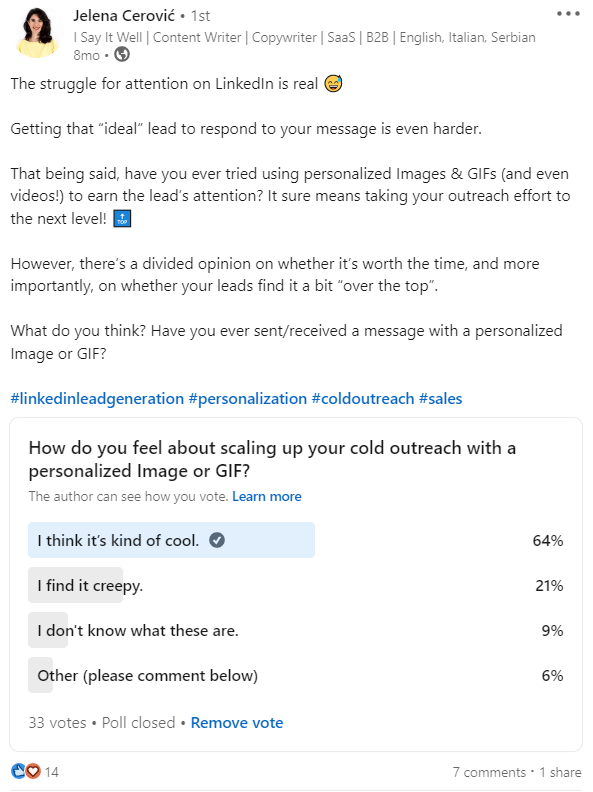
7. Address the pain point
One of the most powerful pieces of content you need to know how to post on LinkedIn is where you address your target audience’s pain points and offer a solution. After all, business is about companies helping each other reach goals. So, you can do the same with the posts. You don’t have to write about your product or service constantly, but you could mention it from time to time.
Post example
8. Last, but not least, celebrate or show gratitude
If you work in a team, and a team member did a great job, post about it. Your company reached a milestone? Share it. If you reach your goal, celebrate it. In other words, there are a great many things to celebrate in this world, so why not share them on LinkedIn?
How to post on LinkedIn: 10 best practices
Even though it takes some time to get the hang of posting valuable content on LinkedIn and being consistent at that, it will get you the results. However, consistency and value proposition are not the only best practices you can use. Here are other tips to boost your reach and engagement
Set up your LinkedIn profile
Posting on LinkedIn won’t do you any good if you haven’t set up your LinkedIn profile previously. If you plan to connect and share content with people that you don’t know in person, then you need to prepare your profile as an introduction to what you publish. This way, they can see your face and qualifications and decide whether they wish to interact with you and your content.
Grow your network
If you wish to reach more people with your content, you need to grow your network as well. One way you can do it is to visit every profile manually, think about the message, and send them an invite to connect.
However, you don’t need to do it by yourself. You can streamline this process using a sales engagement tool, such as Skylead.
With Skylead, you can use many ways to connect with people. Firstly, one of those ways is to target people from your search results.
Secondly, what is fantastic is that you can use Skylead to grow your network via post engagement. In other words, if you see a viral post relevant to your content strategy, you can send an invite to connect to people who react to it automatically.
This is a great way to connect with people who are active on LinkedIn so they can be active on your post as well.
Here is how you can do it.
Go to LinkedIn and find the post you want to target. Then click the three-dots button and click the Copy link to post.
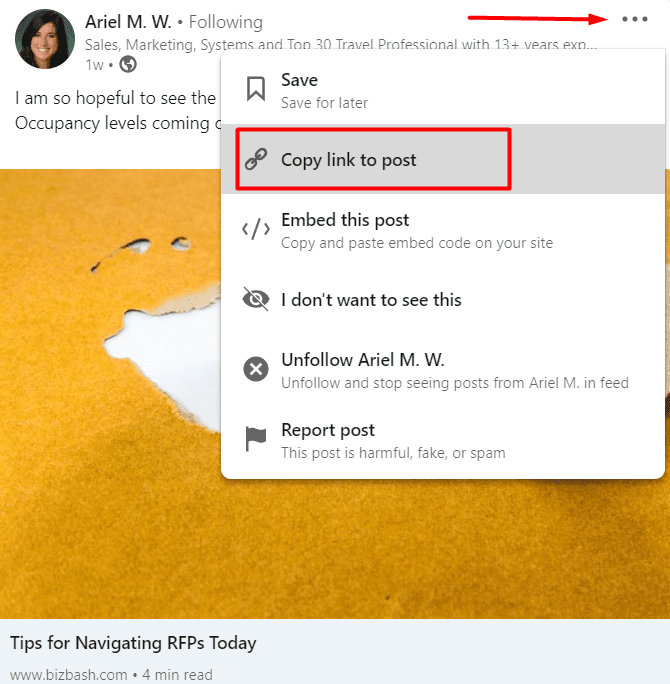
To create this campaign, simply go to your Skylead dashboard and click the Create new campaign button.
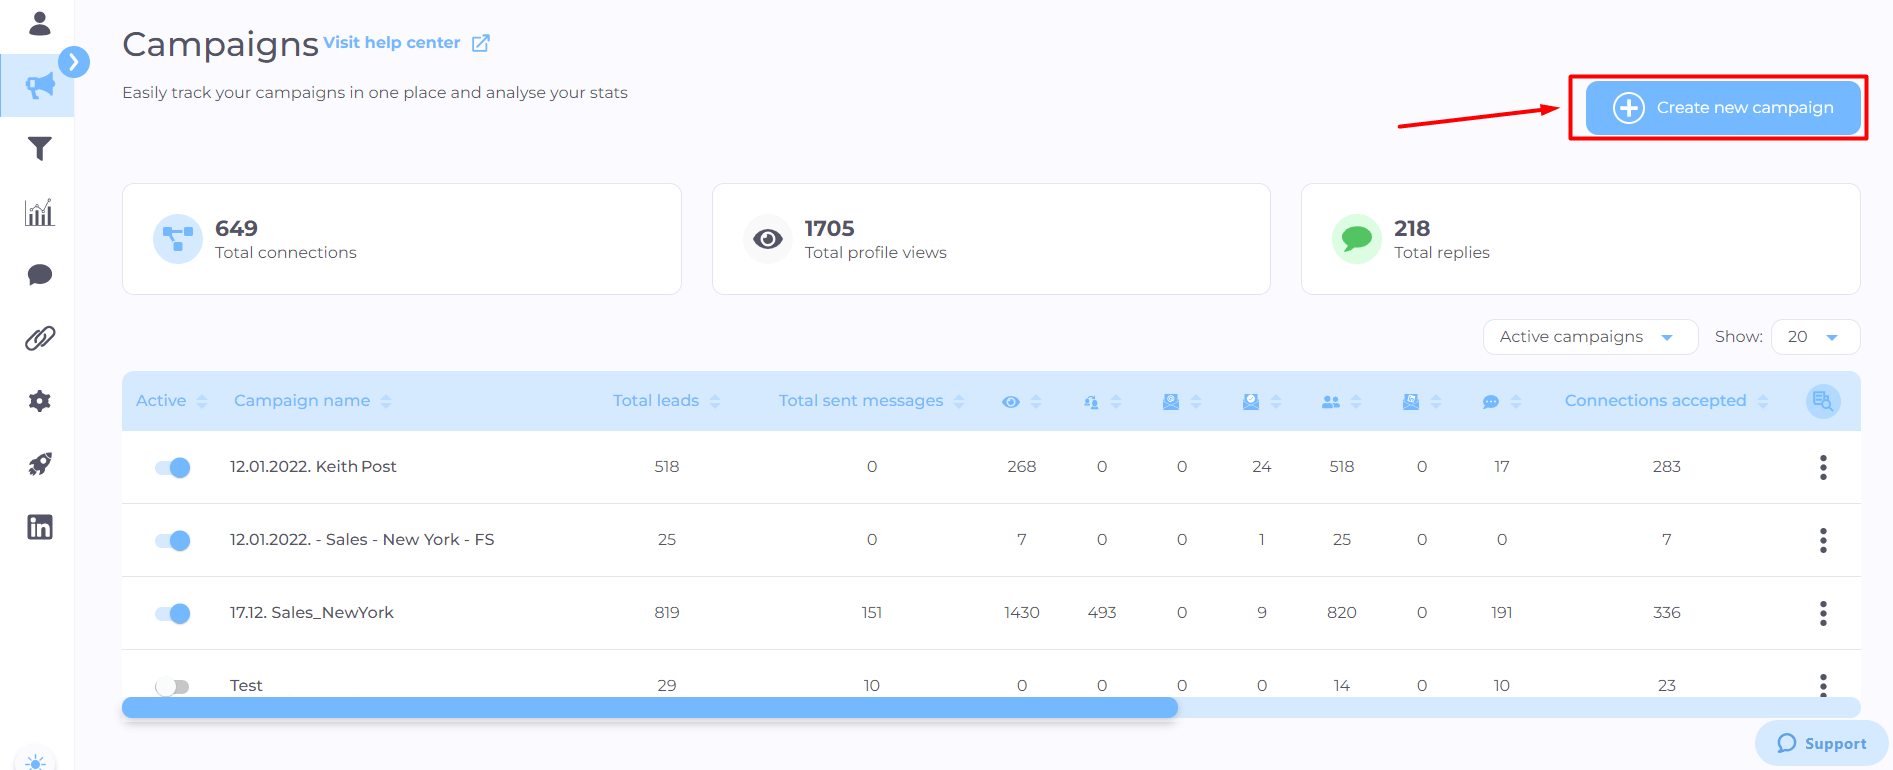
Next, choose the campaign type, and paste the post URL into the respective field. Hit the Next button.
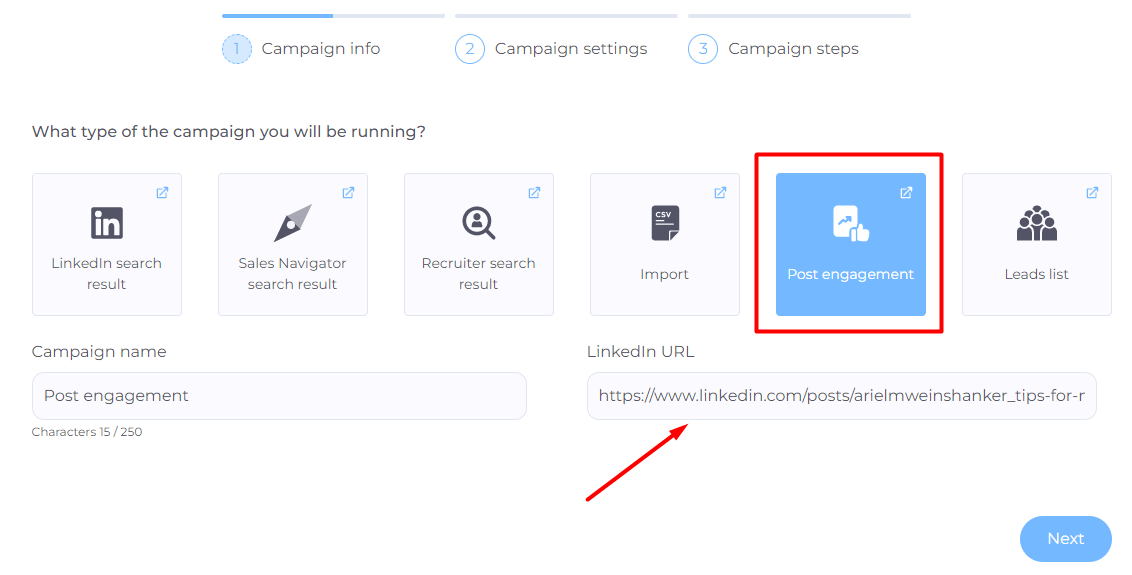
Then, set additional settings, should you wish to, and hit Next.
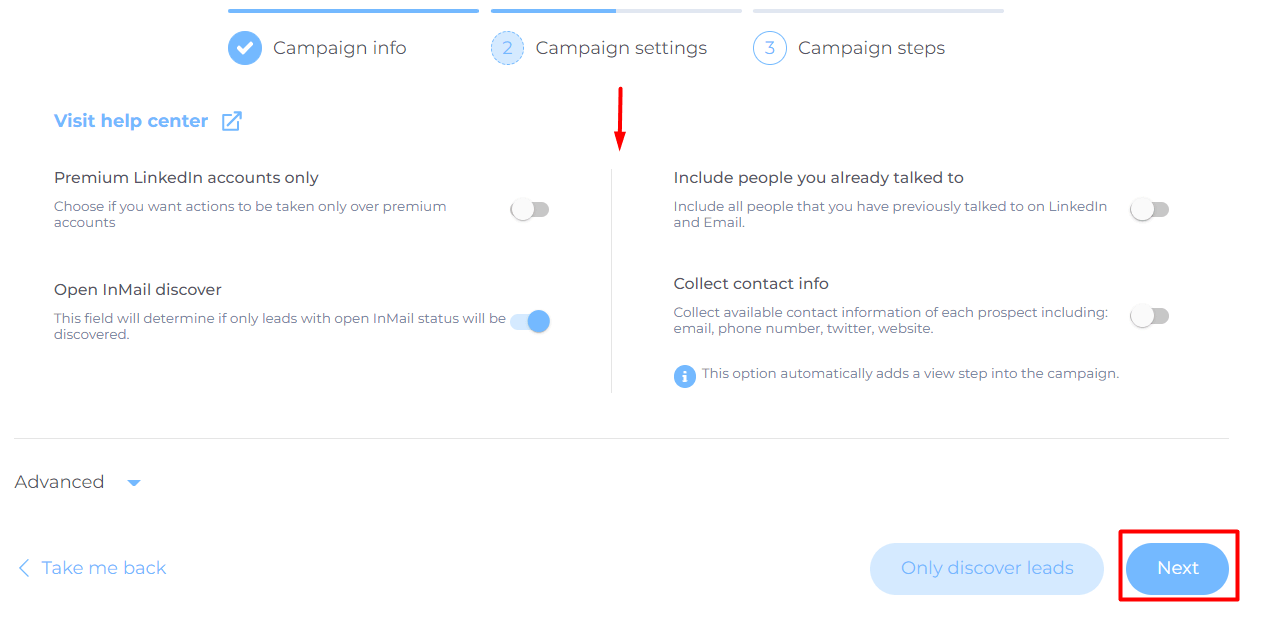
Lastly, create your Smart Sequence so Skylead can do the outreach for you according to your target audience’s behavior.
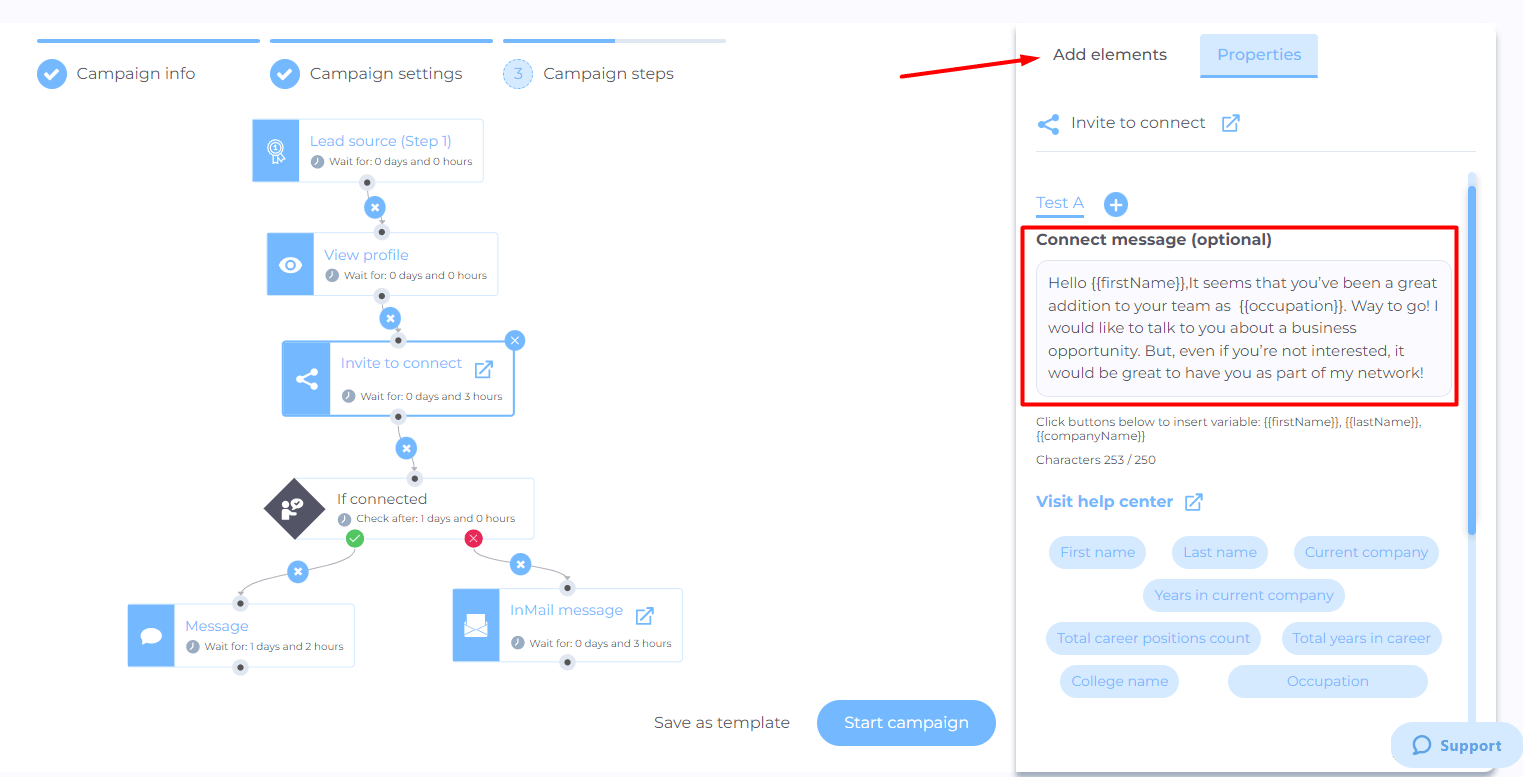
Don’t forget to define your invite message. This type of campaign is perfect as it provides an additional dimension of personalization. In other words, your invite to connect can look something like this:
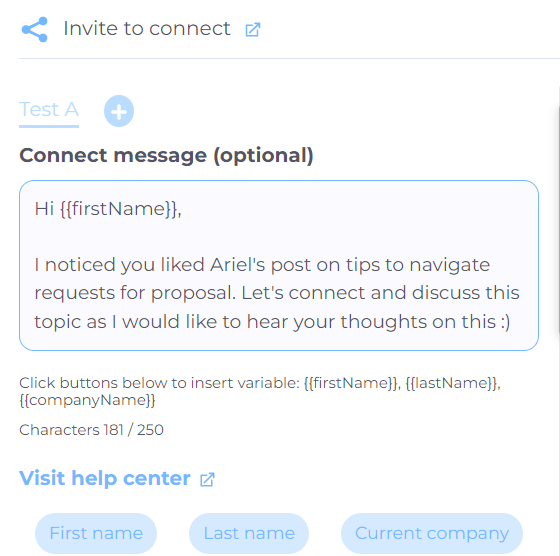
Now, sit back and just watch as your network expands rapidly.
Short posts go long way
If you feel your LinkedIn post will go way over 2500 characters, you better opt in for a LinkedIn article. Or you can break this post into a few smaller ones. The reason for this is that longer posts are heavier to read. In addition, it will often result in a smaller reach since people won’t interact with it that much.
Use hashtags
By introducing hashtags to your posts, you increase the chances for a higher reach, as LinkedIn will show this post under the specified hashtags. Consequently, when someone searches for the tag or already follows it, they will see your post and potentially interact with it.
The optimum number of hashtags is 3 to 5 per post.
Show people who you are through quality
The best way to write LinkedIn posts is to type as if you speak directly to your target audience. What’s more, include personal stories, and show your emotions - be real.
Do not post sentences and expressions that are hard to understand. Moreover, jargon is a big no-no, and you should avoid it. In addition, make sure your content is high quality - no grammar mistakes, poor-quality pictures, or bad advice. Share something others will appreciate.
Pimp up your posts
Apart from being careful about typos, and low-quality content, you need to format your post correctly to make it easier for your audience to read. Here is what you can do:
- Break down your text into smaller paragraphs, even single sentences where possible;
- Add emojis and bullet points.
Use see more option to your advantage
There is a little trick that LinkedIn’s algorithm does to decide if it should increase the visibility of your post, and its name is the See more option.
According to some experts, and from our experience, if people click the See more button and read through your entire post, this sends LinkedIn a signal that the post is relevant, and it will show other people, increasing its reach.
The LinkedIn algorithm first shows your post to your first connections. Then if it goes well, it will show the post to your 2nd-degree connections. After your post gains enough engagement, it will become viral, and LinkedIn will show it to your 3rd-degree connections.
So if you wish to make the most out of this feature, create the first 3 lines of the post that are alluring enough for your target audience to continue reading it.
LinkedIn post image and video size
If you wish to add a video or an image to your post, then be sure to follow current size trends.
For example, the recommended size for your image is 1200 x 628 pixels and must be high-quality.
On the other hand, the LinkedIn video size must be under 5 GB, and its resolution should be somewhere between 256 x 144 pixels and 4096 x 2304 pixels. It’s worth noting that you can post a video on LinkedIn that is up to 10 minutes long. However, for ultimate success, keep it between 15-30 seconds long.
Best time to post on LinkedIn
If you wish to increase your reach and engagement, apart from discovering how to post on LinkedIn, you should know when to post it.
For example, according to SproutSocial, the best way to post on LinkedIn is on Tuesday, Wednesday, and Thursday from 10 AM to 12 PM. However, Influencer Marketing Hub even states that you can post on these days between 8 AM and 5 PM.
We propose to test these times and see when your target audience is most active.
Using links in LinkedIn posts
One of the first things you will see when learning how to post on LinkedIn is the ability to use links. However, be careful about this one, as the word on the street is that LinkedIn doesn’t like you to get off the website. In other words, the LinkedIn algorithm wishes to keep users on LinkedIn as long as possible and doesn’t favor posts with direct links that lead elsewhere.
However, if you wish to share a link, it’s best to put it in a comment after you publish your post.
Frequently asked questions
How often should one post on LinkedIn to maintain engagement without overwhelming followers?
To maintain engagement without overwhelming followers, it's advised to post on LinkedIn 2-3 times per week. This frequency allows for consistent presence while respecting your audience's attention span and feed balance.
Can specific content types, such as videos or articles, significantly impact engagement rates compared to standard text posts?
Yes, different content types, such as videos or articles, can notably boost engagement rates on LinkedIn. Videos often achieve higher visibility and interaction, and articles can establish thought leadership, both contributing to a diversified and engaging profile.
Are there any detailed case studies showing the long-term impact of following these best practices on a user's LinkedIn visibility and professional network growth?
Yes. For example, according to Social Insider’s 2024 LinkedIn benchmark you can see the validity of the advice given above. By following LinkedIn posting best practices is generally understood to significantly improve a user's visibility and professional network growth over time. Regular, quality content aligned with these guidelines can attract more followers and enhance engagement.
Summary about how to post on LinkedIn
To conclude, the answer to the question of how to post on LinkedIn is simple enough. All you need to do is to:
- Go to your LinkedIn feed;
- Select Start a post;
- Choose post type;
- Insert your text;
- Hit the Post button once you finish;
However, what type of posts and content you post is what drives reach, engagement, and overall success.
Here are best practices of how to post on LinkedIn:
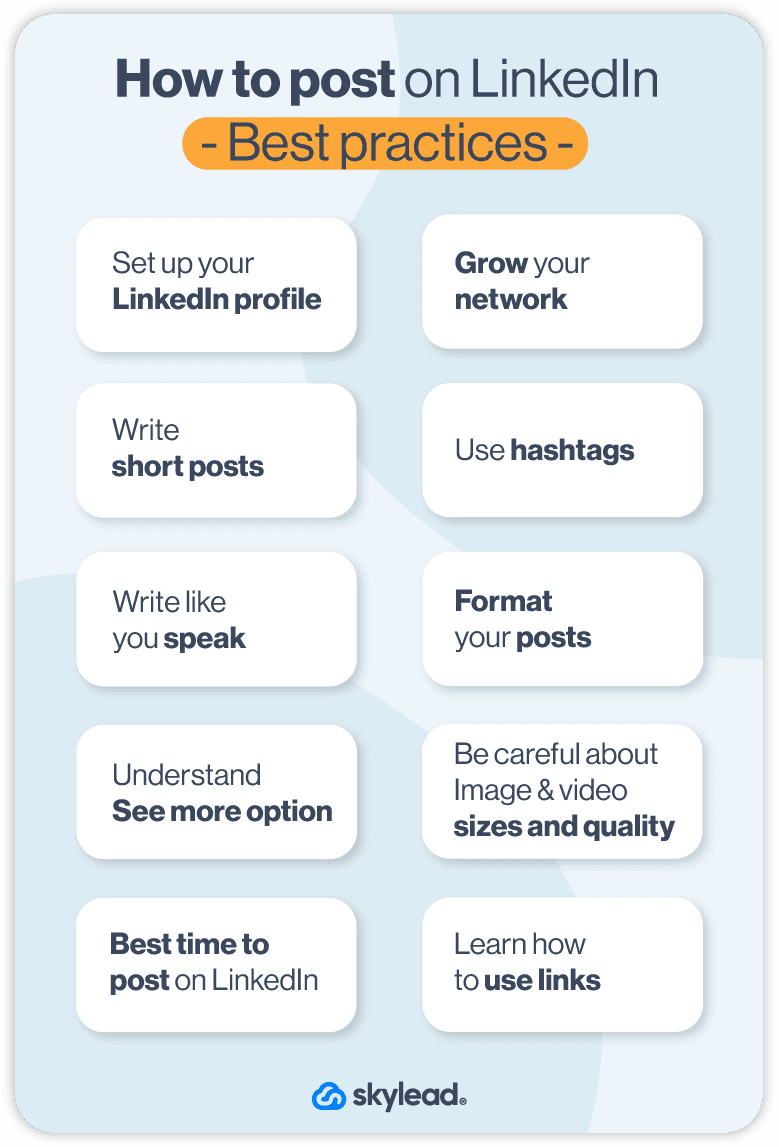
We know this is a lot, but don’t worry. You will get a hold of it, and every future post will be easier to write than the previous one.

And if you wish to grow your network on autopilot, you can always try out Skylead for FREE and see how you can benefit from it.
Disclaimer: Skylead is not affiliated, endorsed by, or connected with LinkedIn in any way.
The topic of how to cancel a LinkedIn invitation is rarely discussed, simply because people tend to leave invites pending for… Well, forever.
However, everyone should monitor their pending invites, especially if you are in sales or a recruiting business, as the integrity of your LinkedIn profile can get damaged. Yes, it’s that serious.
So to keep your integrity intact and help you reduce the number of pending invites in the first place, in this article, we’ll cover:
- Why do you need to cancel your LinkedIn invite;
- What you need to know about the cancellation process;
- How to cancel LinkedIn invitations that are pending for a long time;
- Why your LinkedIn invites aren’t getting accepted;
- How to create engaging invitations that will increase your acceptance rate.
Why should you cancel your pending invitations?
You should cancel LinkedIn invite because of 3 reasons:
- There’s a risk of getting your account restricted;
- Your LinkedIn experience can get damaged;
- LinkedIn won’t allow you to send new ones unless you clear the list.
Let’s clarify these statements.
Firstly, and most importantly, if you do not cancel your LinkedIn invite for a long time, you risk piling them up. It would be fine if LinkedIn didn’t have an eye out for suspicious activities. And, yes, LinkedIn does consider this suspicious.
In other words, if you do not withdraw your pending invites after a month or two and leave them piling up, LinkedIn can restrict your account. Moreover, you won’t be able to send any other connections until you clean out your pending invite list.
Secondly, if the connection doesn’t accept the invite for a while, the chances are they either are not interested, or they aren’t within your business industry.
To clarify. The quality of your network on LinkedIn plays a significant role in experiencing benefits while using this platform. So, one of the things that will boost your career is taking the effort and making a strategy to connect only with people related to you and your business, and cancel LinkedIn invites sent to those who are not.
Lastly, a word on the street is that if you have too many pending requests, LinkedIn won’t allow you to send new ones. Some people say they reached a whopping 3000 pending invites before LinkedIn restricted them from sending more invites. LinkedIn didn’t publish the precise number of how many pending requests you can have officially. However, to avoid this scenario some people experienced in the past, be sure to clean your list regularly.
What you need to know before proceeding to cancel LinkedIn invite?
Before you withdraw any of your LinkedIn invites, you should know a couple of things first.
You can’t cancel LinkedIn invites in bulk.
If you wish to cancel LinkedIn invites in bulk, you cannot do so within LinkedIn itself. However, keep on reading as we will explain how you can do it in bulk using a certain tool 😉 .
About the notification your pending connections receive.
If you send a LinkedIn connection request to a person, they will see the notification as soon as they log into their account. However, in case you cancel LinkedIn invite before the user sees it, they wouldn’t even know that you’ve sent it.
In addition, canceling an invite will stop the recipient from receiving further LinkedIn notifications or emails to remind them of the request.
When can you cancel your LinkedIn invite?
You can cancel LinkedIn invite you’ve sent accidentally or that you regret sending, as long as the LinkedIn member hasn’t accepted your invitation.
In case the LinkedIn user accepts your connection request, there is always an option to remove them from your connections.
If you withdraw your request, you will have a tiny restriction.
After you cancel your invite, you won’t be able to resend it to the same recipient for up to 3 weeks.
How to cancel LinkedIn invite in 5 simple steps?
In case you’ve sent the requests you wish to withdraw or are pending too long, here’s how you can do it.
Cancel LinkedIn invite via desktop
First, go to Linkedin, and click on My Network in the header bar.
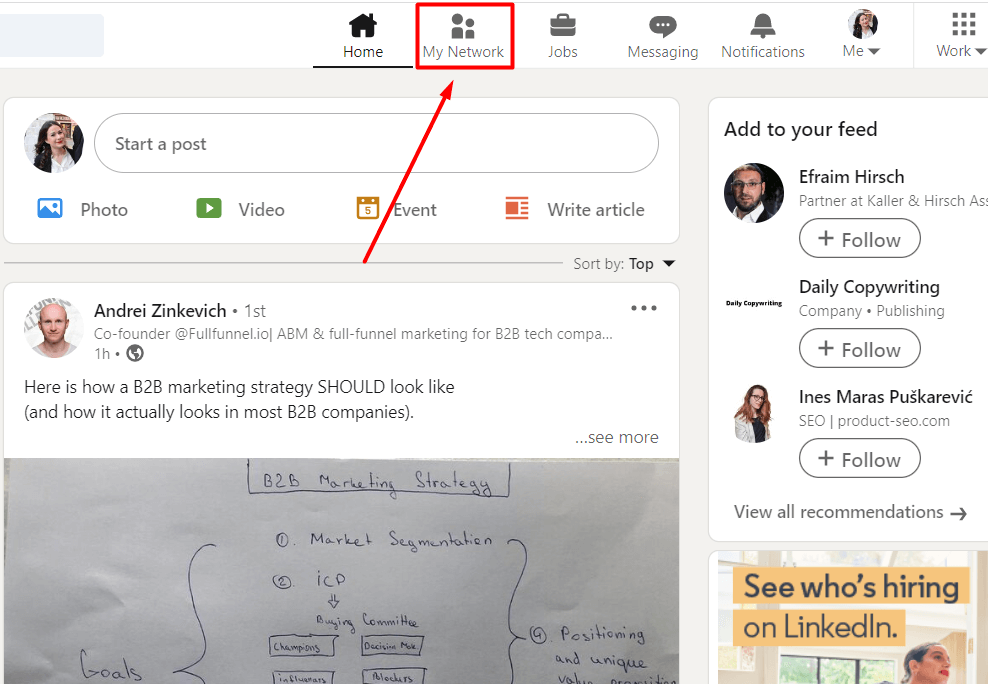
Once you do, you will see the list of invites other people sent you. Hit See all # in the top right corner.
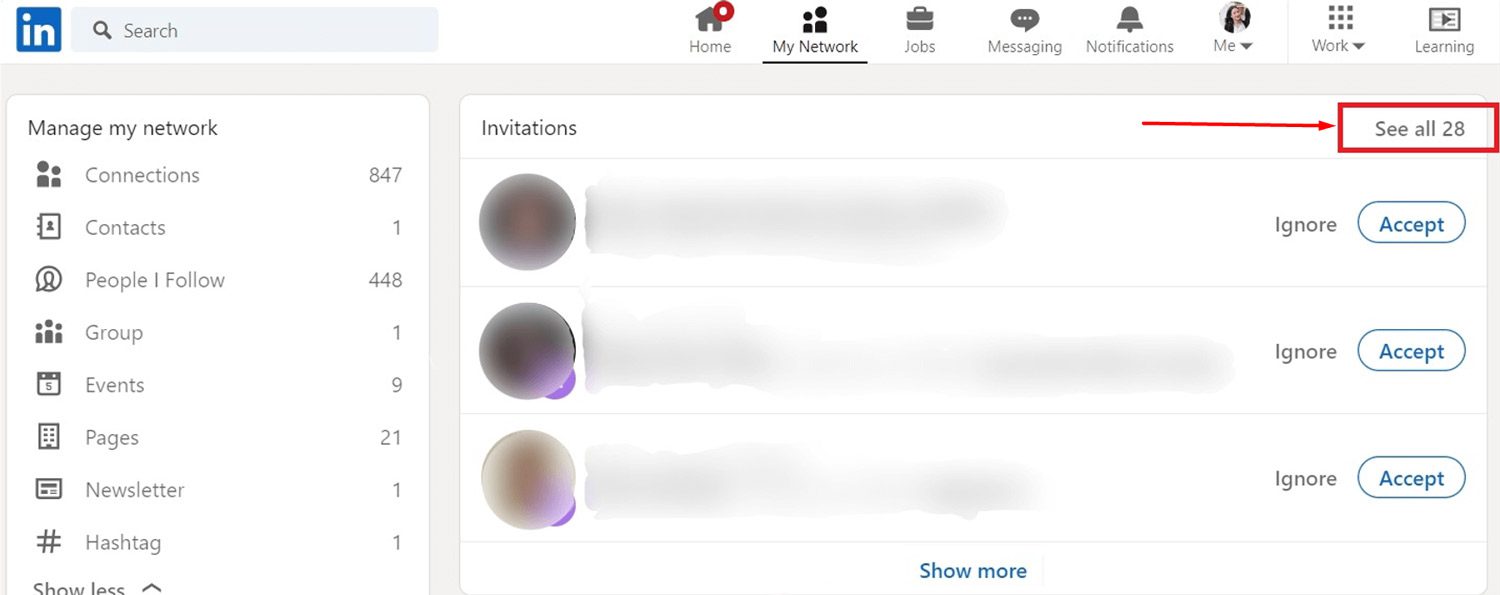
If you don't have any invites you need to approve on this page, the section will look slightly different. In this case, just click the Manage button.
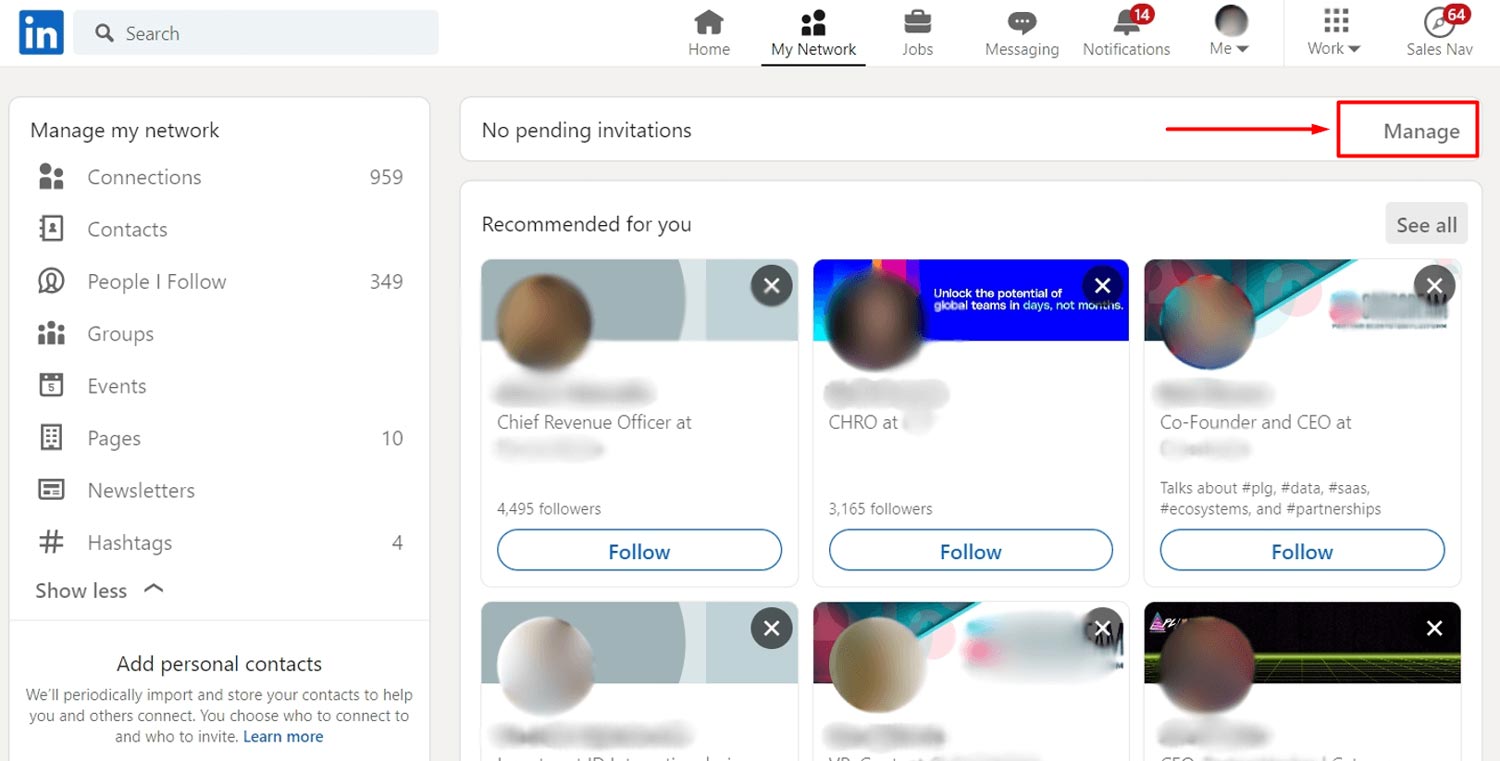
Here, you can see all the invites people sent you. To find the ones you sent out, go to the Sent tab and click the Withdraw button to cancel the LinkedIn invite.
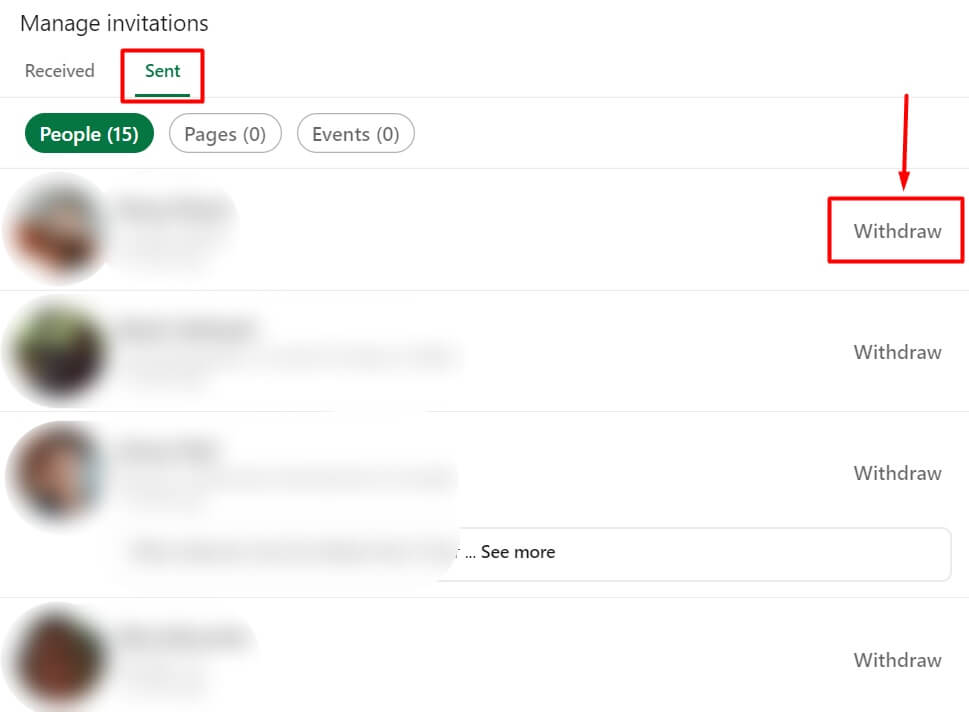
Lastly, LinkedIn will double-check if you wish to withdraw your invite with the notification. Continue the cancellation process, and you will be done.
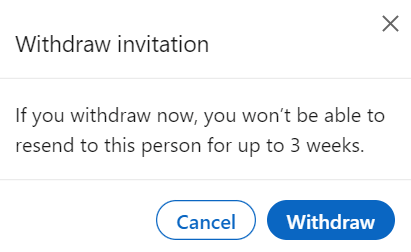
Canceling invites via Android
You can withdraw invitations using your android phone too, and the process is not that different than the one using your PC.
First, go to your Network page, and click the Invitations button.
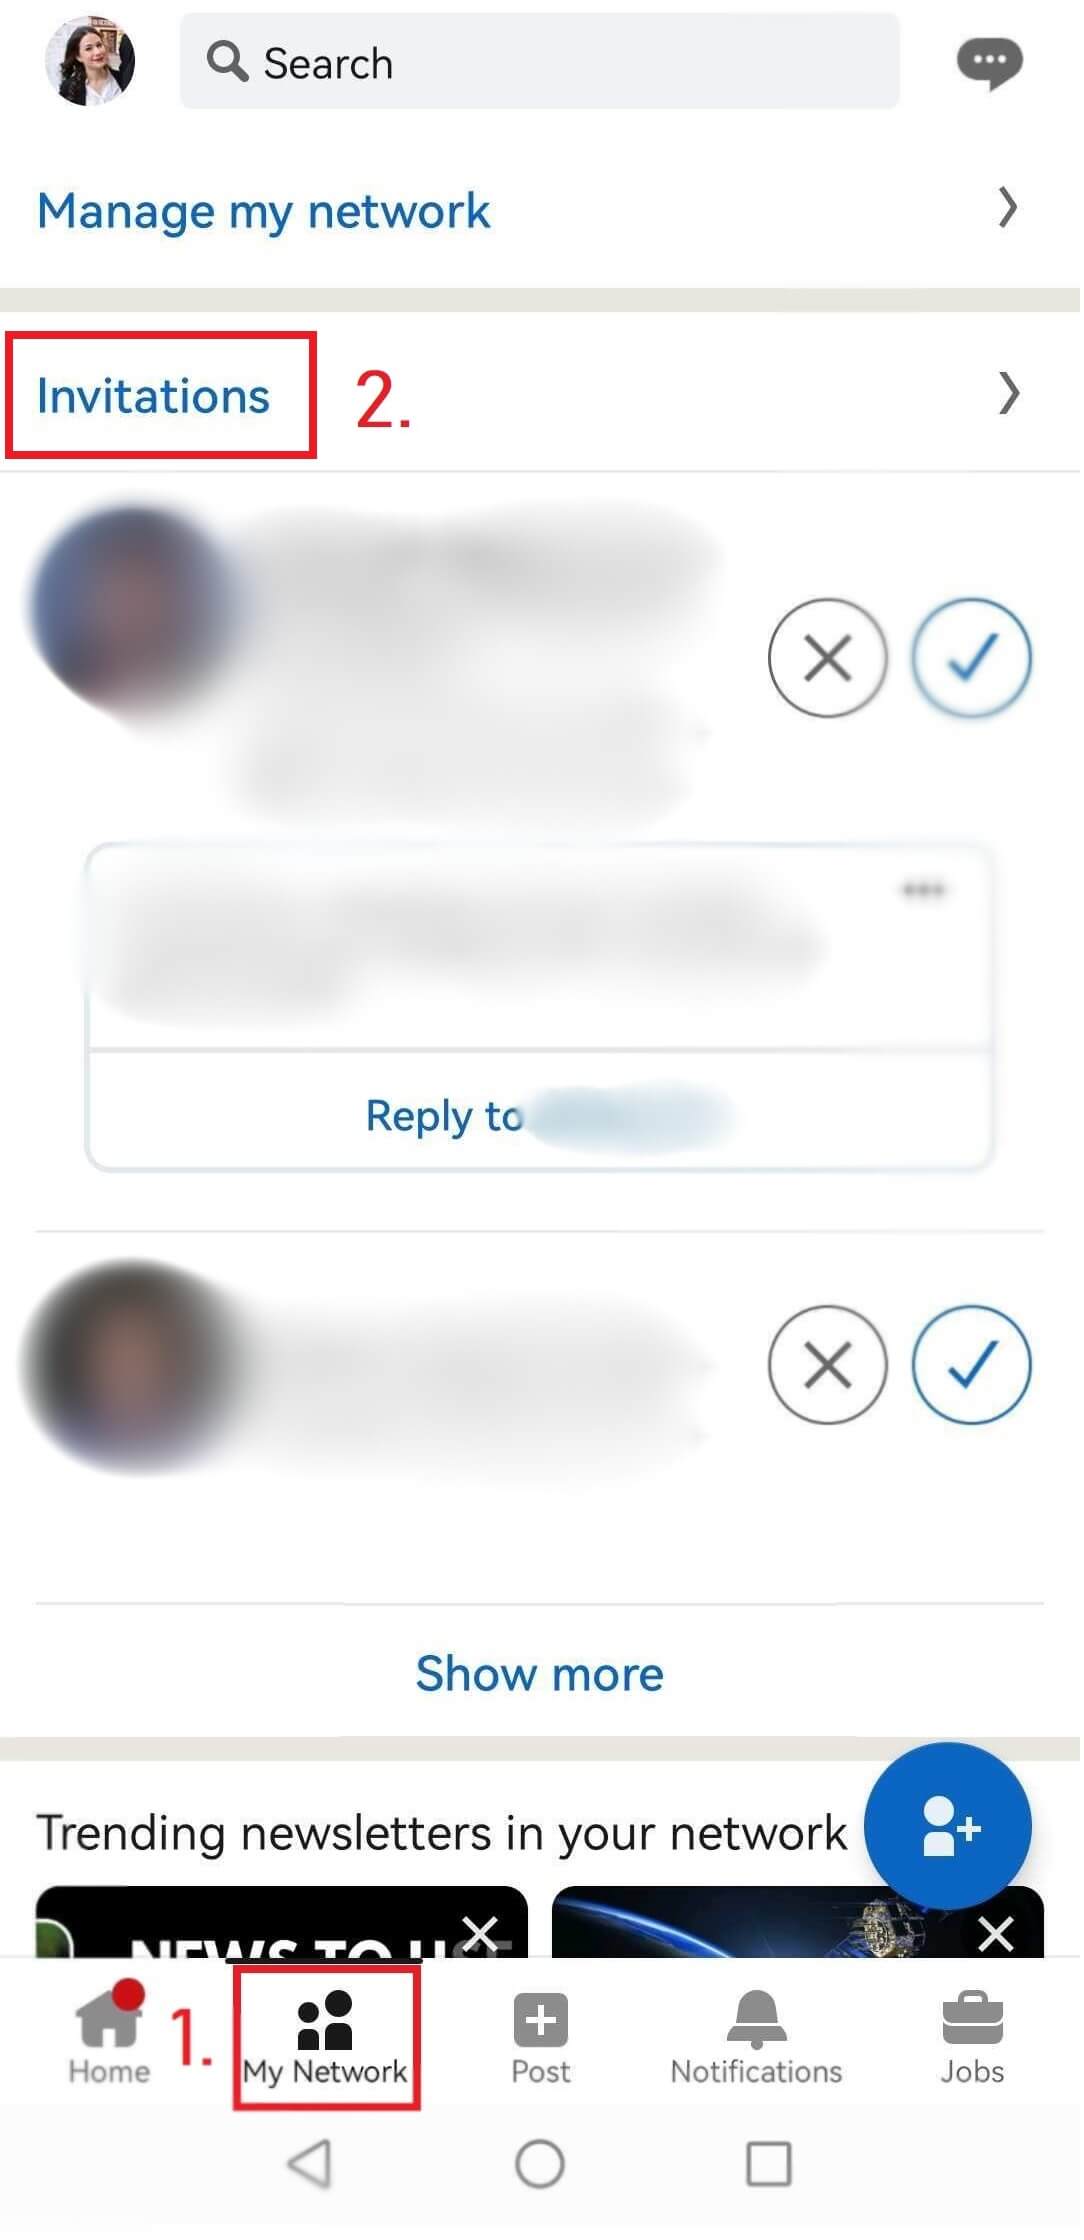
Next, click the Sent tab, and withdraw the invites you wish.
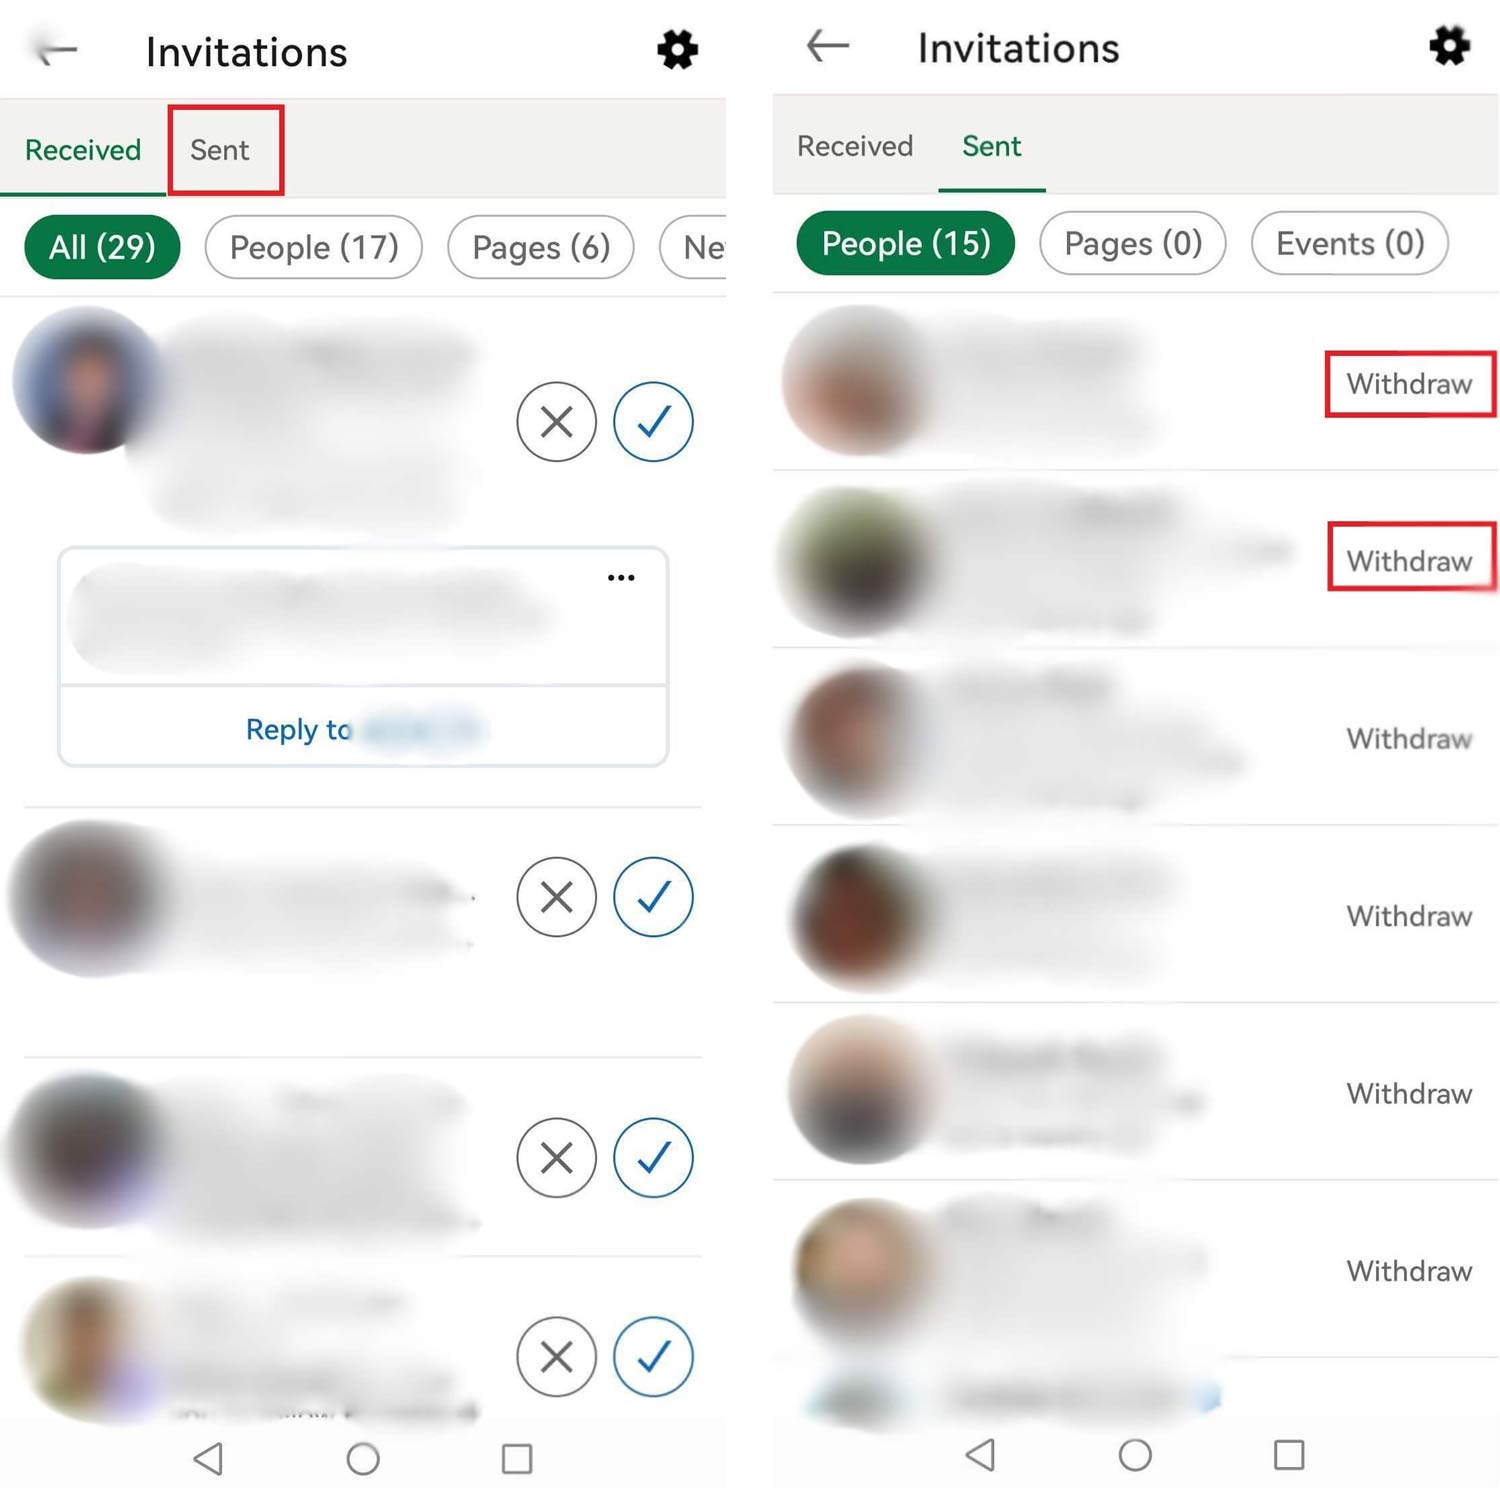
How to cancel LinkedIn invite on iOS
The process is somewhat different on iOS devices. So if, for example, you have an Apple phone, here is how you can cancel LinkedIn invite.
First, go to Notifications at the bottom of the screen. Then, click the Invitations button at the top. After the pop-up opens up, click View invitations you sent.
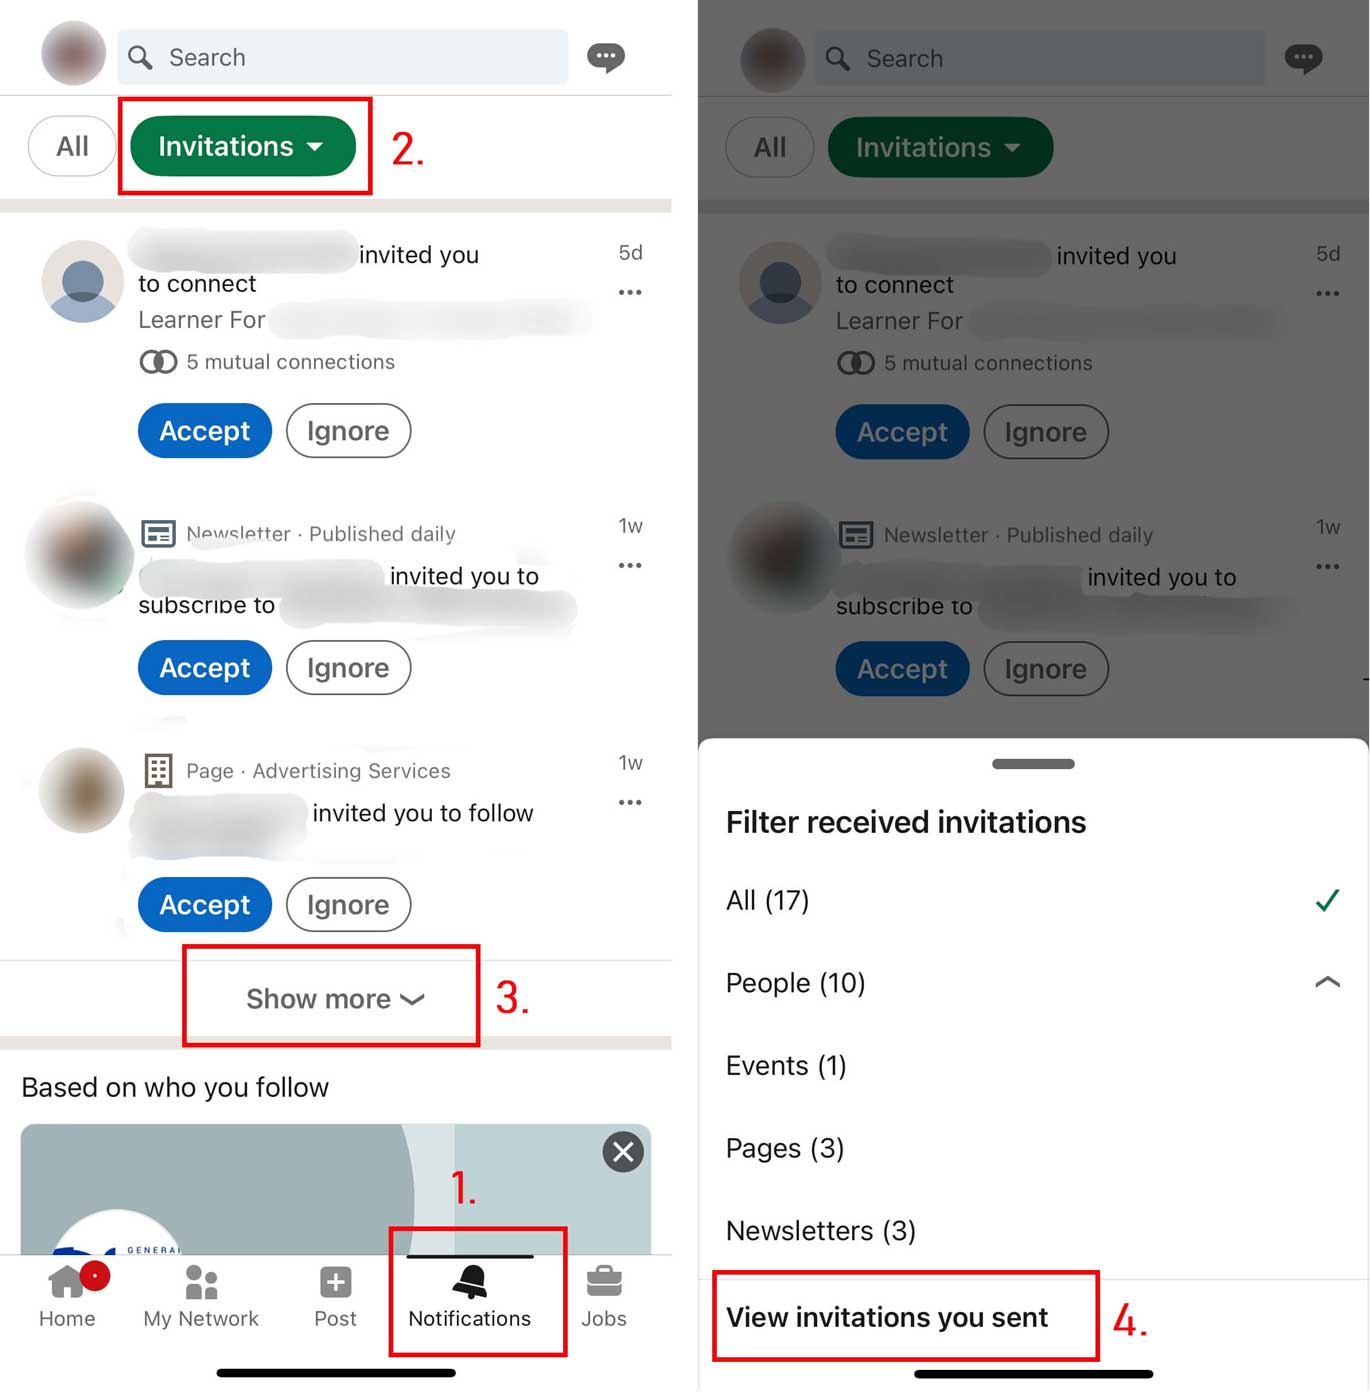
From there, choose the LinkedIn invites to withdraw and cancel them one by one.
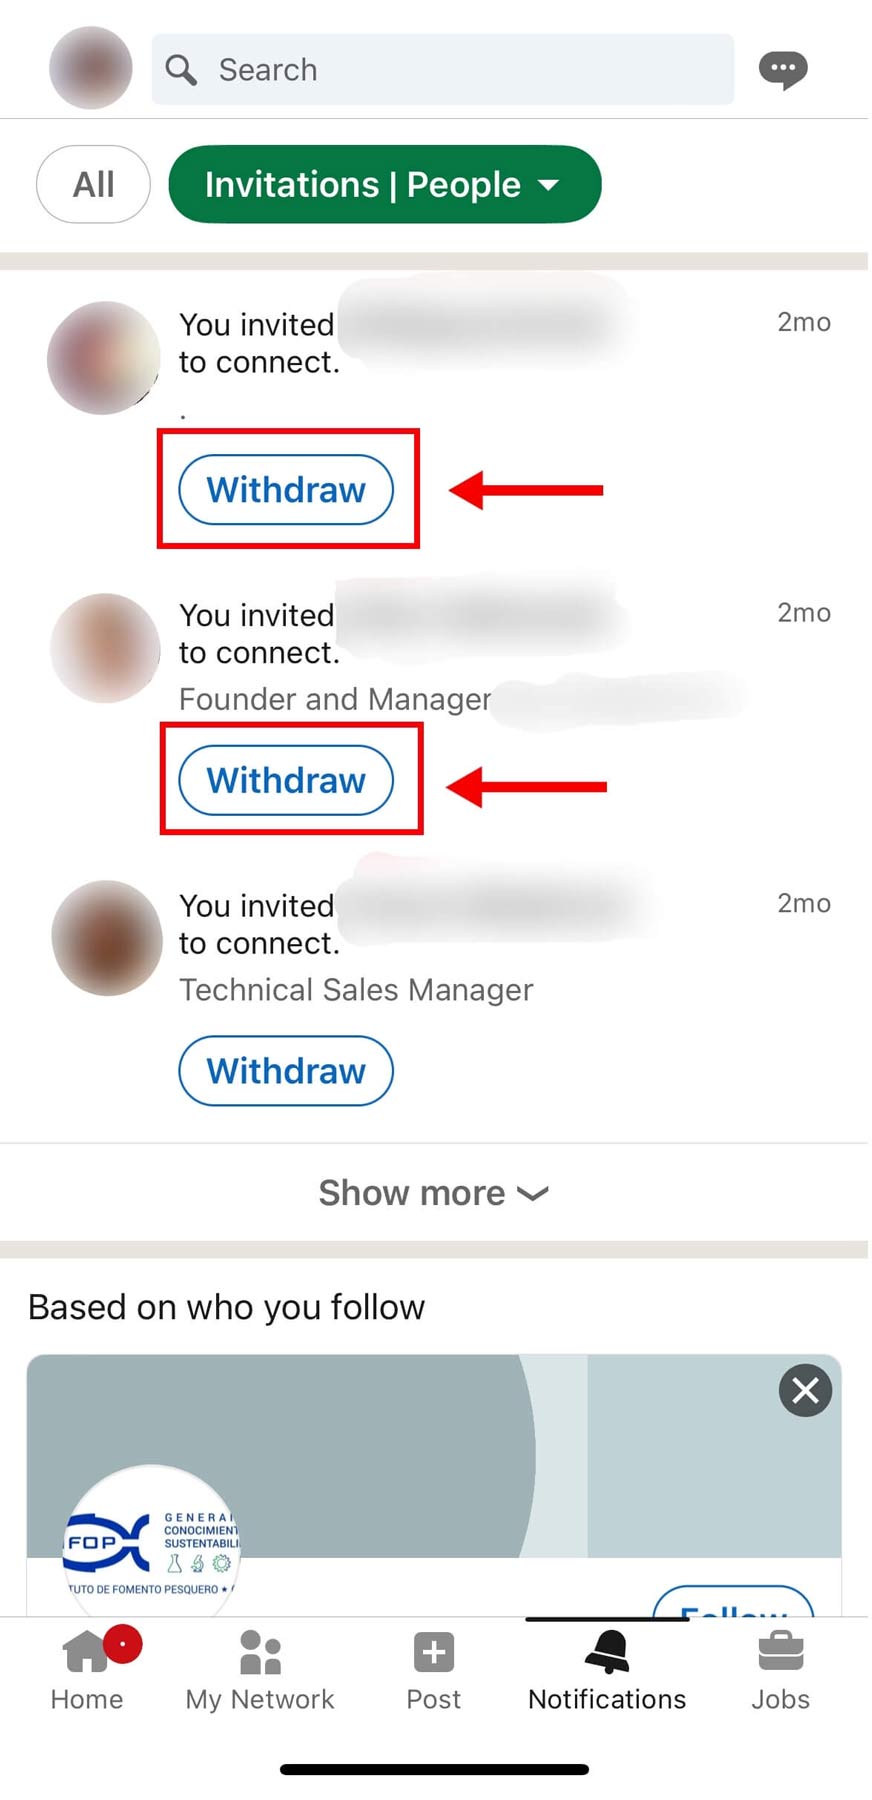
Let Skylead do the withdrawal for you
Canceling LinkedIn invites, one by one, can work if you have just a few pending. However, what should sales managers or recruiters do when they have thousands of invites pending? Should they all cancel the thousands of invites manually? No.
Remember when we said you could not cancel LinkedIn invites in bulk on LinkedIn? The point still stands - you cannot withdraw them all at once… Within the LinkedIn platform, that is.
However, you can use an sales engagement tool for outreach, such as Skylead, to do it for you.
In other words, you can use our LinkedIn outreach tool and set how many pending connections you wish to have before Skylead starts removing them to keep your account safe and healthy.
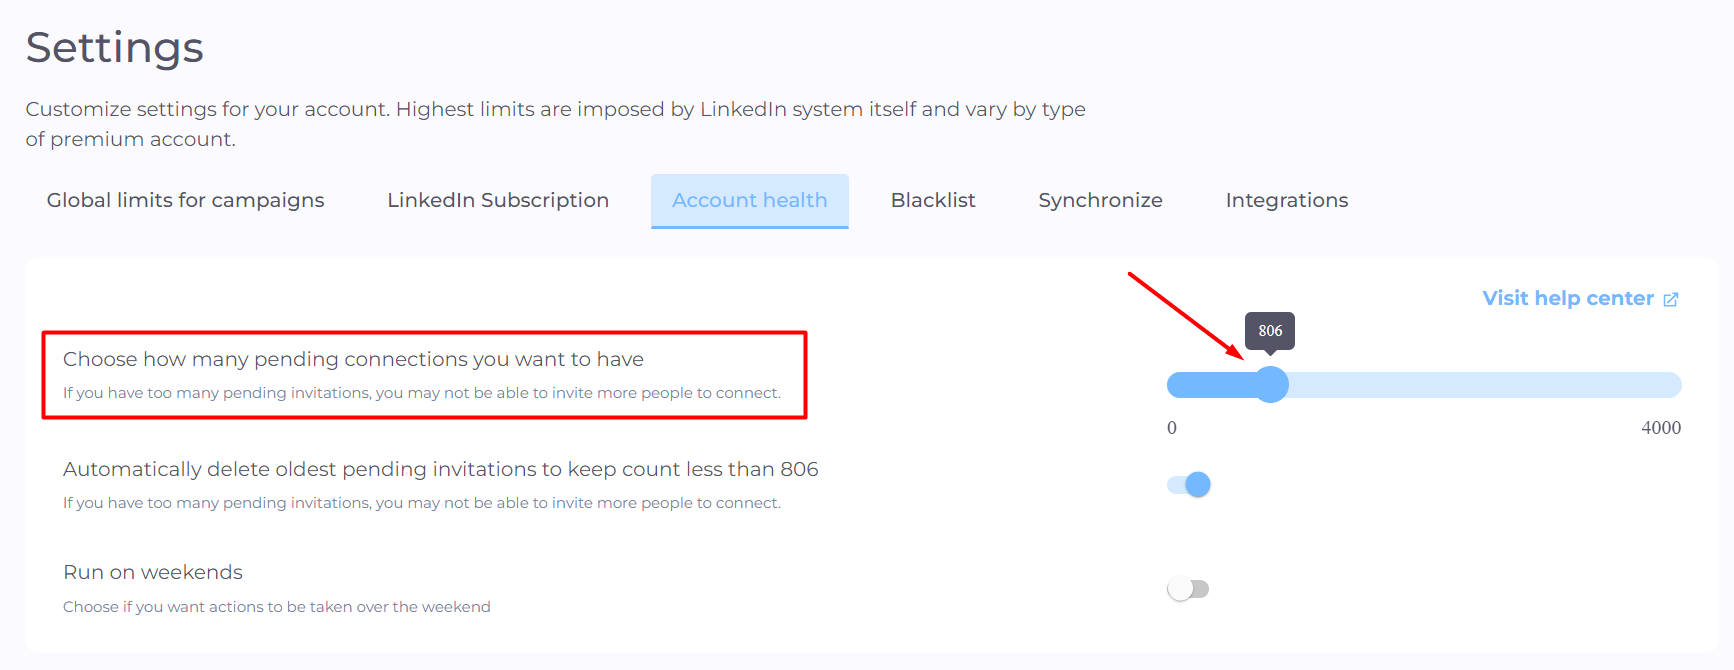
Why your LinkedIn invitations aren’t getting accepted
Speaking of connecting on LinkedIn, the best case practice is to connect with people related to you, your position, and your business industry. Naturally, if you are a salesperson or a recruiter using LinkedIn for lead generation, you’d go with your target group.
In the end, no matter who you wish to connect to and why, the goal is the same – to get the right message across and be accepted. However, there are numerous reasons why your LinkedIn invitations aren’t getting accepted or stay pending for a long time. So, to help you increase your acceptance rate, let’s first cover the possible reasons why this metric is not high at the moment.
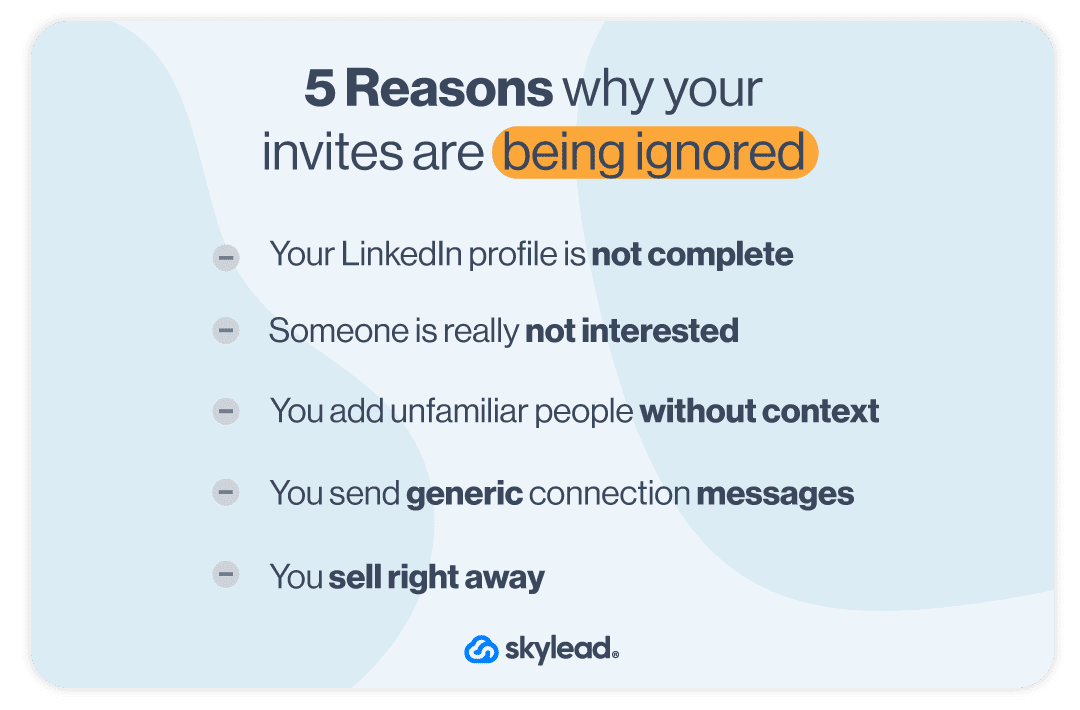
1. Incomplete LinkedIn profile
Sending invitations actively to users without previously setting up your profile is a huge mistake.
There are many profiles on LinkedIn that look like this, and you don’t want yours to be one of them.
Start from yourself - would you accept an invite from this kind of profile? No, you wouldn’t.
If you have no photo, no description of any kind, and no experience details, no one on LinkedIn will take you seriously. Why would they want to connect with you without knowing who you are, right?
So if you send a request to someone with a profile like the one above, go back and cancel LinkedIn invite yourself. Then focus on setting up your LinkedIn profile first.
2. Someone is really not interested in accepting the invite
One reason may be that the user does not wish to connect with you and just prolongs declining your invite. I know - it’s like ripping off the band aid, but it had to be said.
3. Outreaching unknown people without context or common connections
This depends on the person, but some LinkedIn users don’t accept unfamiliar people. To clarify, those people sometimes see nothing they have in common with you, which makes them skeptical.
In this case, it’s good to have or reference a mutual connection, so they do not ignore your request.
4. Sending generic message requests
This mistake is the one that most LinkedIn users make. They think that writing something generic like “Hey, I’d like to connect with you” is enough to have their request accepted. Yeah, right!

These requests may be accepted in some cases, but not by a person who gets a lot of invites daily. Such people tend to get tons of messages that resemble yours and mostly ignore them. So, why would they make an exception for you?
What’s more, with this kind of message or no message at all, there is a chance the recipient can click the Ignore button and then the I don’t know this person option. With too many “I don’t know this person clicked“, you risk getting your account restricted by LinkedIn.
5. First touch selling
The chances of successfully selling something via the LinkedIn invitation request are close to zero.
You have probably received tons of invitation messages where someone is trying to sell insurance to you.
It is not the way sales work. Nowadays, it’s all about social selling.
In your invitation message, you should explain why you want to connect with the user you’re outreaching, but not by trying to sell something. First, focus on personalizing, building normal human connections, and providing value before they buy anything you’re selling.
How to create engaging LinkedIn invites and boost acceptance rate
We cannot stress this enough. Before you even start creating and sending out your invitations, you need to optimize your LinkedIn profile first.
Almost every LinkedIn user will check your profile before they decide whether they should accept or ignore your invitation. That’s why it’s in your interest to give them a strong reason to accept your invitation, get value from you, and create a relationship.
After you’ve taken care of your profile, you’re ready to start inviting other users to connect. Here is our advice on how to do it more efficiently.
Prepare the ground for an invitation
It’s easy to connect with your colleagues or someone you know because those people know you personally.
However, even if you don’t know someone, you can try to remove that obstacle by becoming more familiar with that person. In other words, it’s good to start engaging with the posts of those potential connections.
Start liking their posts, create meaningful comments, and try to make a connection with them before sending an invite.
This will pave the way for you to build a relationship, and those users will start to perceive you as someone who is a valuable connection. Consequently, you won’t get in a position to cancel a LinkedIn invite that has been pending for a long time.
Personalize your invite messages
Before sending an invitation, make your messages as personalized as you can. It is a must if you want to improve your acceptance rate.
Sending personalized messages helps you leave a good first impression. Also:
- Addressing users by their names,
- Referencing something familiar to them,
- And avoiding generic phrases
play an important role in creating a strong relationship between you two.
Start by answering how you came across their profile and what made you want to connect. Don’t worry - the time you invest in LinkedIn prospecting your potential connection always pays off here.
Since you’re limited to 300 characters, you can use it to be more direct and honest.
Discover 20 ready-to-use connection invite templates with up to 78% acceptance rate.
Mention common interests
Adding many LinkedIn users who aren’t from your niche can decrease the quality of your LinkedIn feed and make it full of irrelevant content. That’s why connecting with someone that you share interests with is a great approach.
Mentioning the shared interests in your invite will show those users that you’ve invested some time into getting to know about them and their work. Moreover, you can mention the topic you wish to discuss with them. A message with these two elements will skyrocket your acceptance rate for sure. So, you won’t have to be in a position to cancel LinkedIn invite that has been pending for a long time. 😉
For example, start your message by commenting on your mutual job position, an event you both attended, or a post you both liked a while back.
Involve a little humor
It’s essential to have a professional tone of voice when you write your connection invite. However, “professional” doesn’t mean not having some sense of humor. You can always add a subtle joke here and there to make your invite stand out.
Moreover, using humor in your outreach is a nice pattern interrupt and has an immediate effect. Here is our example.
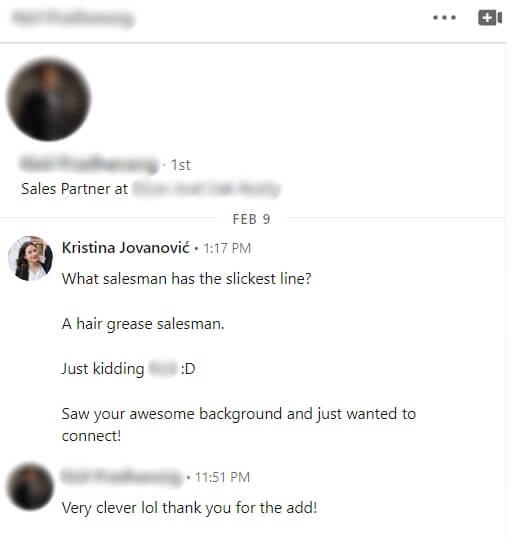
Check out our list of 35 position-related jokes ready to use in your outreach.
At the end of the day
We hope this article helped you understand why your requests have been pending for a long time and learn the tricks to improve the acceptance rate.
Remember: you must keep track of the request you sent and clear the list on time. This is just so you don’t land on the LinkedIn radar for suspicious activity and get restricted.
If you invest time in your connection message and LinkedIn profile, you won’t ever need to be in a situation where you have to cancel a LinkedIn invite. However, if you do, you can always use Skylead to automate your outreach process and make adjustments so it removes your pending request along the way.
Using Skylead makes it easy to get tons of new connections, personalize all your messages based on the interests of the people you want to connect with, and it only takes a few minutes to automate many of your lead generation processes.
Skylead does all the sales tasks for you while shortening the time you originally needed to make connections on LinkedIn. Try out Skylead, and let’s skyrocket your business together.

Disclaimer: Skylead is not affiliated, endorsed by, or connected with LinkedIn in any way.
So, you just got the request to find employees, ha? And you need to find candidates that perfectly match your company culture, skills, and a billion other requirements? No worries. LinkedIn has got your back.
As a #1 professional networking place, LinkedIn is an open book of business contacts. Moreover, it is commonly used by professionals of all caliber, including hiring managers.
However, with 810 million registered users on the market, how would you find the right employees? By using LinkedIn Recruiter Search Filters, of course.
That is why, in this article, we are going to show you how to use LinkedIn Recruiter filters. We will even uncover a now-public hack to streamline the recruiting process.
What is a LinkedIn Recruiter?
LinkedIn is undoubtedly one of the best ways to build your professional network and find employees. Thus, this company created a special platform for all hiring managers. That's right. LinkedIn Recruiter.
This feature allows HRs to be more organized, post jobs, generate leads on LinkedIn and start the recruitment process. In addition, hiring managers can find the candidates through various filters. For example, skills, job titles, and education level.
As a useful tool to have, LinkedIn Recruiter offers:
- Access to the largest professional talent pool to find employees;
- Managing your candidates' pipeline;
- Many search filters to find the right employees;
- Posting jobs for free, etc.
Moreover, LinkedIn Recruiter is perfect for any hiring managers of small, medium, and enterprise companies. However, not every hiring manager has the same needs and features. Thus, LinkedIn developed various subscription plans.
LinkedIn Recruiter Lite VS Recruiter Professional and Corporate
LinkedIn developed 3 different subscription plans:
- Lite: For individuals in small and medium businesses.
- Professional: For medium to large companies.
- Corporate: For large enterprises with high-volume hiring needs.
There are many differences between these three, but the main ones are:
| Feature | LinkedIn Recruiter Lite | LinkedIn Recruiter Professional | LinkedIn Recruiter Corporate |
| LinkedIn Network Access | 3rd- degree connections only | 3rd- degree connections, with 30 out-of-network profiles per month | Access to entire network |
| Search Filters | 20+ filters available | 40+ filters available | 40+ filters available |
| Spotlights Filters | No | Yes | Yes |
| Open To Contract Work Filter | No | Yes | Yes |
| Skill Assessment Filter | No | Yes | Yes |
| Candidate And Company Insight | No | Yes | Yes |
| InMail Messages Per Month | 30 | 100 | 150 |
| Reports | Jobs and InMails | Jobs, InMails, Usage, Pipeline | Jobs, InMails, Usage, Pipeline |
| LinkedIn Recruiter Price | $140/month | Must Contact LinkedIn Support | Must Contact LinkedIn Support |
In this article, we will cover Recruiter Lite Search Filters. Simply because it is the most common type of subscription between recruiters.
Also, be sure to check out our analysis of the 3 LinkedIn subscriptions for recruiters here.
How to find employees using LinkedIn Recruiter search filters
Creating LinkedIn Recruiter project
Thanks to LinkedIn Recruiter’s filters, the talent acquisition is considerably simplified. Sometimes, a broad search may do the trick. However, often HRs are looking to connect with a more narrow candidate group.
For example, this group can include individuals with certain years of experience. Thus, determining what filters to use will make the prospecting on LinkedIn for the right candidate more powerful. Stay with us till the end to find out how you can make the recruitment process even easier.
When you first get into LinkedIn Recruiter, you would need to create a Project for your job post. Specifically, the purpose of the project is to keep your candidates, research and messages organized.
To create a project, hover your mouse over the Project tab in the header and click the Create New button.
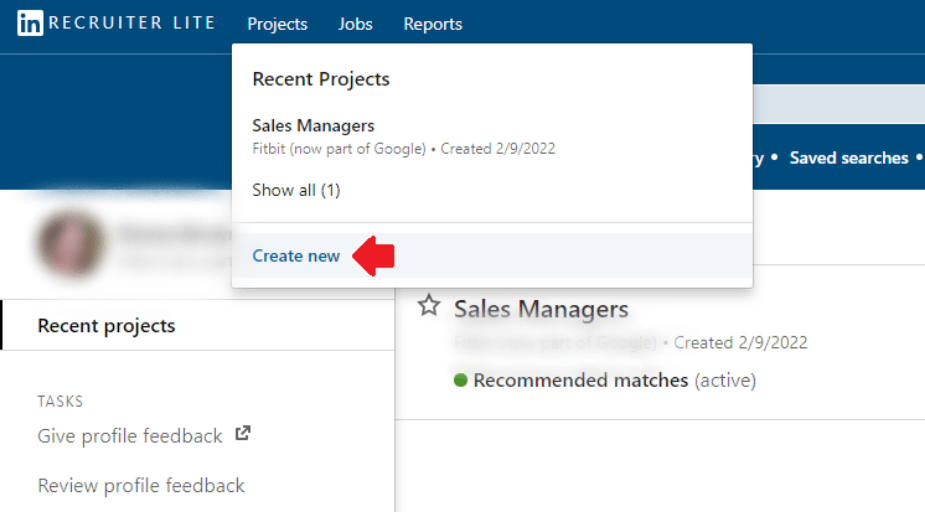
Once you’ve filled in project details, you will be taken to the Project dashboard. Here, you can gather all the candidates you need for the job role. Lastly, to find LinkedIn Recruiter search filters, go to the Talent Pool tab of your project.
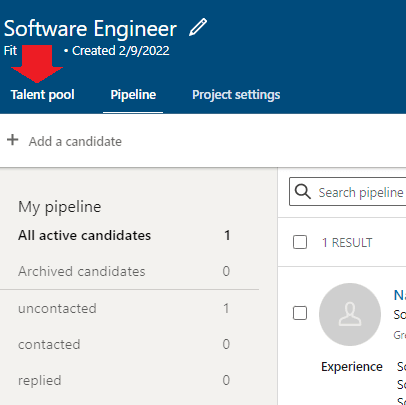
And you are in! Now the real fun begins.
LinkedIn Recruiter search filters
Once in Talent pool, you will notice that LinkedIn has 2 types of search filters. Sidebar and Advanced filters. Familiarizing yourself with these filters will get you one step closer to finding your perfect candidate. Let’s see what Recruiter Lite has in store for us.
LinkedIn Recruiter sidebar search filters
You can see LinkedIn recruiter “Sidebar” filters on your left side of the Talent Pool tab. These are the basic Recruiter filters. Thus, they will create a good base for specifying what you are looking for in a candidate.
Job titles
This filter searches the job titles users add to their profile in the Experience section. Start by choosing the time when the candidate had this job, from the drop-down menu.
For example, let's say you are trying to find employees for a Sales Rep job posting.
- Current or past option helps you find employees that have the title “Sales Rep” set either as their current or past position.
- Secondly, the current option shows candidates that have the title “Sales Rep” listed as their current position.
- Past option will show candidates that have the title “Sales Rep” listed as their past job title. The list will be independent from their current position.
- Lastly, past not current will help you find employees that used to be Sales Reps, but are not in a position anymore.
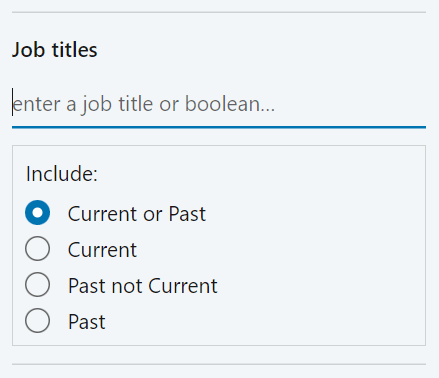
Now, you just need to type in the position name. What’s interesting about the Job titles is that LinkedIn allows Boolean Search. To clarify, Boolean Search means using mathematical operators in some filters to broaden or limit your search on LinkedIn. In addition, mathematical operators used on LinkedIn are:
- AND - if you are looking for multiple-roles candidates
- OR - When you want to specify alternatives in jobs or skill
- NOT - When you want to exclude certain roles or skills
- () Parenthesis - When you wish to combine previous operations
Here is an example of what a job title boolean search should look like:
(Software Engineer) OR (.NET Developer) NOT (JavaScript Developer) NOT (Java Developer)
Locations
The Locations filter allows you to filter candidates by geographic region. Furthermore, you have even more search features. For example, you can choose candidates who are open to relocating, or who are currently living in that location.
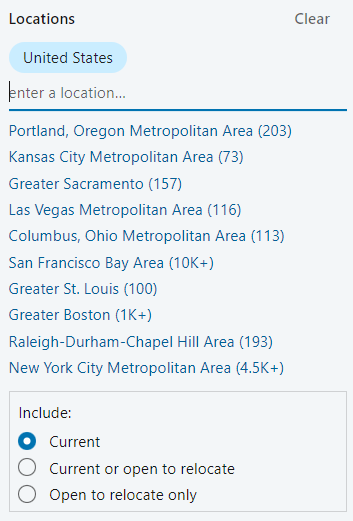
Workplace types
This filter lets you find employees depending on their workplace preferences. To clarify, LinkedIn draws this information from the users’ Open To Work preferences. There are three types to search from: On-site, Remote, or Hybrid workplace.
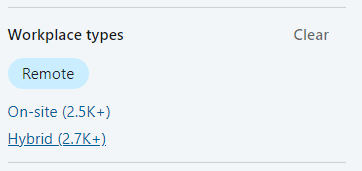
Skills and assessments
The popular Skills and Assessments filter allows you to insert the skills needed for the job. Consequently, LinkedIn will look for the profiles with the specific skill set and list the potential candidates that match those skills.
In addition, this filter works for the skills keywords, as well. To clarify, there is an option to let LinkedIn know you wish to see only the candidates who demonstrated the knowledge of said skills.
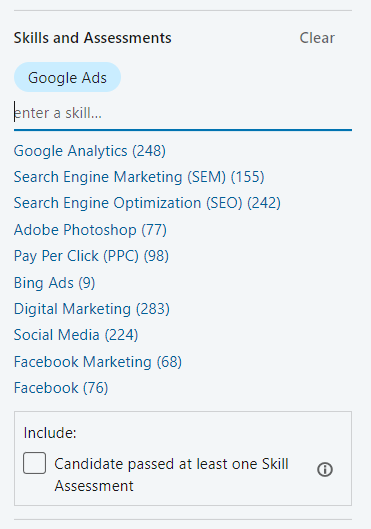
Companies
You can use the Companies filter to find employees who work in the specific companies. Furthermore, you can specify the time when they did by choosing Current, Past, Current or Past, Past not Current. The same options as in the Job Titles filter.
This filter draws the information from the company name field in the Experience section of users’ profiles. In addition, it allows Boolean Search so you can exclude or include certain companies in the search.
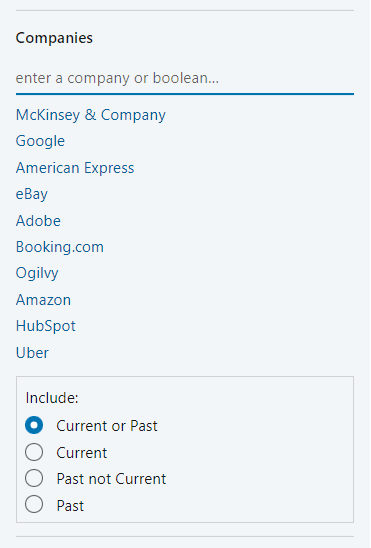
Schools
This filter allows you to choose candidates based on schools they graduated from. In other words, the school the candidates attended. You can select the school or the university name from the drop-down menu, or simply type it in.
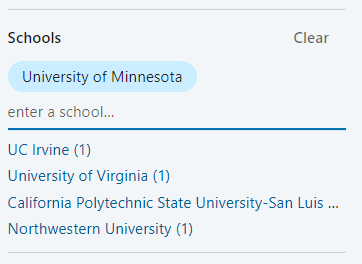
Year of graduation
With this filter, you can search for the candidates based on the year when they graduated. The Year Of Graduation filter pulls the data from the Education section of the user's profile. In other words, this is the end date listed for each educational institution.
Furthermore, you can select one specific year, or choose the range according to your needs.
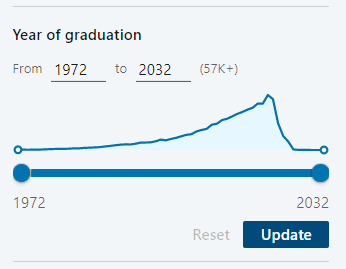
Industries
Filter named Industries lets you search candidates based on the industry they selected on their profile. Be careful with this filter though, as LinkedIn will pick up solely the industry they listed.
In addition, it won’t count the other candidates with the same job role in different industries. Unless you insert multiple industries, that is.
For example, a Software Engineer working in Financial Services could enter Information Technology and Services as their industry. Thus, they would be excluded if you filtered only for candidates in the Financial Services industry.
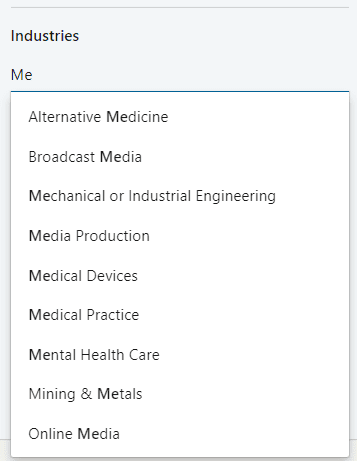
Keywords
To further refine your search, you can use Keywords. You can search anything that might be mentioned on users’ profiles. This filter also allows you to use Boolean Search. In addition, it serves as the perfect filter for any criteria that aren’t mentioned in other filters.
Find employees using LinkedIn Recruiter custom filters
In addition to previously mentioned search filters, there is an option to create custom filters. In other words, this option allows you to combine sidebar filters that are most frequently used.
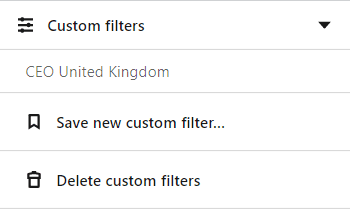
Furthermore, you can save multiple custom filters under different names and filter combinations. You can save up to 50 custom filters. However, the option for editing saved custom filters is not available.
LinkedIn Recruiter advanced search filters
You can find advanced search filters in Recruiter and LinkedIn Sales Navigator filters only. They offer more options for finding employees and narrows down the search.
LinkedIn Recruiter Advanced Search Filters include:
- Candidate Details Filters
- Education And Experience Filters
- Company Filters
1. Candidate details filters
Postal code / Zip code
This filter is an extension to the Location filter. Postal/Zip Code allows you to zero in on the candidates based on the distance from a certain town or a city. In other words, you can find employees within 40 kilometers of a town or suburbs of the cities.
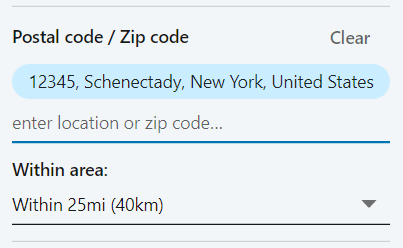
Profile languages
The Profile Languages filter allows you to filter search results based on the language used in a candidate's profile. You can include as many profile languages as you wish. LinkedIn will then show the number of candidates that match this criteria.
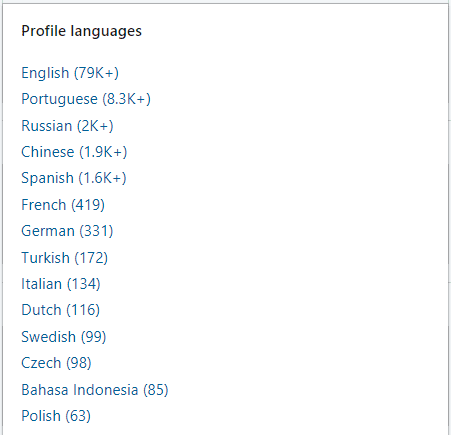
Recently joined LinkedIn
If you wish to find employees who are most likely to seek a new job opportunity, look no further than the Recently joined LinkedIn filter.
It narrows your search results to find candidates who joined LinkedIn from 1 day to 3 months ago. People that recently joined LinkedIn most likely did so to seek a new job opportunity.
First names and last names
If you happen to meet someone during an event and cannot recall their first or last name, LinkedIn’s got your back. Using the first and last name filter will allow you to pinpoint that person and contact them via LinkedIn.
Network relationships
You can search 1st or 2nd, and 3rd-degree connections or group members using the Network Relationships filter. If you are using LinkedIn Recruiter Professional or Corporate, you will be able to see everyone else on the network.
2. Education and experience filters
Years of experience
Use this filter if you are searching for candidates that are experienced for certain number of years. LinkedIn calculates the number of years the candidate has set on their profile. Furthermore, it enables you to set the years range or insert a specific number.
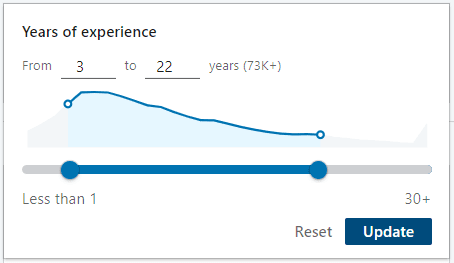
Military veterans
Use the Military Veterans filter to find employees who have a background in the U.S. military. According to LinkedIn, veterans are one of the best users of LinkedIn and the #1 source for their post-service careers.
Seniority
The Seniority filter allows you to find employees by the position level in the current company. It draws the information from the job title. Seniority level includes Entry, Senior, Owner, Director, or Volunteer.
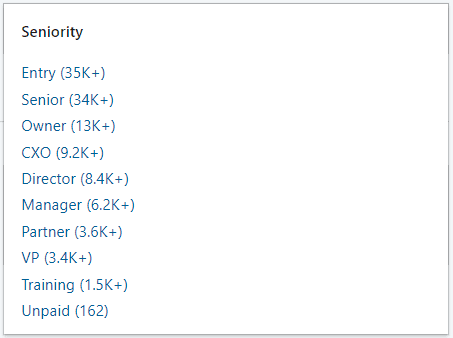
3. Company filters
Current companies
The Current Companies filter allows you to find employees who currently work in the specific company. Furthermore, this filter allows you to use Boolean Search. You can also exclude companies you do not wish to see in your current search.
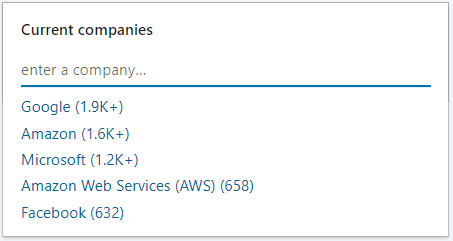
Past companies
If you wish to find employees who have experience working for certain companies in the past, the Past Companies filter is for you. This can be useful, for example, if you wish to find candidates who have experience in similar companies such as yours.
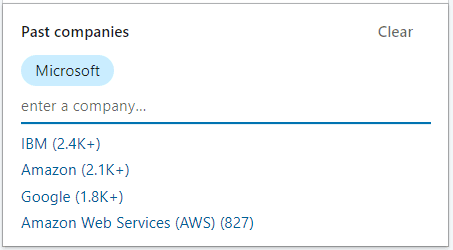
Company sizes
This filter allows you to find employees who work for companies of various sizes. LinkedIn will find candidates based on the size of the current company they listed in the Experience section of the profile.
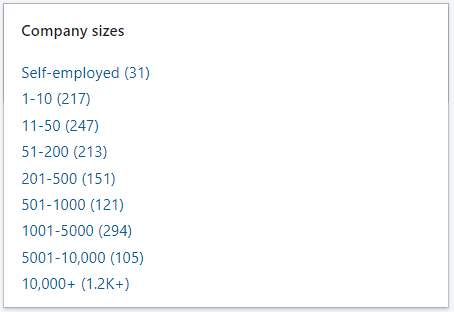
Job functions
A Job Function filter is basically the candidate’s area of expertise. It is determined based on all the present positions. For example, a person could have been a salesperson and later became a consultant for that company. Thus, their job function would be sales and consultant.
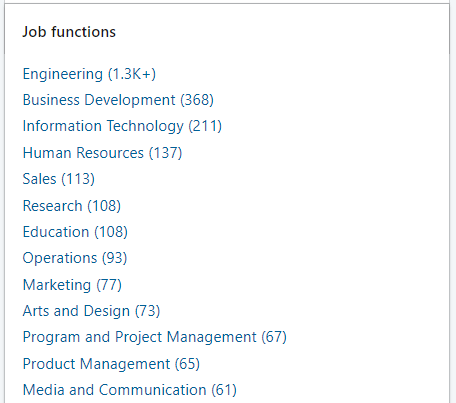
Excluding the LinkedIn Recruiter Search filters
LinkedIn allows you to exclude some filters from the search. For example, if you do not wish to see sales skills when finding employees, you can easily exclude them by clicking the crossed circle button next to the skills name. In addition, you can do the same with location, companies, schools, industries, past companies, current companies, and job titles filters.

Additional hacks to find employees using LinkedIn Recruiter
#1 Recommended matches
LinkedIn created a nice feature called “Recommended Matches”. It will give you access to a list of candidate recommendations based on your search activity within a project. In addition, it will provide 25 searches daily to try and find your ideal employee.
To see the recommended matches, go to the bottom of the pipeline page. You can also click the Recommended Matches tab next to Talent Pool.
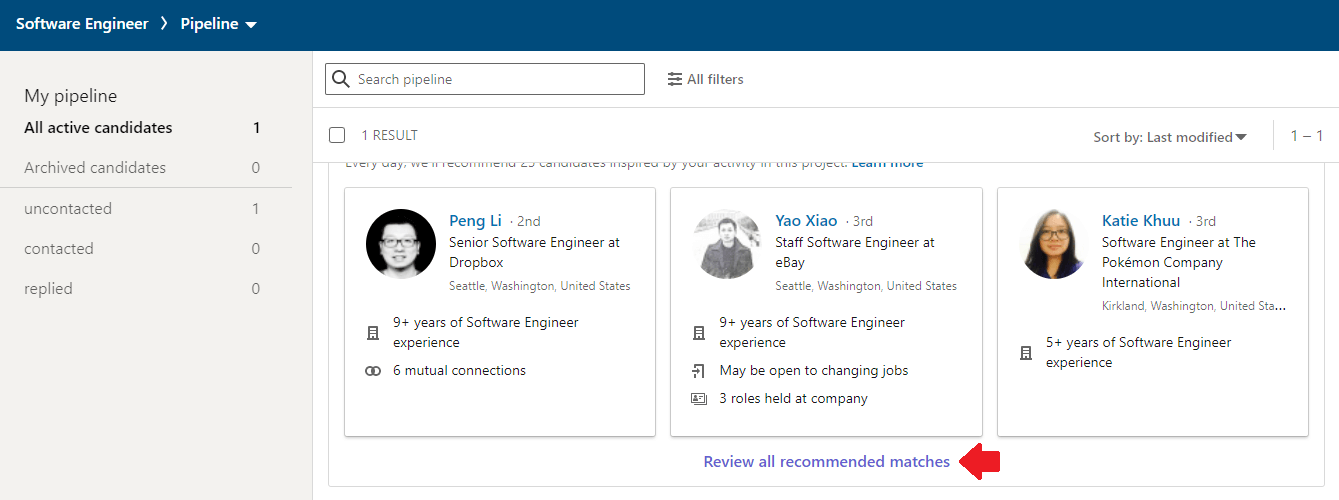
Once you are there, you can save each recommended candidate to your project by clicking the Save To Pipeline button.
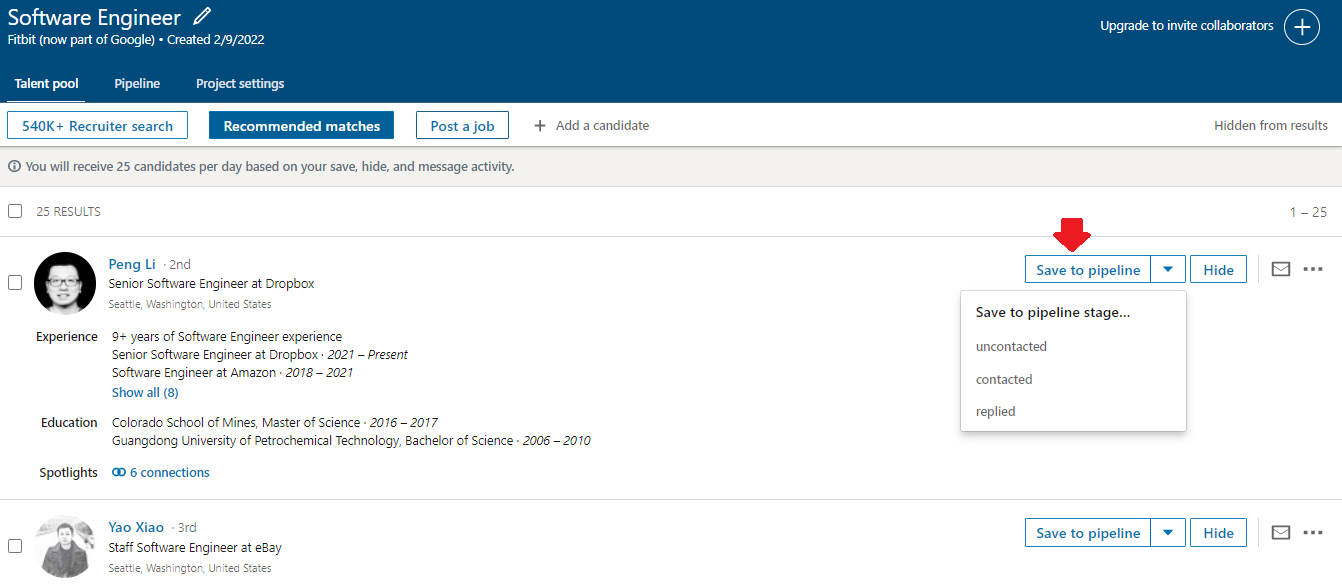
#2 Expand your network
For example, let' say you are using Recruiter Lite. And you need access to the full network that Corporate version offers. However, you do not wish to pay that kind of money. Thus, the nifty trick here is to expand your network as much as you can. You can get a lot closer to your candidates that were previously outside of your network. Furthermore, Out Of The Network alert won’t be a problem anymore.

#3 Use LinkedIn InMails
InMail messages are free or paid direct messages on LinkedIn that you can send to members outside of your network. In other words, InMails are LinkedIn’s version of email to contact your 2nd or 3rd-degree connection.
In addition, statistics show that getting a response from a 2nd or 3rd-degree connection is 3x more likely if you send InMail rather than email message. Thus, InMails are a great trick to find employees and reach out to them. That is, if they do not accept your invitation to connect to begin with. You can check out our 13 InMail examples.
You found perfect candidates - Now what?
Well, now you need to reach out to your candidates. However, imagine you found 300 perfectly good candidates using LinkedIn Recruiter search filters, and you need to outreach them manually. It would be quite a tedious task, wouldn’t you agree?
If only there were a way to do this fast, so you could focus on more important tasks.

As a matter of fact, there is. It is called a sales engagement tool for recruiters. Take Skylead, for example. This sales engagement tool gives the hiring managers the right features to outreach their candidates on autopilot.
Skylead campaign creation
Firstly, to create a campaign in Skylead, you need to determine the candidate's source, aka where Skylead will pull the candidates from to reach them out. To clarify, Skylead supports both Recruiter and Recruiter Lite subscriptions, thus you can select candidates source from LinkedIn Recruiter or Recruiter Lite:
- Search Results;
- Talent Pool;
- Your Pipeline.
For example, we will choose the first option. Start with copying the URL link of your LinkedIn Recruiter or Recruiter Lite search.
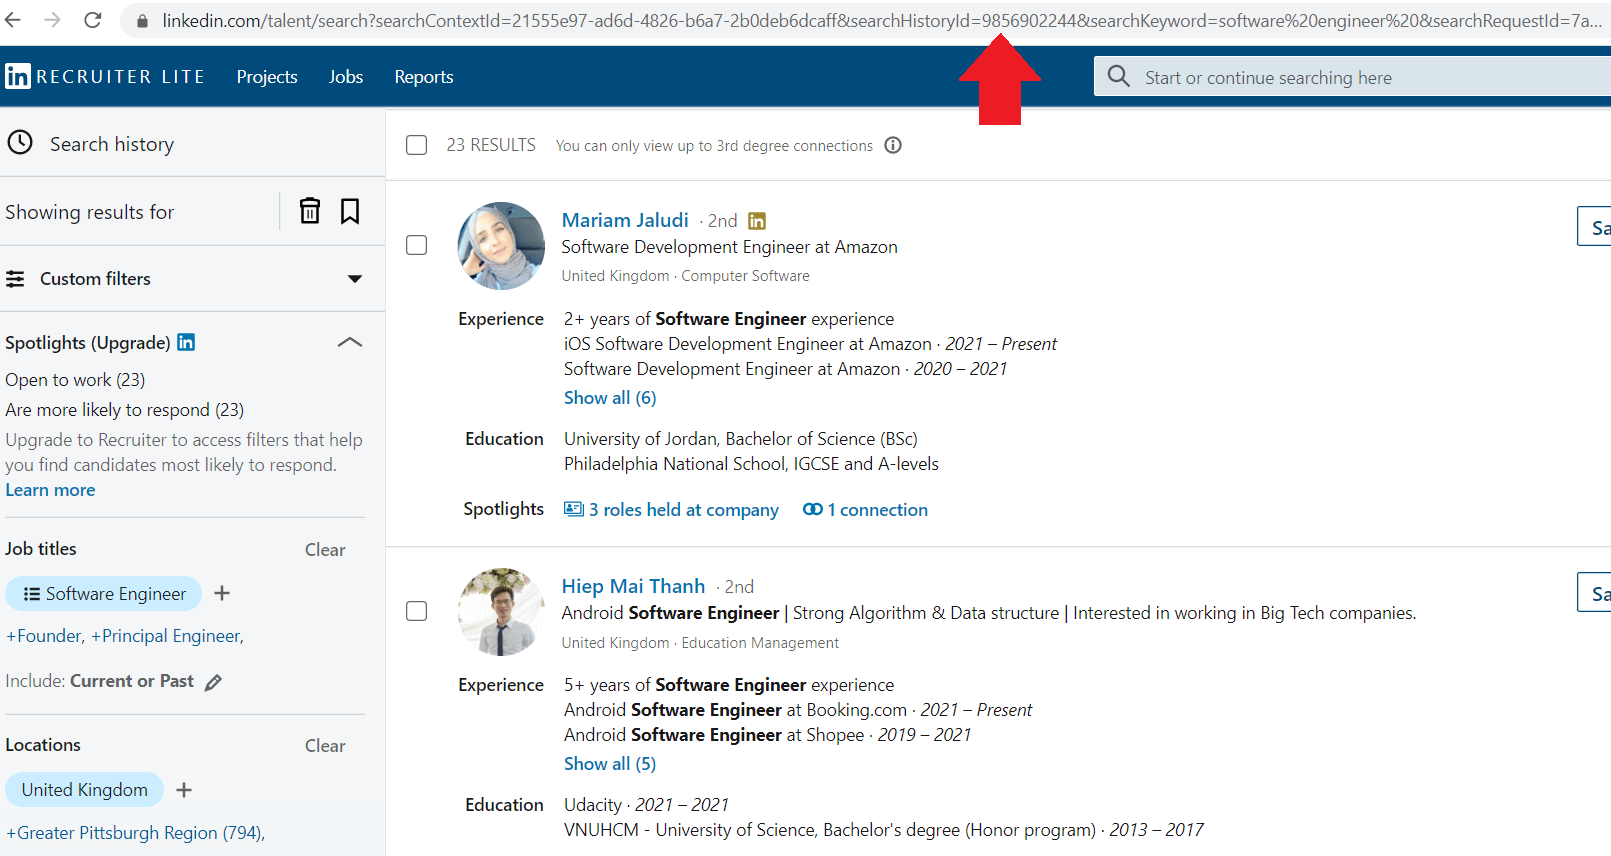
Secondly, it is important to check and confirm the Network Degree connection type. To clarify, you need to do this both in Skylead campaign creator and in LinkedIn Recruiter manually. How? By using the Network Relationships filter. Here is how you should do it within LinkedIn Recruiter.
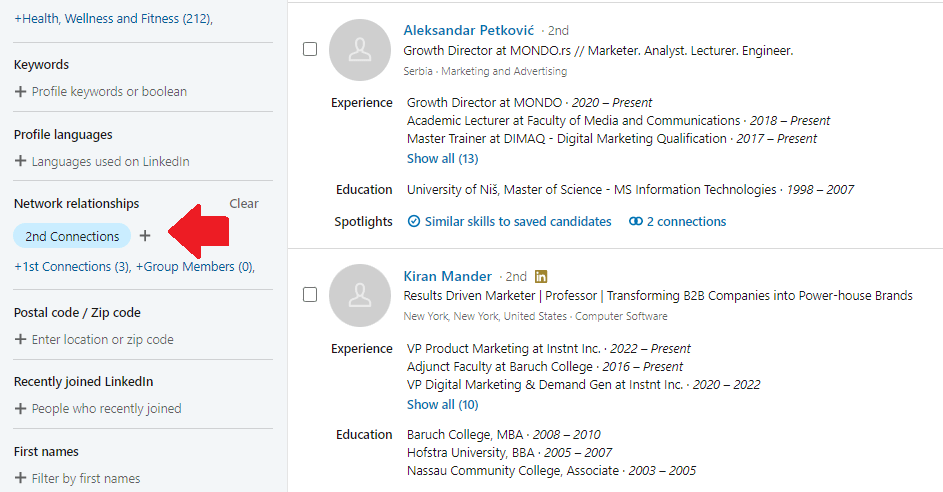
Lastly, select the type of campaign, and insert the campaign name. In addition, be sure to check the Network Connection option in Skylead, as well. To insert target candidates, paste the URL link of your search into the Campaign URL field.
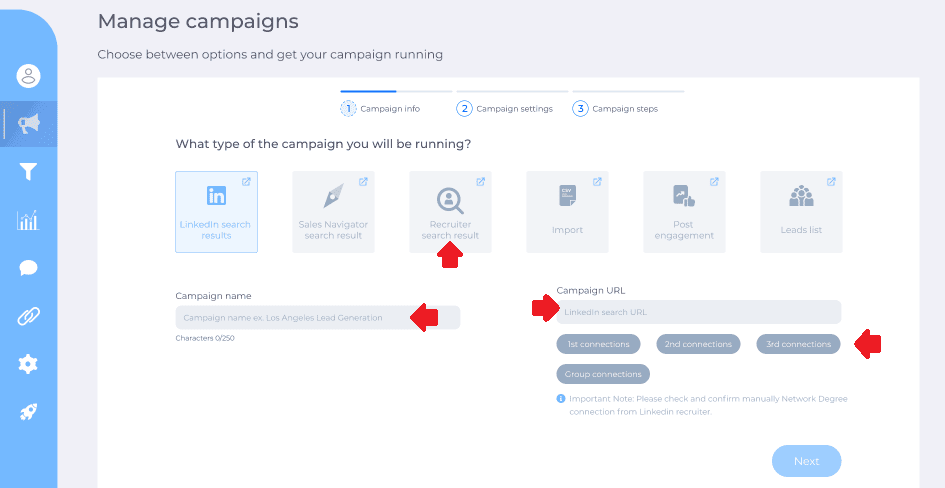
Next, go ahead and create your Smart Sequence steps and your messages. To clarify, Smart Sequences are Skylead's groundbreaking algorithms. They allow you to use multichannel outreach and personalization to their maximum potential.
With Smart sequences, you can create and execute different scenarios to interact with your candidates based on their behavior. In addition, you can add as many steps as you wish so the algorithm can ultimately do all the work for you.
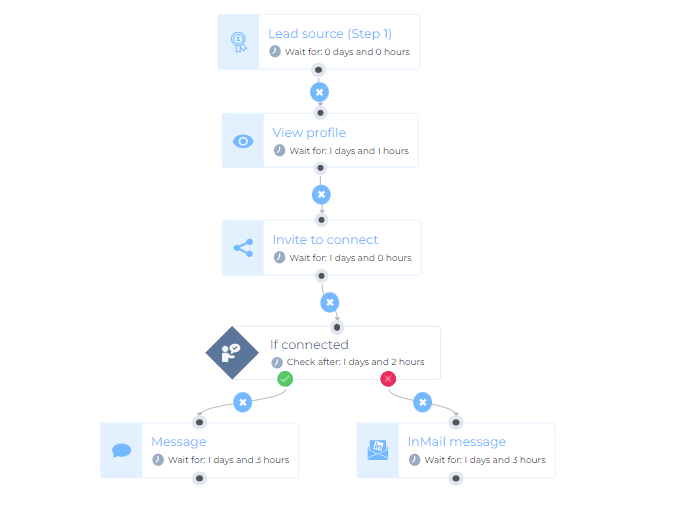
And you are done! Your messages and connection requests will be sent out.
Skylead will help you schedule a call from all-in-one Smart Inbox. In addition, it will also let other candidates know you successfully found employees at the end of the recruiting process. To check out how Skylead works in detail, click here.
In conclusion
Finding the right employees for your organization is not an easy task. You need to take the candidates’ experience, knowledge, and much more into account.
Luckily, finding candidates is easier since LinkedIn created cost-effective Recruiter Lite. And let's not forget its various filters to play with and combine.
Yes, there is a big difference between Standard Recruiter And Recruiter Lite. For example, the LinkedIn Recruiter levels of access to the network or the number of InMail messages available. However, the overall Recruiter Lite experience is not that bad, if we talk about the search filters option. So, here is a shortlist of LinkedIn Recruiter search filters available for every subscription type.
| LinkedIn Recruiter Sidebar Search Filters: - Custom Filters - Job Titles - Location - Workplace Types - Skills And Assessments - Companies - Schools - Year Of Graduation - Industries - Keywords | LinkedIn Recruiter Advanced Search Filters: - Postal/Zip Code - Profile Languages - Recently Joined LinkedIn - First And Last Name Filters - Network Relationships - Years of Experience - Military Veterans - Seniority - Current Companies - Company Sizes - Job Functions |
Furthermore, finding employees can be more simplified by using a sales engagement platform, such as Skylead. You can create the outreach campaign in just minutes, and let Skylead do the work for you. All this while you focus on the interviews.

Wish to get to know Skylead more, use it for finding employees and outreach on autopilot? Come, say hi, and try out Skylead for free.
Disclaimer: Skylead is not affiliated, endorsed by, or connected with LinkedIn in any way.
If you are doing LinkedIn outreach, how you write your Summary is of vital importance. Do not believe us? Then let’s demonstrate with one of the most common scenario examples, which starts like a bad joke.
An SDR sends a LinkedIn connection invite.
Person on the other end of the ’’line’’:
My, my... Who do we have here? Who are you?
*Sees a profile picture and a name*
What do you want?
*Sees a message* *Goes to profile*
Ahh... An SDR.
*Goes to profile and scrolls down to Summary*
Empty. No valuable information or expertise.
If they didn’t take the time to properly introduce themselves and show who they are, I won’t have time for this connection either.
*Clicks Ignore*

See what they did there? They tried to make indirect connections and confirm the validity, but you denied them the opportunity, even though you are the one who reached out.
At the end of this article, you will learn:
- How to write a LinkedIn summary;
- Best practices;
- Mistakes to avoid;
- Tips and tricks;
- Examples that will inspire you.
All this, so you can improve the connection requests acceptance rate, which leads to sales.
So what is the magic formula for the scenarios at the beginning of the article to disappear? Let’s start with a Good Quality Summary + Optimized LinkedIn profile.
Benefits of optimized LinkedIn profile and a summary
Now, when it comes to attracting new visitors and leads, apart from the optimized LinkedIn profile, the key element on your profile is the Summary, aka About section.
With the well-optimized account and the Summary, your profile will be shown in search results more often. This means you’re directly increasing your chances to connect with your target audience, thus reaching your goals.
Flipping the other side of the coin. When doing cold outreach, prospects will see your About section, and they will indirectly feel more connected to you.
They will know who exactly contacted them, the value you provide, your expertise, and that you know what they are talking about. They will know you are legit - and not as you are trying to catfish them on some level.
Key elements of a well-optimized LinkedIn profile
Let’s first talk briefly about your LinkedIn profile optimization. This is for all the users out there: Whatever your current job description or a company are, you need to be aware of the fact that, as an individual, you represent yourself as well as the company. Therefore, your LinkedIn profile should be as optimized as possible.
If you are an SDR, then this is that much more important. You need to make sure to optimize your profile for LinkedIn lead generation, as well.
In short, a well-optimized LinkedIn profile should include:
- A representative profile and cover photo (preferably company branded with a taste);
- A catchy LinkedIn headline with keywords;
- An interesting, unique, and keyword-rich summary;
- Your job position, accomplishments, and work history.
After you complete the headline and photos setups, the next thing that you should take care of is creating a compelling summary.
LinkedIn summary: Definition and purpose
LinkedIn Summary, also known as the LinkedIn About section or Bio, is the part on a user's profile right above the Featured, Activity, and Work experience sections. It is usually a few-paragraphs-long-text and one of the first things the visitors notice on your profile.
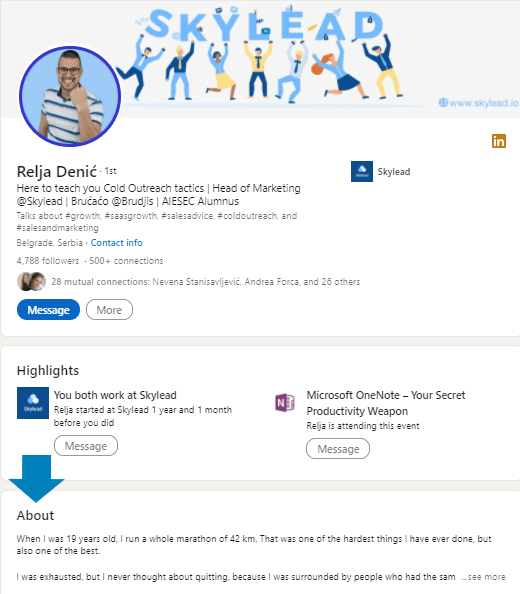
According to Rain Group’s “Top Performance in Sales Prospecting” Research, 82% of buyers research providers on LinkedIn before responding to a cold outreach message.
While the headline is there to appeal to somebody to visit your profile, the LinkedIn About section for SDRs is a place that lets people learn more about who you truly are, and encourages them to take certain actions (connect, schedule a Demo or work with you).
In other words, it is a place where you’re able to introduce yourself, give visitors a clear message of who you are, what your career story and goals are, what you are professionally known for, what drives you, and what value you can bring to them.
This section of 2600 characters is the only place where you can express your personality and connect with your prospects on a deeper level. Plus, this is the place where you can trigger the leads to take the kind of action you want them to.
Common mistakes whilst writing the LinkedIn summary
Before we present you with LinkedIn Summary examples, let first go over the most common mistakes that we noticed sales reps made.
1. Writing your profile for recruiters, not prospects
As basic as it is, this mistake does happen in the sales world. It usually happens due to a previous job search or completely forgetting the importance of the About section as is. When reaching out, be sure to update your summary so it doesn't address the wrong audience, such as recruiters and hiring managers, rather prospects and customers.
2. Non-existent LinkedIn summary
The biggest mistake the users make is leaving the summary completely blank or just repeating the work history. When you do that, other users won’t perceive you as professional, rather as plain jane/john who, as a salesperson, has no value to offer. Consequently, they will leave your profile quickly.
3. Dull looking one-paragraph LinkedIn summary
Another mistake we see often is for sales reps to write the entire summary in one long paragraph. As much as you think the content itself is interesting, unstructured and unorganized paragraphs will repel your prospects, and you will look sloppy in return.
Therefore, you need to break the summary into a few smaller paragraphs, to allow the lighter read and to get your point across.
To help you understand the examples and how they work, let's go over how to best write a LinkedIn summary as well as a few tips on what to include in it to maximize your connection acceptance rate, number of leads, and sales.
How to write a great LinkedIn summary
There is no one-size-fits-all when writing a LinkedIn summary. However, there are some guidelines SDRs should follow.
Remember: Sales is all about building genuine connections, so for the beginning, keep in mind to humanize your overall approach. Furthermore, one glance at your profile allows users to read only the first 300 characters of your summary. So at this starting point, you’ll have to get your readers hooked enough for them to read your full summary.
Example:
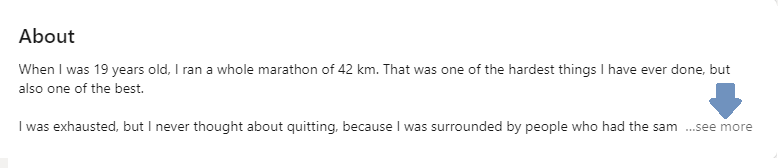
Once you attract their attention, you have to give them a reason to engage with you. To stand out from other LinkedIn profiles and connect with your ideal prospects, answer the following “the big four” questions:
Who are you, and what are your main work goals?
If you wish to reach new clients, answering this question will state your purpose. You will know what to focus on in order to introduce yourself to prospects.
Example:
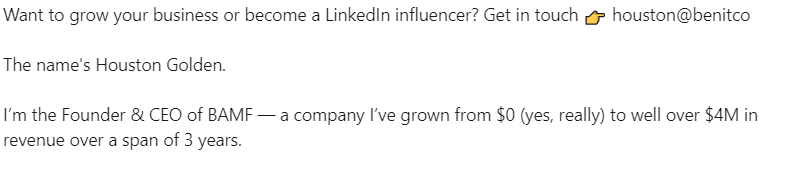
What are you passionate about and why (customer-wise)?
To build a relationship and be more trustworthy, show your prospects what inspires you and why you love your job. Make sure to include why the prospects should choose your company. Do it indirectly.
Example:
What is your job experience, and what have you accomplished?
By providing info on your accomplishments, you’ll establish expertise and show your prospects that they can count on you. Ideally, include the proven metrics of your success.
Example:

How can your product/service help prospects reach their goals?
As a salesperson, do what you know to do best - show your prospects the benefits of working with you and using the product/service and how it can help them. However, don’t get too salesly.
Example:

After you answer these questions and get done with the main part, you’re ready to go further through the process.
Tips and tricks to make your summary more attractive and interesting to prospects
To enrich the four previous questions, here are some useful tips that will help you write an eye-catching Summary:
- Write your summary in the first person;
- Don’t be afraid to add some personality;
- Include some key search terms that your prospects will likely search (it will appear higher in LinkedIn search results);
- Add a context to your career;
- Let your summary be about the prospects and their goals also;
- Write common problems that you solved while focusing on the prospects greatest pain points;
- Speak about your biggest accomplishments;
- Share real metrics, awards, and figures about your accomplishments;
- Break up the content into short paragraphs and bullet points;
- Include a CTA message at the end;
- Bold or italicize parts of the text;
- Use emojis but do not overload;
- Include your contact information - make it easy for prospects to reach back to you;
- Use brief sentences.
5 best LinkedIn summary examples perfect for sales
Without further ado, here are the five best LinkedIn summary examples for sales reps or SDRs that you can use as an inspiration for creating your description.
We’ll present different summaries types and emphasize what dominant tips they used from the checklist above.
#1 LinkedIn summary example – Show your personality
The great thing about this example is the author’s expression, perky personality. Right off of the bat you can feel the author’s uplifting energy. Furthermore, the author’s willingness to help and inspire others comes across effortlessly.
This example also shows how collaboration and building trustworthy relationships are important to the author, which makes the reader feel more connected to them.
On the technical side - there is a strong hook statement that is promising and instantly attracts new readers. They also included a few searchable keywords, which are great for getting more visits.
To strengthen their expertise, they expressed their accomplishments, and to make their summary earn more conversions of any kind there are CTAs included.
Tips applied:
- Added personality;
- Hook statement;
- Keywords included;
- The value offered to the prospect as well;
- Metrics about accomplishments included;
- CTA and website included.
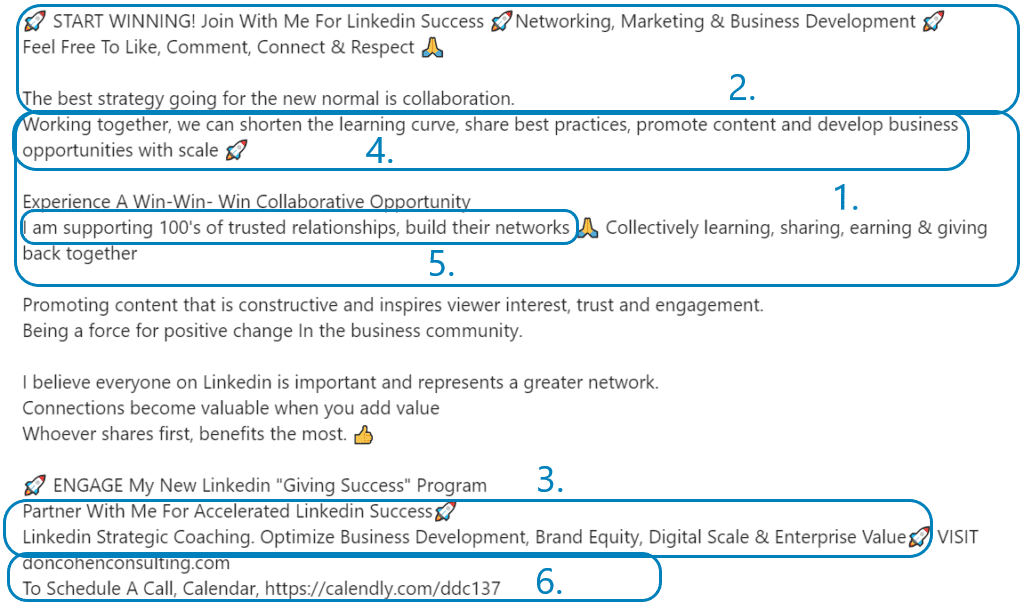
#2 LinkedIn summary example – Show accomplishments and win credibility
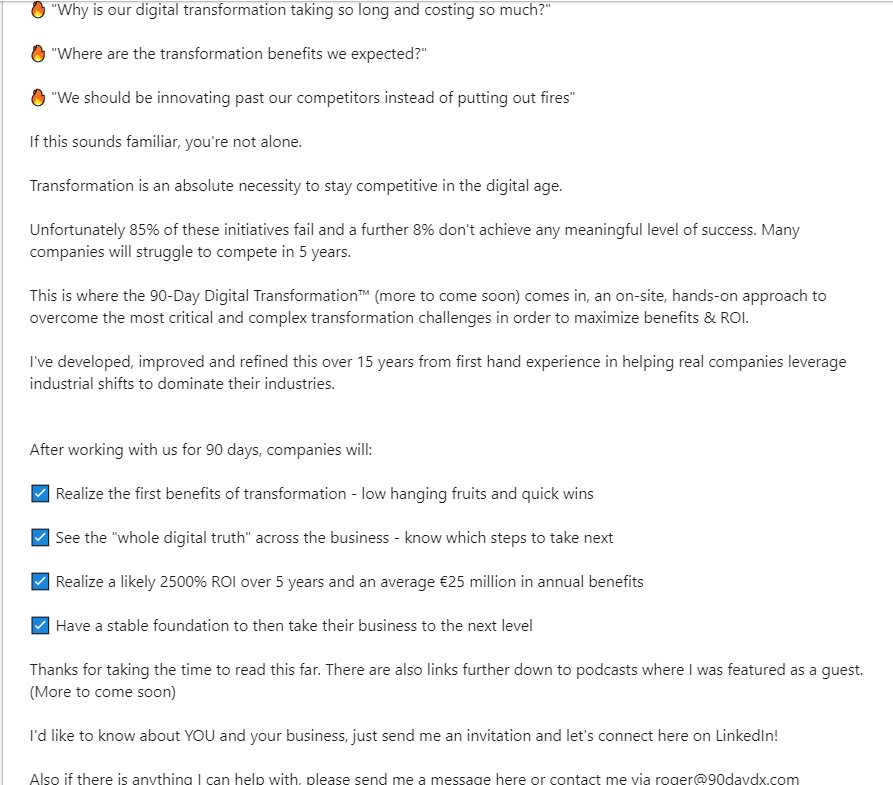
This example starts with the most alluring intros of them all - questions his target audience wishes to know. This is an excellent example as it is pretty result-oriented and a great conversation starter. If you are aiming to signify the benefits of using your services or products, this is the way to go.
Demonstrating your business results and collaborations in your summary is a great way to increase conversions and get a lot of sales, especially if you include real proof. In other words, to get new sales, show what influence your product or service may have on other people’s lives or businesses.
Tips applied:
- Hook statement in the questions form;
- The value offered to the prospect;
- Contact information included;
- CTA included;
- Emojis as bullet points used;
- Text broken into small paragraphs for easier read and accomplishments;
- Summary about the reader.
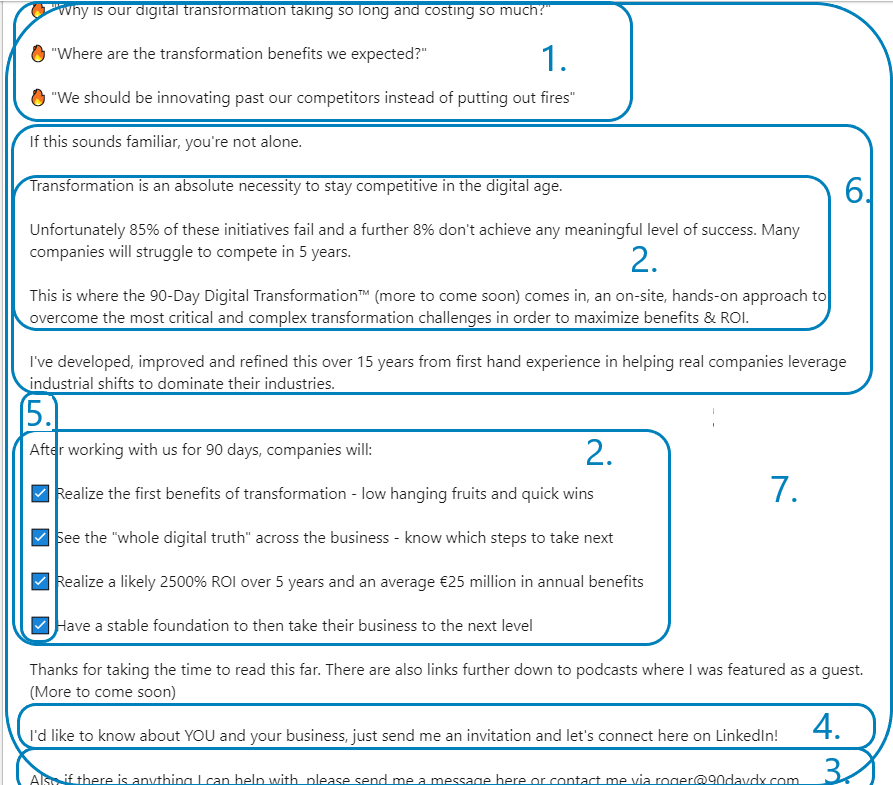
#3 Example LinkedIn summary – Sincere, short and niche-focused
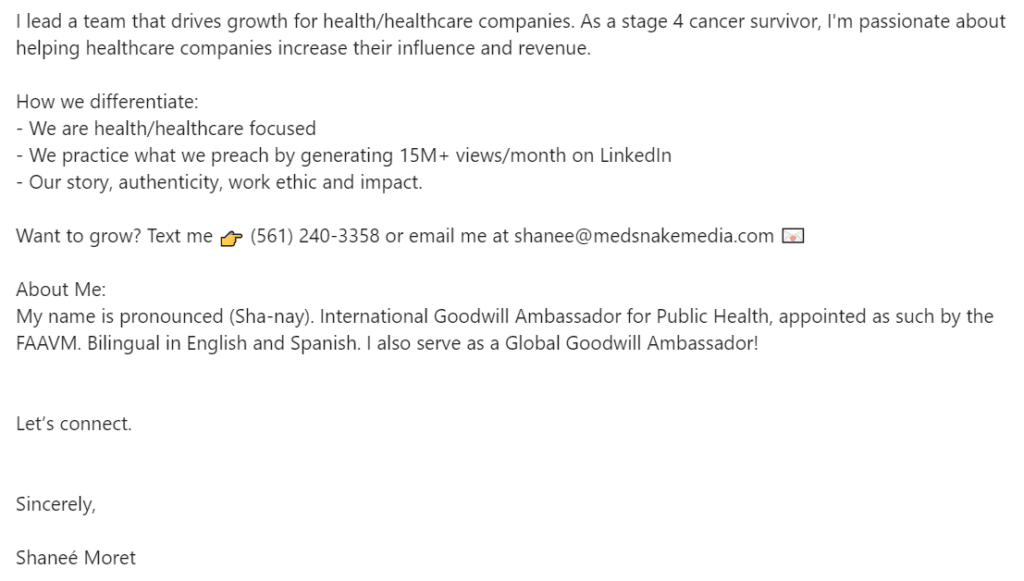
A lot of decision-makers on LinkedIn don’t have much time to read your summary, so if you need to reach them only, you can apply this example. The short version of the summary can do a great job of growing your conversions, especially if your business is narrowly focused.
This kind of self-presentation, in summary, can be very memorable as it contains personal history, the reason behind the company, and it goes straight to the point without wasting a lot of the reader’s time.
Tips applied:
- Value offered to the prospect;
- Added personality;
- Context to the career added;
- Metrics about accomplishments included;
- CTA included;
- Contact information included;
- Minimal use of Emojis and bullet points;
- Text broken into small paragraphs for easier reading.
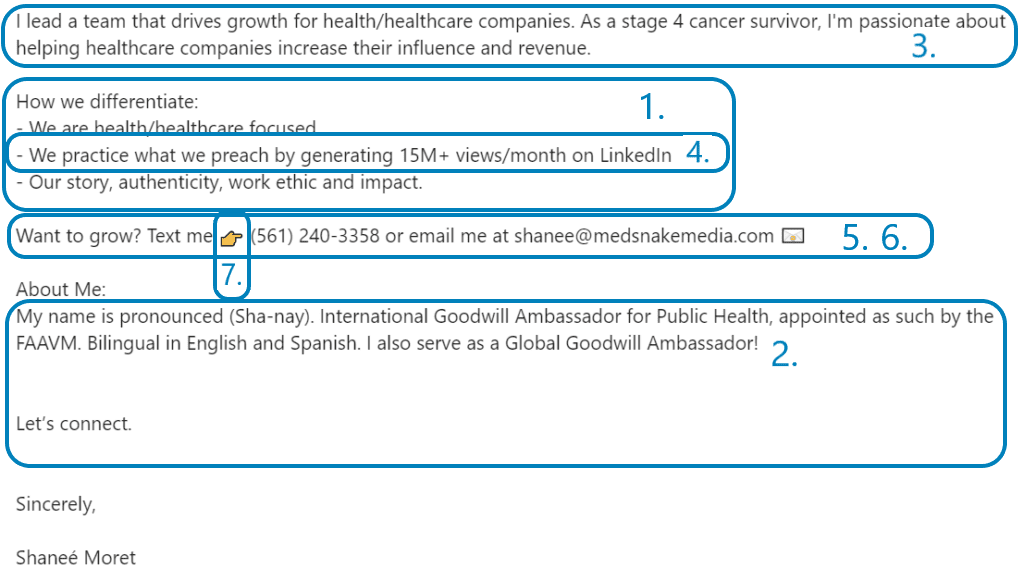
#4 LinkedIn summary example – Value everywhere you turn
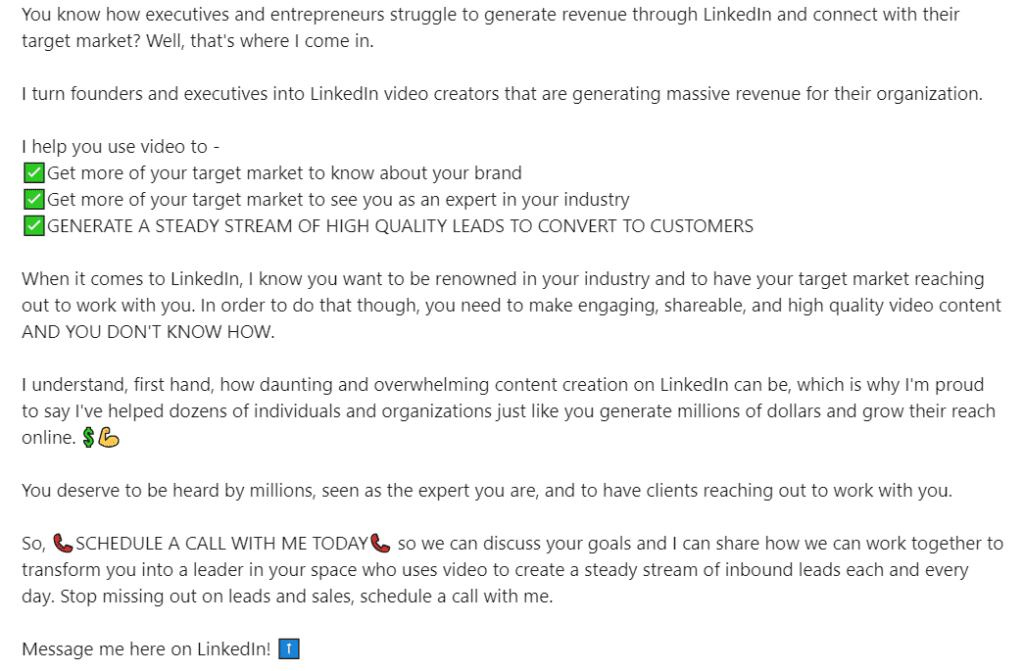
This is another example with the great hook in the intro, which uses questions, but this time, it demonstrates the pain points as well.
Text is broken into paragraphs, and each one is emphasized with either value, pain point, or empathetic statement. This combination brings great results in practice, so you can use it as an inspiration in your creative process.
Tips applied:
- Hook statement in the questions form;
- Keyword included;
- Summary written in the first person;
- Value offered to the prospects;
- CTA included;
- Emojis as bullet points used;
- Text broken into small paragraphs for easier read;
- Common problems solutions demonstrated while focusing on the prospects biggest pain points.
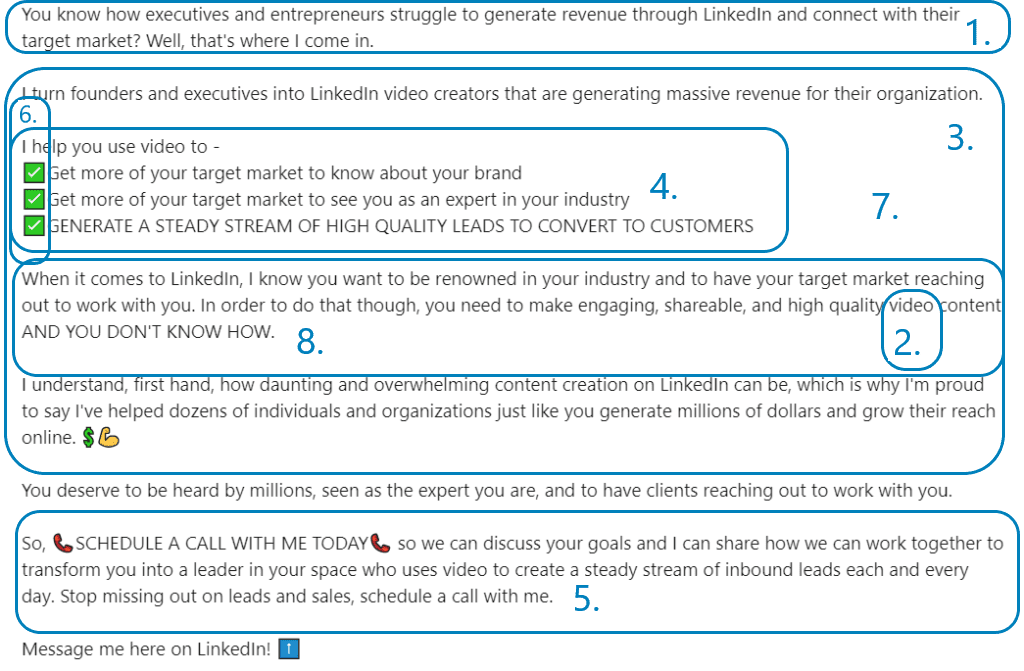
#5 LinkedIn summary example – The ”big four” answers
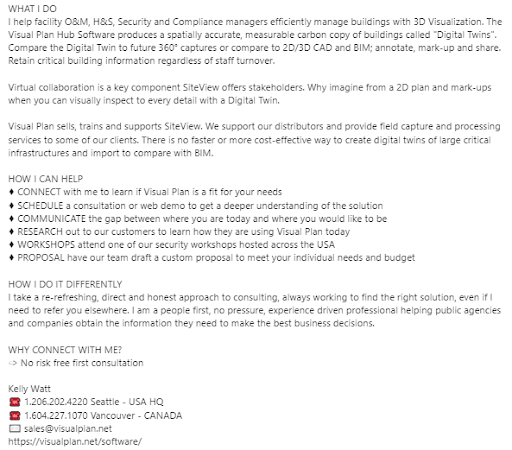
This is another straight-to-the-point example. It is well organized as it follows the structure:
- What I do
- How I can Help
- How I do it differently
- CTA
In addition, the author included many verbs and guided the prospects’ eyes by capitalizing them, which creates a sense of action.
Another great point is that he uses plain language and gives you the feeling he’s already part of the team.
Tips applied:
- Follows the structure;
- Keywords included;
- Summary written in the first person;
- Value offered to the prospects;
- Contact information included;
- CTA included;
- Text broken into small paragraphs.
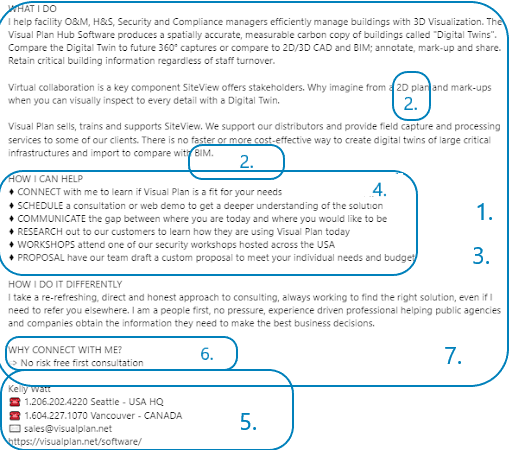
Summary about the LinkedIn summary
A well-crafted LinkedIn summary needs to compel your prospects to accept your invite and later on convert. Using any of these Linkedin Summary examples for sales will do just that, so we hope it will spark a bunch of new ideas for your own description.
First, think about how you want to present yourself on LinkedIn because the summary shows your personal brand. But do not forget, as a salesperson representing your company is that much more important.
To write the perfect LinkedIn summary, start with answering:
- Who are you, and what are your main work goals?
- What are you passionate about and why (customer-wise)?
- What is your job experience, and what have you accomplished?
- How can your product/service help prospects reach their goals?
After that, unleash yourself onto the Tips and Tricks checklist and decide if you wish to include all or some of them.
- Write your summary in the first person;
- Don’t be afraid to add some personality;
- Include some key search terms that your prospects will likely search (it will appear higher in LinkedIn search results);
- Add a context to your career;
- Let your summary be about the prospects and their goals also;
- Write common problems that you solved while focusing on the prospects greatest pain points;
- Speak about your biggest accomplishments;
- Share real metrics, awards, and figures about your accomplishments;
- Break up the content into short paragraphs and bullet points;
- Include a CTA message at the end;
- Bold or italicize parts of the text;
- Use emojis but do not overload;
- Include your contact information - make it easy for prospects to reach back to you;
- Use brief sentences.
Let the questions we mentioned be your guide, tips merely your way, and the examples your map to build a better LinkedIn summary.
Happy writing!
Are you using LinkedIn for prospecting and reaching out to your leads? Skylead is here to help you personalize, improve and maximize your outreach. See it in action - Try out Skylead for free.
Disclaimer: Skylead is not affiliated, endorsed by, or connected with LinkedIn in any way.
Making your LinkedIn profile an exceptional one is a job half done!
That’s right. Your LinkedIn lead generation strategy or prospecting on LinkedIn might be impeccable. However, if your LinkedIn profile doesn’t give out the right first impression, all your efforts will go down the drain.
Taking into consideration that 80% of social media leads for the majority of B2B marketers come from LinkedIn, you will agree that it is of utmost importance how you present yourself professionally.
You’ve probably heard many times that it only takes around 7 seconds to form the first impression.
The same applies to your LinkedIn profile.
Therefore, an optimized profile not only boosts your visibility in the search results but also helps other LinkedIn users form a first impression of you as a professional.
That’s why we prepared 15 tips to make your LinkedIn profile more appealing to future leads and potential clients.
Your (profile) picture is worth a thousand words
The first thing people notice when they find you on LinkedIn is your profile picture, your name, and headline.
Your profile picture is your first chance to communicate that you are friendly, likable, and trustworthy, crucial attributes for people to engage with you.
Therefore, make sure that you look professional, yet approachable and open to networking.
However, keep in mind that LinkedIn is a professional network. Your profile is your brand.
Therefore, selfies, party pictures, and photos where you visibly had to cut someone else from it, as well as low-resolution photos, should not find their way to becoming your LinkedIn profile picture.
Examples:
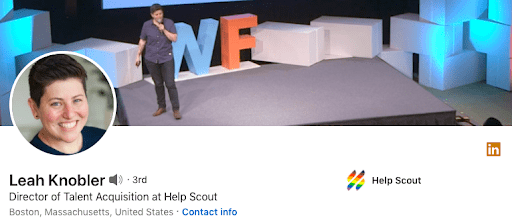
Leah Knobler went for an approachable, yet professional profile picture. She seems comfortable and open to networking. There is nothing distracting about the picture, such as her being in an informal setting. Quite the contrary, the blurred background keeps the focus on the actual user of this LinkedIn profile.
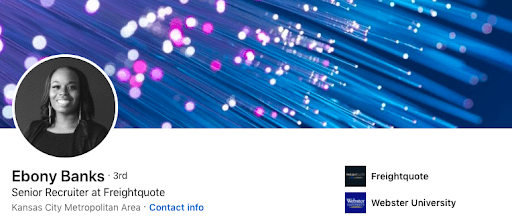
You can never go wrong with an en-face profile photo. Furthermore, Ebony Banks took a picture in a professional outfit with a matte background.

It is pretty self-explanatory why these pictures are inappropriate. LinkedIn is a professional network, and as much as you want to seem approachable, putting a party picture will for sure give out a wrong impression. Furthermore, posting a picture where someone has been visibly cut off, let’s be honest, doesn’t look neat on any social network.

The same rules apply to pictures that are visibly from private (non-business-related) events such as weddings. As much as you want to post a picture in a suit, make sure that you have a professional background, and that you are preferably not wearing a flower.
Move with the times: Add a cover story
The LinkedIn mobile app gives you the chance to create a 30-sec video and add it to your profile picture.
Namely, your LinkedIn profile photo will still be visible to other users. However, if you put a cover story as well, an orange ring will appear around it. It will be a sign that if they click on it, they will have the chance to know a bit more about you.
A cover story is a great way to introduce yourself better to other users, articulate your career goals, provide a sneak peek into your personality, and showcase your communication skills.
Additionally, LinkedIn gives you the option of adding three hashtags that best describe your topic. This way, you will give a short insight into your professional story to those who visit your LinkedIn profile.
Your cover has your back
Don’t underestimate the role of the cover photo in your LinkedIn profile aesthetics.
Data shows that humans only remember 20% of what they read, but 80% of what they see.
Having the logo of the company you work for or a creative yet connected to your professional background cover turned out to be making a major impact when connecting with other LinkedIn users.
Here are a few examples of highly creative, yet professional and industry-related cover photos.
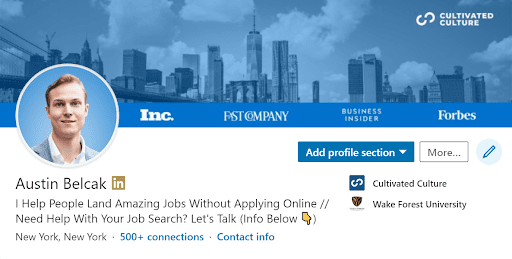
Austin Belcak went for the cover that showcases his company name, all the industry-related prominent magazines where it appeared, as well as the picture of the city where they are located.
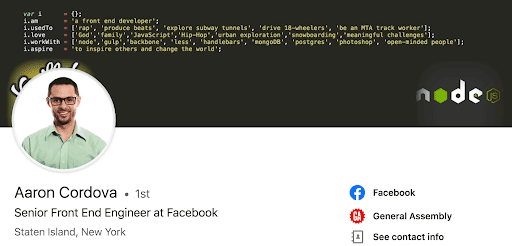
Aeron Cordova went for an “industry-related”, creative way to draw attention to his profile while listing his profession, interests, values, experience, and aspirations.
On the contrary, leaving your cover blank or putting a photo that is not relevant to your field, might seem unprofessional. It could leave your users with the impression that you don’t give much importance to your online resume.
For example, putting a picture of you doing yoga is acceptable only in case you work as a yoga instructor, or in that particular field. However, if you are a doctor or an engineer who does yoga as a hobby, this move might seem a bit awkward for those who are trying to connect with you on LinkedIn.
So, leave these choices for other, more casual, social media networks.
Win them over with your headline
Usually neglected and underused, the LinkedIn headline is the part of your profile that catches most of the attention.
“Content Marketing Consultant at Drift” is such a passé.
Therefore, be bold enough to go for more than just the default headline.
When deciding what you should write, think about:
- The benefits that people get out of working with you;
- The value that you bring to their businesses;
- The specific niche of your expertise;
- Including keywords that other users are likely to search.
For example:
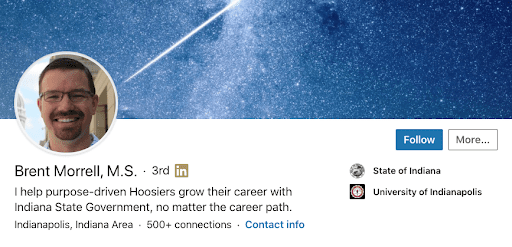
Brent Morrell points out the benefits you can get out of working with him, such as growing your career.
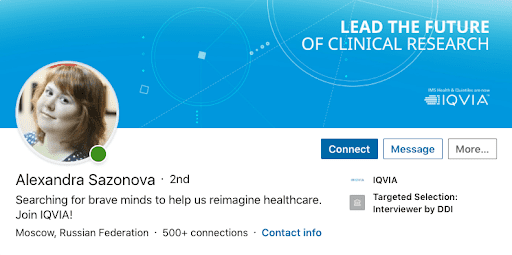
Alexandra Sazonova highlights the value of her work in a particular area, such as healthcare.
If you would like to know more on how to write a good headline, check out our blog “13 LinkedIn headline examples with templates for lead generation". Get inspired!
Write an attention-grabbing summary
First of all, leaving the summary blank is a huge mistake!
With just a little bit of effort, you can write a great summary that draws the attention of your future leads, customers, or recruiters (depending on what your professional goals are at the moment).
When writing your summary section, have in mind that most users see only the first 300 characters (out of the total of 2000). Only if clicking on “Read more” will they get the full description.
Therefore:
- Start Strong;
- Use Keywords;
- Mention your greatest accomplishments;
- Point out your goals and ambitions;
- Include your guiding principles.
Here’s an example of an out-of-the-box, attention-grabbing summary.

Or of a strictly professional, yet effective one.
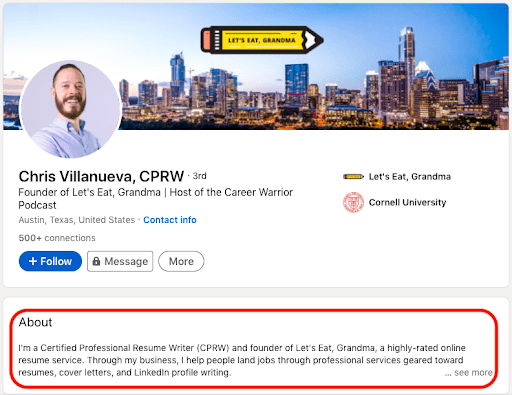
If you would like to know more about what makes the perfect summary, check out “top 5 summary examples to reach more sales”.
Grow your network
The first thing you can do to grow your network is to import your list of contacts.
Once you set up your profile, LinkedIn will give you the opportunity to run an upload of your address book contacts.
In case you skipped that step, and would like to do it at another time, follow these instructions:
- Click the My Network icon at the top of your LinkedIn homepage;

- Choose Connections on the left rail;
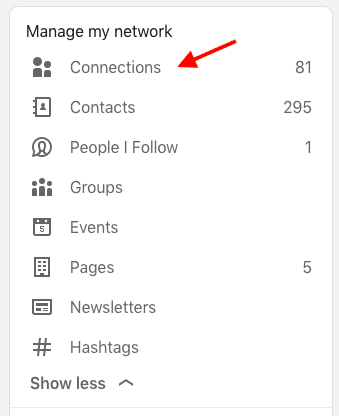
- Go for More options on the right rail;
- Type your email address in the field provided, or choose a service provider from the list below the text box. If your email provider is not supported, you can still invite people to connect by email;
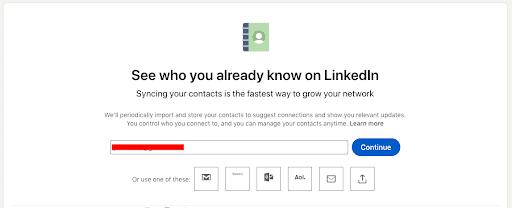
- Click Continue.
You’ll be redirected to a list of your contacts who are already on LinkedIn. You can:
- Check the boxes next to contacts you want to invite;
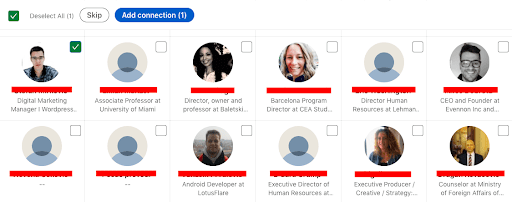
- Click Add Connections to send invitations;
- Click Skip if you don't want to invite anyone.

Of course, you can also add your connections manually through the search option at any time.
Show off your skills
The “Skills & Endorsements” section is one of the most important ones on your profile.
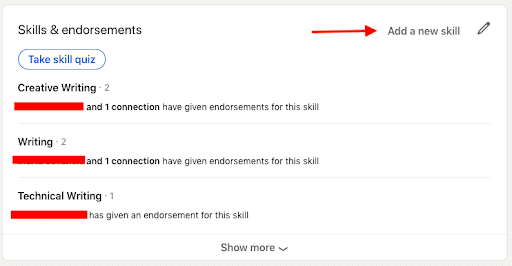
Did you know that people who have five or more skills listed are contacted up to 33 times more by recruiters and other LinkedIn members?
While you want to list a lot of skills, you also want to list the right skills.
Therefore, be honest with yourself and your profile visitors.
List the skills you truly possess and find relevant for your connections to know.
If you have difficulties specifying them, search for profiles with the same or similar job titles in your industry. See what skills these users have listed and check which ones apply to you and to what degree.
However, there is one catch. Once you delete a skill on LinkedIn, you cannot list it again. Be clever with what you choose and/or remove.
Endorse and you will be endorsed
Endorse others for their skills.
Not only is it polite to show some support to your 1st-degree connections, but they will also be more eager to endorse you.
The more endorsements you have, the more your LinkedIn profile will be appealing.
Furthermore, rumor has it that endorsements affect the algorithm. Namely, your profile is more likely to show up in searches if you have any. This is not confirmed, but even if it wasn’t true, having plenty of endorsements positively influences your acceptance and response rates for sure.
Besides the visibility, it simply gives out the impression of you being a well-skilled, responsible individual. And that is what all LinkedIn users want, right?
Get recommended
A recommendation is a commendation written by a LinkedIn member to recognize your work.

You can ask for a recommendation from the 1st-degree connections you work with or have worked with, whether a client or a colleague.
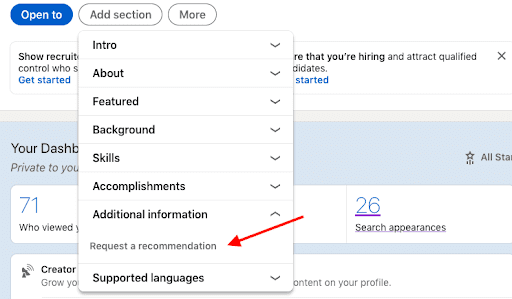
Having one or more recommendations on your LinkedIn profile will significantly boost your chances of getting noticed and/or accepted.
This means that you are the type of person who makes an impact at the workplace. Your colleagues value your contribution and are willing to put their name behind yours. It’s huge.
So if you think there are people who would gladly do that for you, go for it!
Include industry-related keywords
Whatever you are filling out at your LinkedIn profile, make sure to use the top keywords for your industry.
Before creating your online brand, think about which keywords are most sought for by your potential clients, co-workers, recruiters.
Once you have the list, use them wisely throughout your profile.
List your professional experience in a concise manner
Your LinkedIn profile is your online resume.
When you are sending your regular CV to employers or potential partners, it is not smart to list everything you’ve done so far. That is, only the most important jobs and projects find their place in your resume.
This should be the case with your LinkedIn profile as well.
List only those achievements that are relevant to your current professional field or to your future goals. Describe your duties and major accomplishments by using industry-related keywords while holding those positions.
This way you will give other LinkedIn users a significant insight into your professional experience without overwhelming them. Also, they will be more interested in reading your entire profile page. Seeing a bunch of unnecessary and incoherent information can just turn them down.
Fully complete your LinkedIn profile
Once you sign up for your profile the first time, LinkedIn will automatically guide you to fully complete it.
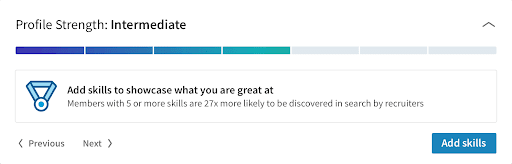
As you may see, LinkedIn will not only measure your profile strength but will also suggest (bottom right corner) what your profile is missing to be excellent.
LinkedIn wants you to prosper and expand your professional network. If you complete your profile, it will reward you with making you appear in search results up to 40 times more.
Get a custom URL
The majority of people use the URL that LinkedIn assigns automatically.
However, know that you can customize it and make it more appealing especially when posting it in your resume.
If you want to customize your LinkedIn profile URL:
- Click the Me icon at the top of your LinkedIn homepage.

- Choose View profile.
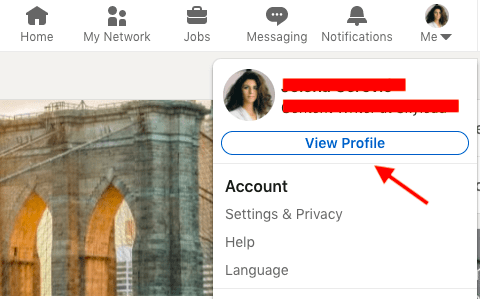
- Opt for Edit public profile & URL on the right side.
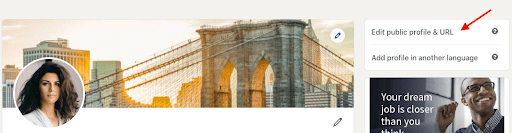
- You’ll be redirected to the Public profile settings page.
- Under Edit your custom URL on the right side, click the Edit icon next to your public profile URL.
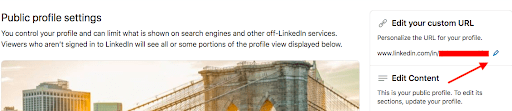
- It'll be an address that looks like www.linkedin.com/in/yourname.
- Type the last part of your new custom URL in the text box.
- Click Save.
Have in mind that your custom URL can be 3-100 characters long. Don’t use spaces, symbols, or special characters. The customizable part of the URL is case insensitive. Whether you write christianwhite, Christianwhite, christianWhite, it will all point you out to the same profile.
You can change your URL up to 5 times within six months. Once you have changed your URL for the fifth time, you won’t be able to change it for another six months. Despite having the chance to customize your URL so many times, keep in mind that it will be hard for people to find you if you change it too often.
Brag a bit in your featured section
If you click on the “Add section” you can choose “Featured”, and write out or upload any posts, articles, links, or media that you find significant for your professional achievements.
This is a great place to highlight articles and blogs that you wrote, or in which you appeared. You can leave your company’s or your personal website, Youtube videos, or any other media you think might contribute to your professional prestige.
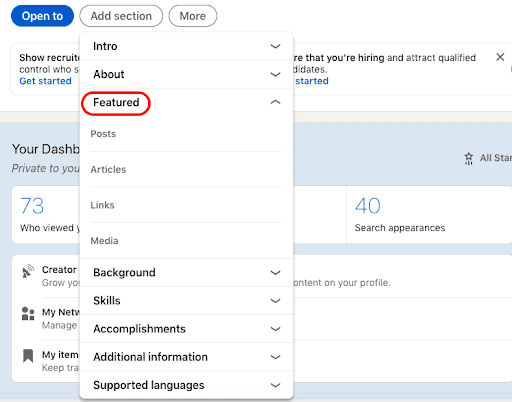
Share what moves you
Birds of a feather flock together.
The LinkedIn “Interests Area” gives you the chance to show your audience that you have a life outside of work. Have in mind that people do business with people, not machines. Therefore, by listing your interests that can and not necessarily need to be career-related, you will seem more approachable, and other users might be more likely to do business with you.
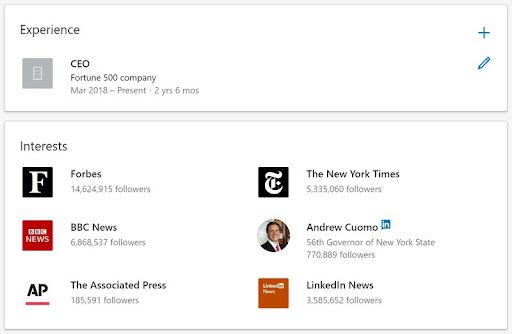
Additionally, listing your interests will not only say a lot about you, but it will also be useful for the LinkedIn search engine. People might run into your profile by researching certain interests you share (or not).
Summary
Whether you are doing LinkedIn outreach or you just appear in somebody’s search results, your LinkedIn profile is a synonym for the powerful first impression. Or quite the opposite.
Therefore, make sure it’s on point.
Also, in case you are going for an sales engagement tool, Skylead might just be the right choice for you.
Schedule a demo call with our specialist and see how you can benefit from everything that Skylead has to offer.
If you are already a user and have questions about improving your outreach, feel free to reach out to our customer care and success team via chat on our website!
We are waiting for you.