How to use any CRM with Skylead [webhook explained]

CRM software became an essential part of the sales workflow. However, with manybenefits to count for, using CRM alone simply won’t be enough if you wish to optimize your sales engagement process.
That’s where Skylead comes in - the LinkedIn automation tool and cold email software that helps you optimize your sales engagement efforts so you can focus on closing more deals.
Only is it possible to integrate your CRM with Skylead and use them together? Why yes. Yes, it is.
Thus, in this article, we will show you the process of Skylead and CRM integration using webhooks.
What is a CRM integration?
CRM integration stands for connecting a CRM with third-party systems, such as sales tools. In other words, by linking your CRM with the other tools, you allow these systems to exchange or transfer data effortlessly. Consequently, this will make your CRM more functional and operational.
By integrating CRM, you will experience multiple benefits. Firstly, you don’t need to navigate between the tools to find the information, as you have all the information you need in one place. Secondly, CRM integration optimizes your productivity by minimizing the time and the need to navigate between the applications. And lastly, it reduces data duplication, making your workflow cleaner.
There are two ways of CRM integration:
- Via Webhooks - triggered by the event;
- Via Open API - native integration, triggered by request.
However, not every integration can be native, as sometimes you will not have API access to your CRM. Thus in this article, we will focus on webhooks as they are a bit easier way to push your data into the CRM rather than using API.
What is a webhook?
A webhook is a type of API that automatically sends the data from one application to another. It is commonly known as HTTP push API, lightweight API, or HTTP callback. Webhook serves as a tool to push data when you do not have the possibility of native integration - aka API.
To clarify, let's go over a couple of main differences between a webhook and an API.
Firstly, the API allows two-way communication between the applications. On the other hand, a webhook is a one-way street, meaning it will send the data only one way.
Also, API is request-based. In other words, one application requests from another to receive a response. However, a webhook will trigger and send the data automatically only when a specific event happens.
Lastly, API allows you to send and receive a large amount of data. Contrary to API, webhook will extract and send a small portion of real-time data.
Here is an example:
Let’s say you wish to automatically create a deal in your CRM when a lead replies to your sales outreach. Instead of CRM asking Skylead if a lead replied all the time, it would be much easier for Skylead to send the data once such an event occurs.
So instead of CRM constantly requesting data from Skylead and spending resources, it can chill out and wait for Skylead to push that information via webhook.
Still, both have their advantages and disadvantages. Nonetheless, since API spends more resources and it is more complicated to use, webhooks are regarded as a more suitable solution for real-time data transfer.
CRM integration with Skylead
Imagine you ran a cold outreach campaign with 1K contacts. In addition, you wish to single out those interested and make a deal in your CRM. How would you do it? Well, manually, and you would spend a ton of time. Not anymore. Let’s get you set up, so the webhook sends this data automatically.
How to create a webhook?
You can create a webhook in many ways. However, keep in mind that you will need to pay an additional subscription to some webhook providers. Unless you wish to program it by yourself, that is. Thus we will take Zapier as a webhook provider as an example.
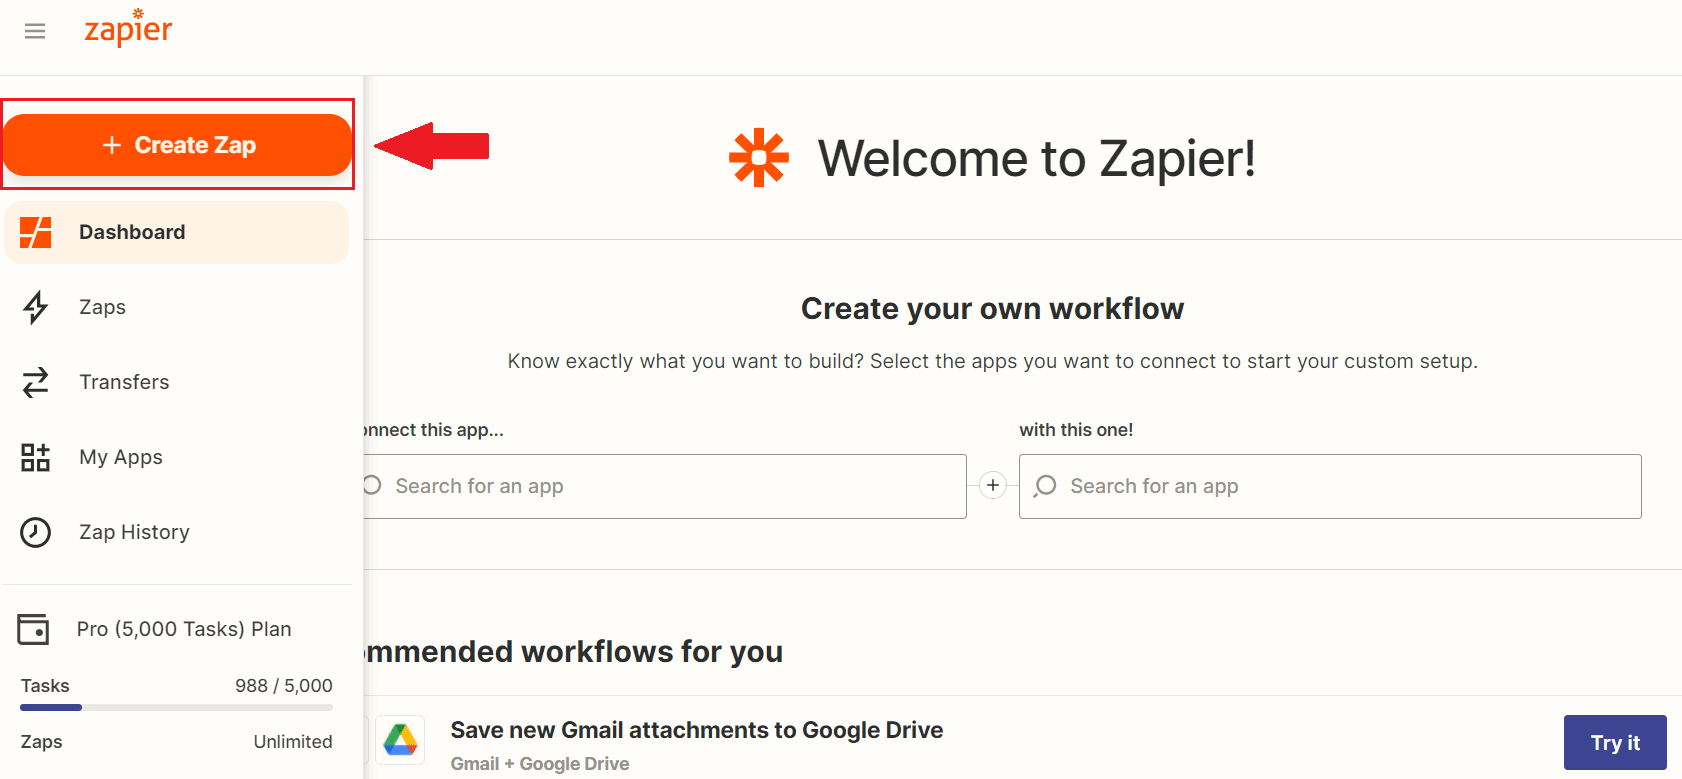
Go to the Zapier and click the “Create Zap” button in the sidebar.
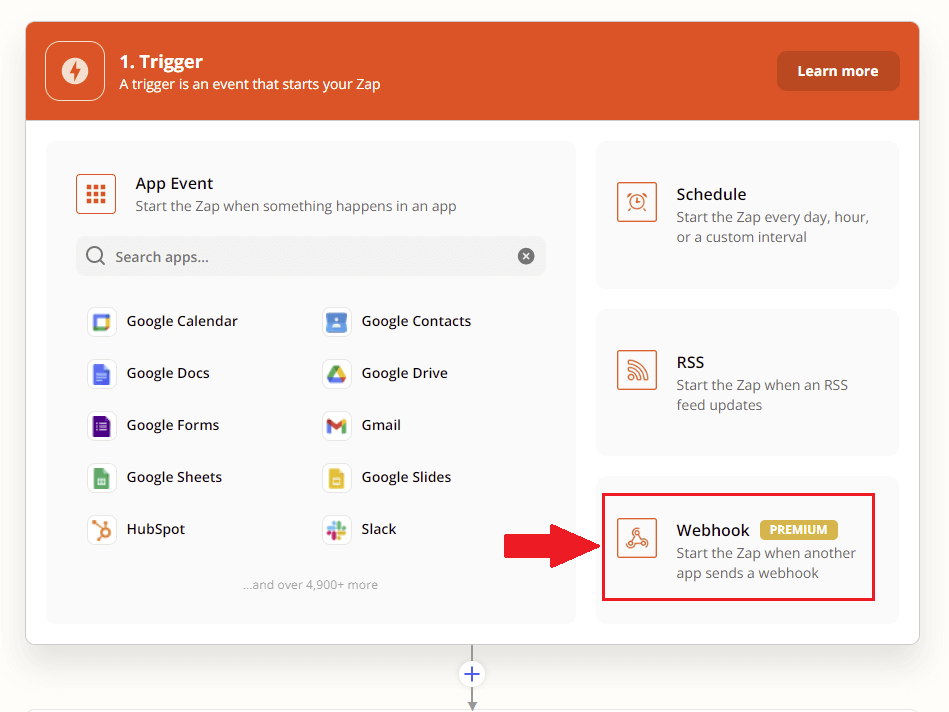
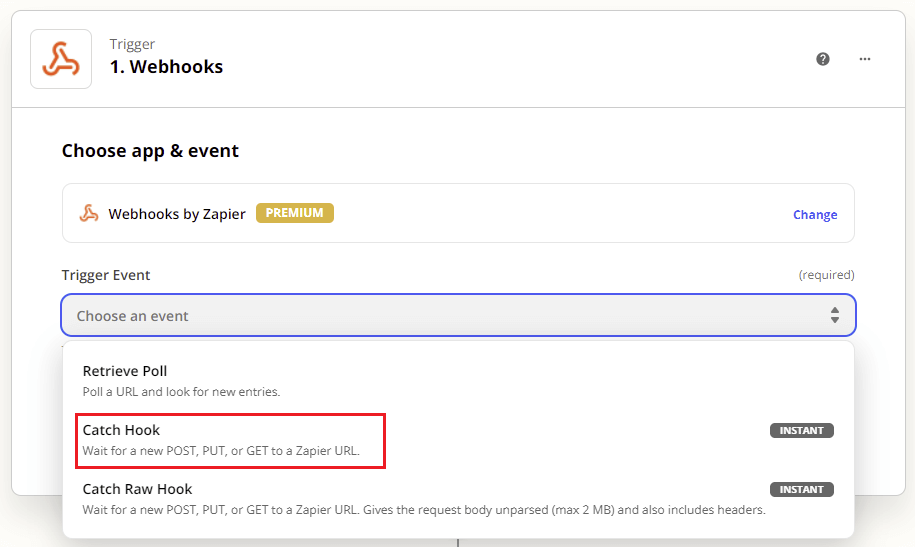
For the trigger, choose the Webhook option.
Under the Trigger Event, select “Catch Hook” and the “Continue” buttons.
Now, Zapier has created a custom Webhook URL for you to send the data. Copy it to the clipboard.
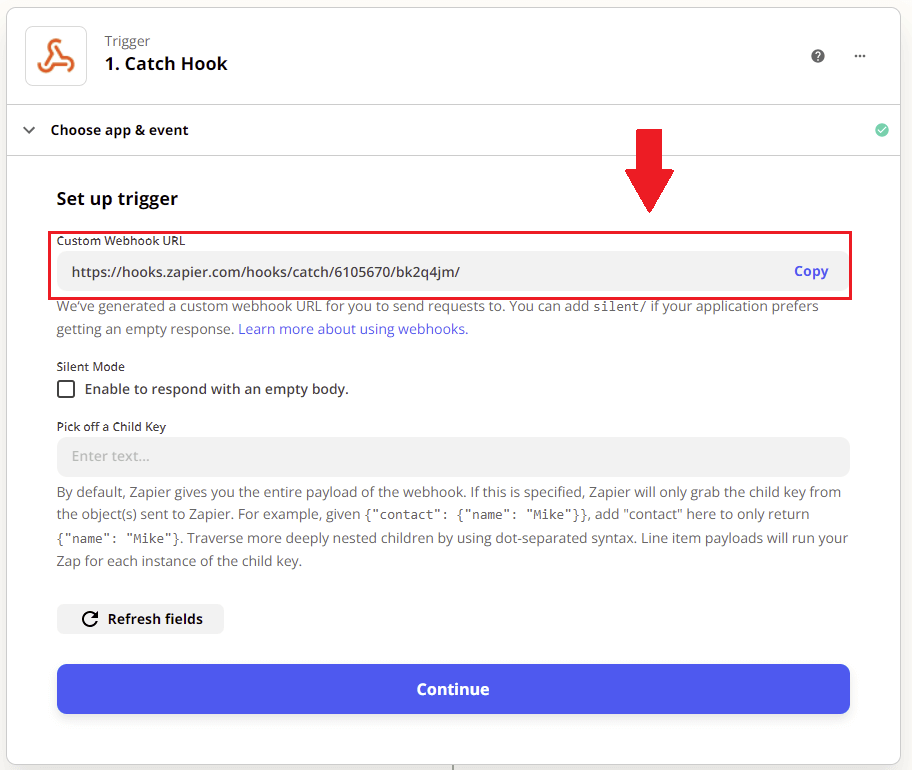
Please don’t close this window yet, as we will be back here shortly.
Webhook setup in Skylead
Open the Skylead dashboard and go to the Integrations page.
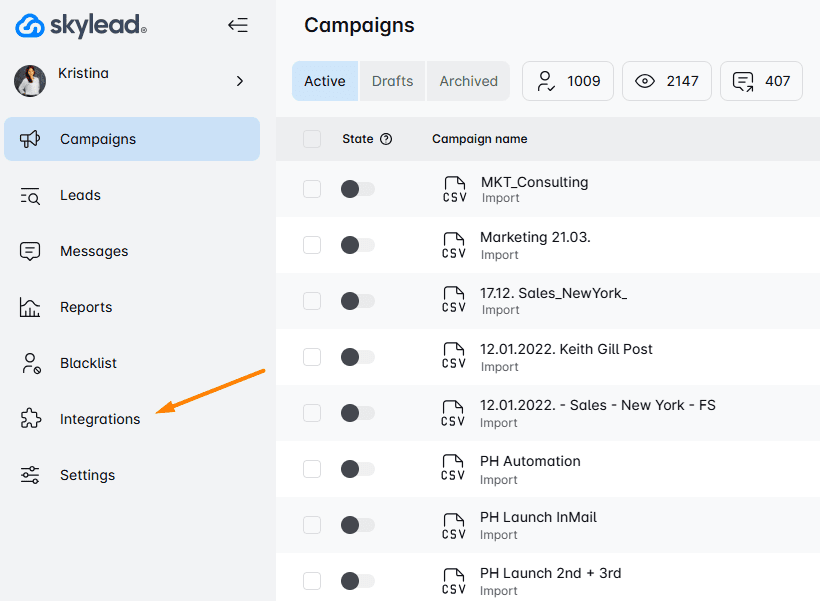
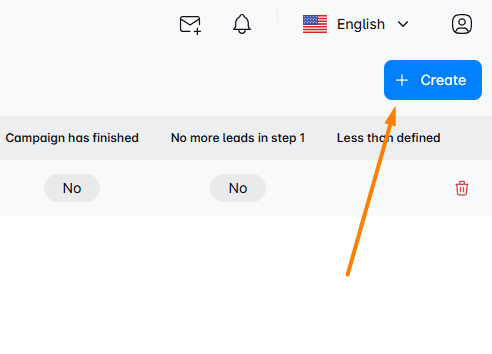
Once there, go ahead, and click on the “Create New Webhook” button at the top right of the page.
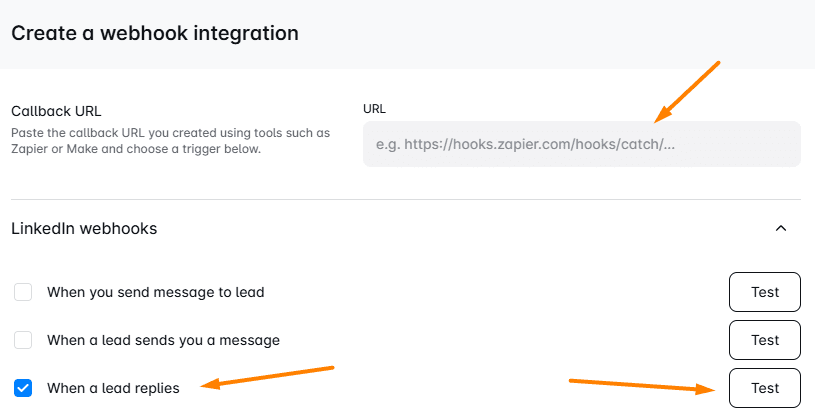
Next, Skylead will ask you what type of event you wish to occur so it can send the data to your CRM. So, choose one.
Pro tip: The most useful events to send data to CRM are When a contact replies or When a label is added. This way, you will send data to your CRM with already warmed-up leads.
Webhook setup example
So, say, for example, you wish to create a deal in your CRM when a contact replies. Thus we will choose this option. Also, be sure to paste the Webhook URL in the "Callback URL" field, and don’t forget to test it.
In addition, you can create a webhook for your active Skylead campaigns by choosing Global Webhook. This way, you create the webhook for all past, present and future campaigns, so you don’t have to create new webhooks all over again. Or, if you wish for a webhook to fire only for some active campaigns, choose Let me select individual campaigns.
Once you have everything set up, click the Submit button.
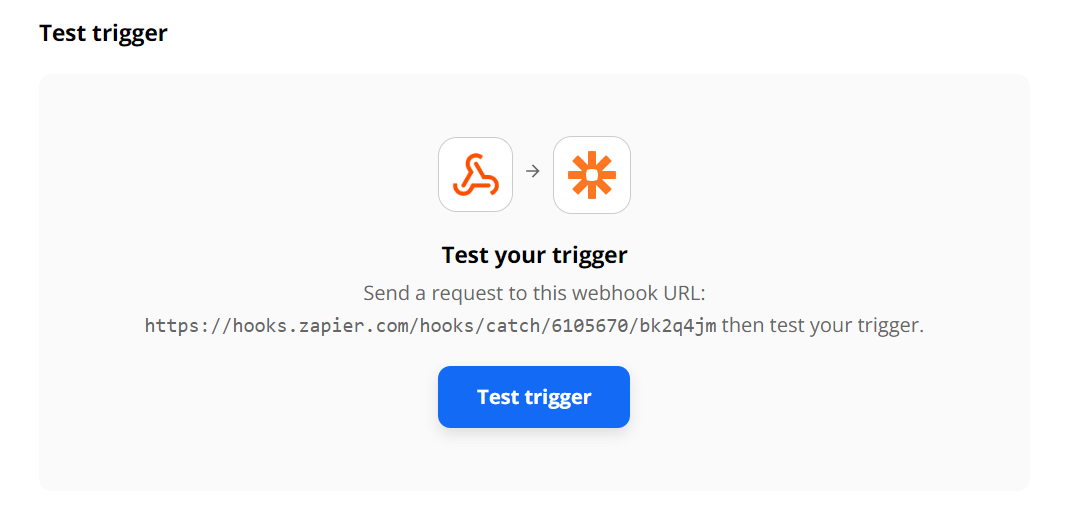
Test your webhook trigger
After you’ve done your work in Skylead, you need to go back to the Zapier to finish the set-up there. To test your trigger, click the Continue button. Next, go ahead and click the Test trigger button.
In addition, if the test ends up unsuccessful, you need to copy and paste the Webhook URL again in Skylead. But if you copied right, to begin with, everything should be good.
Once your test goes through, you will see all the information that Skylead can collect.
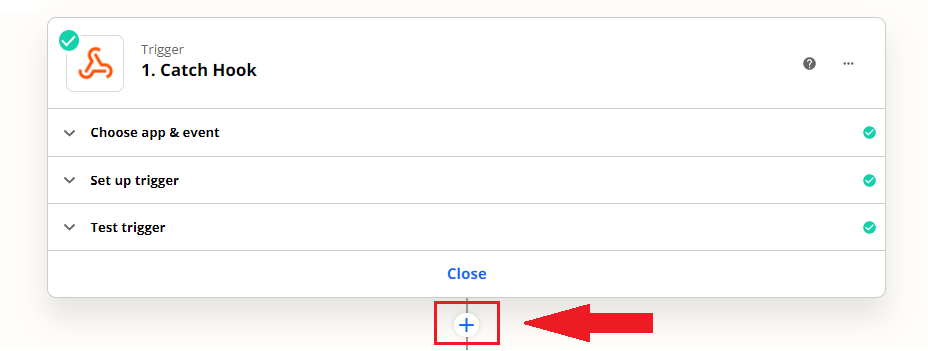
Creating actions in your CRM
Let's move on. To get to the Action stage click the + button.
Here you can choose the tool where you want to send your information. In other words, choose your CRM of choice. For example, we will use Pipedrive.
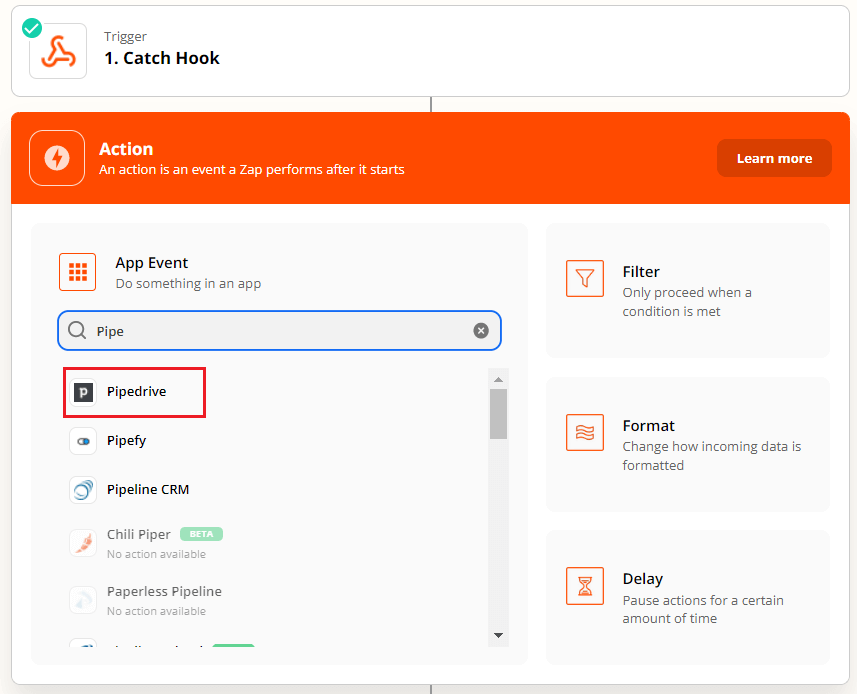
Now, to make a deal, you can first set an action to create an organization and person page in your CRM. To clarify, this will help you link them to the deal and add more information on each.
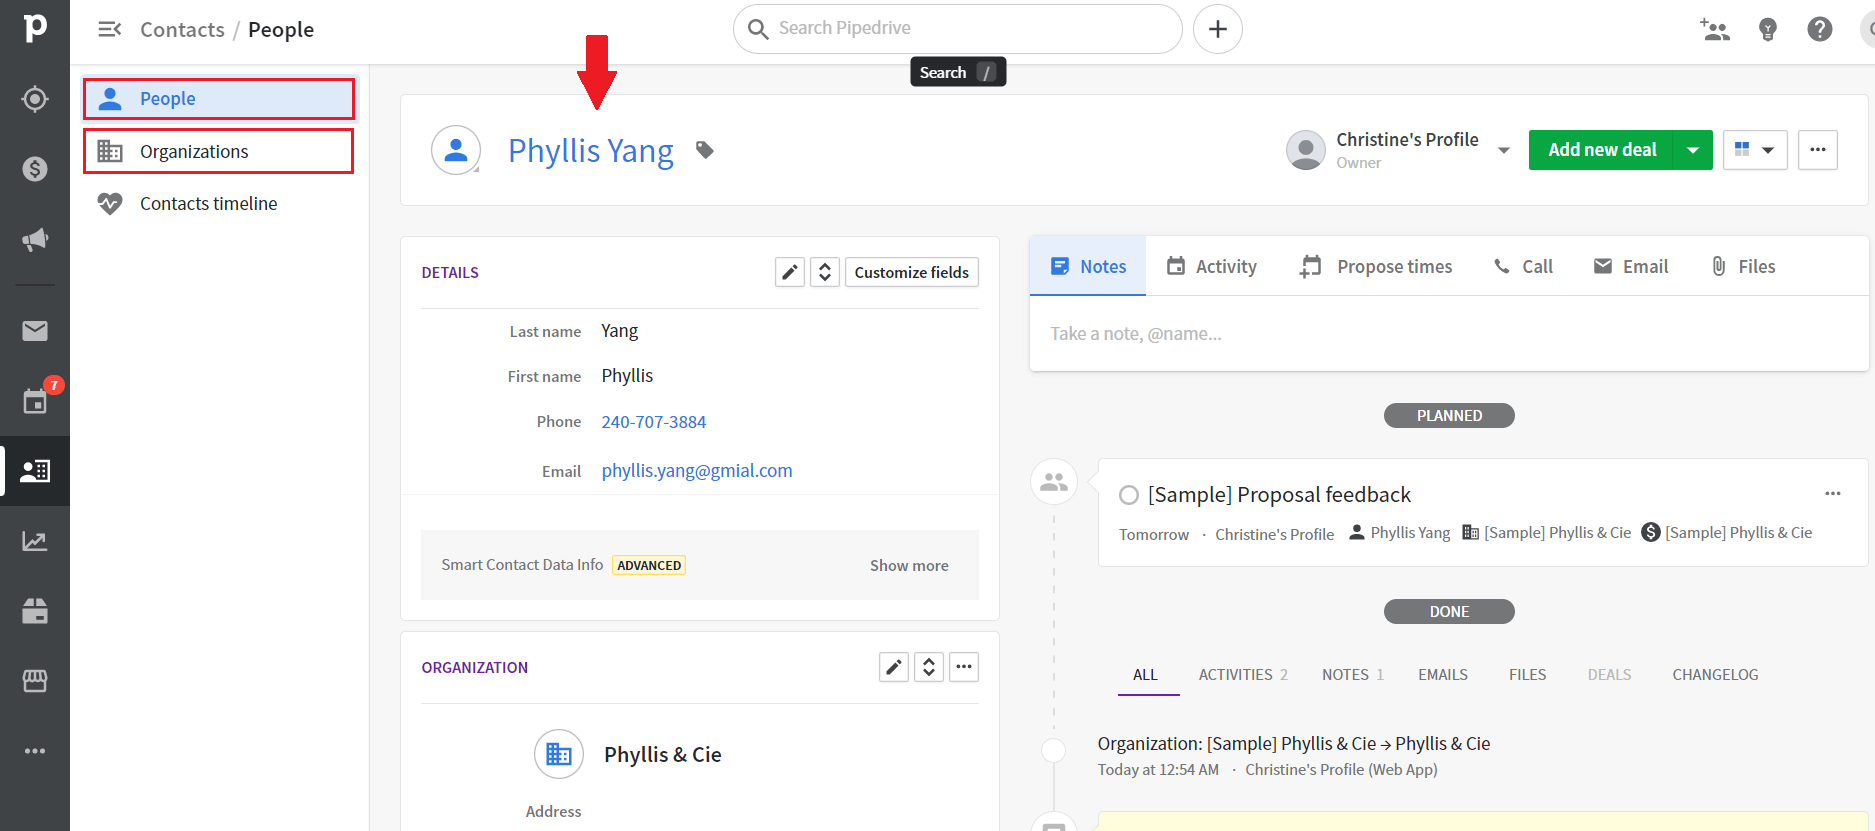
Here is what an example lead page looks like in Pipedrive.
Create an organization page in CRM
Let's start with an organization. For an Action Event, pick Create Organization.
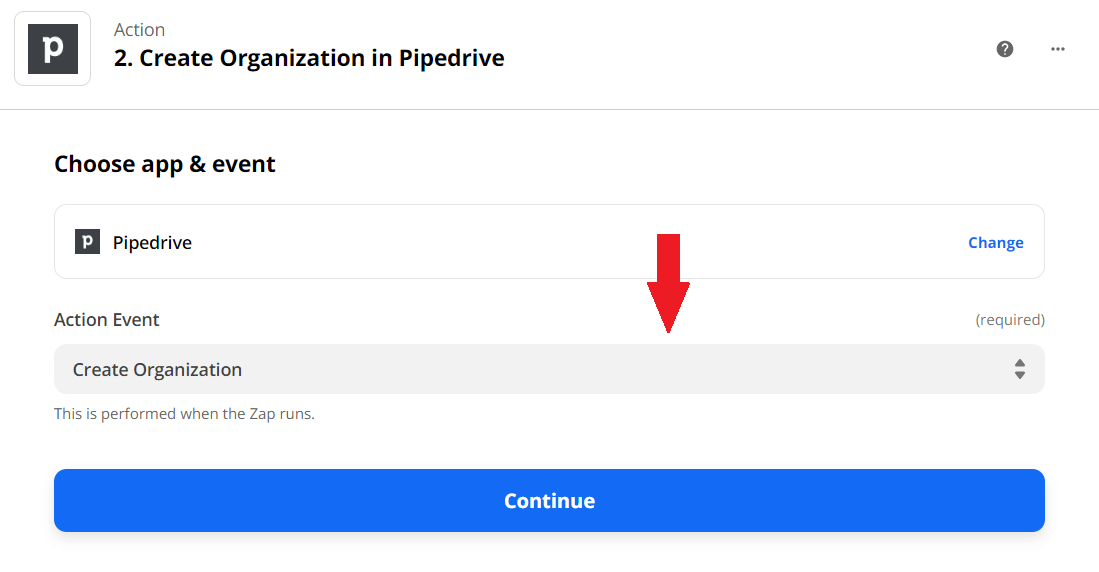
Then, click the Continue button and choose your CRM account. If your account is not listed there, you need to link it to Zapier first, using the +Connect a new account button.
Now, to set up action details. In the Name column, select Current Company under Catch a Hook. Please don’t worry about the name next to the current company. This is just a name drawn from your webhook test. To clarify, this serves as a parameter for any future data that will be sent to your CRM.
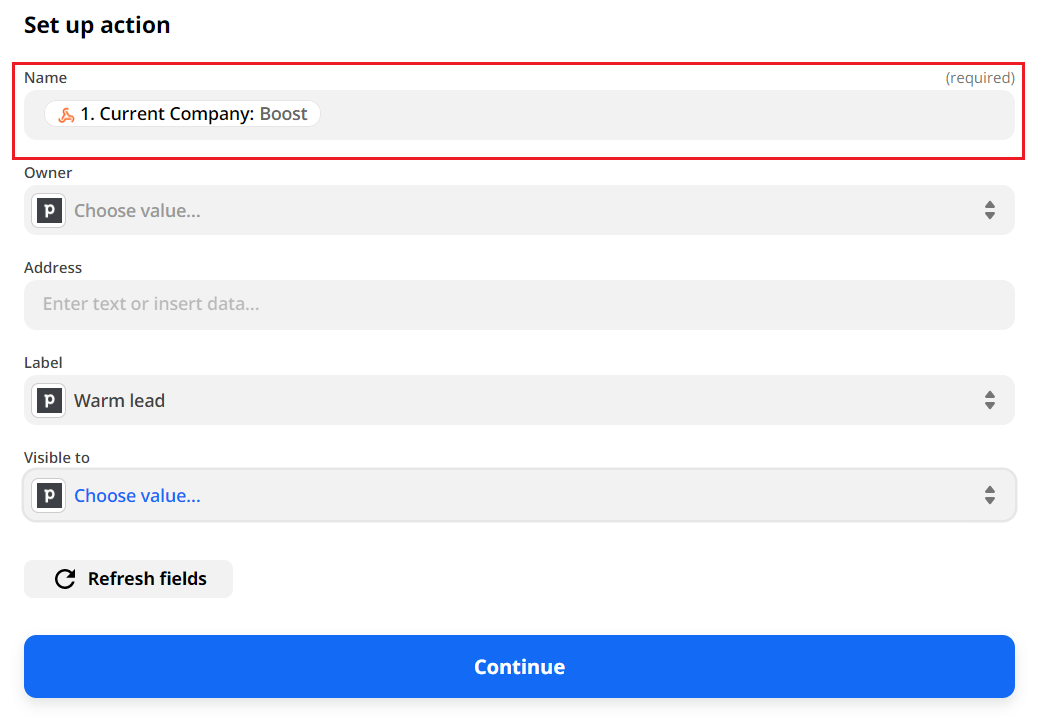
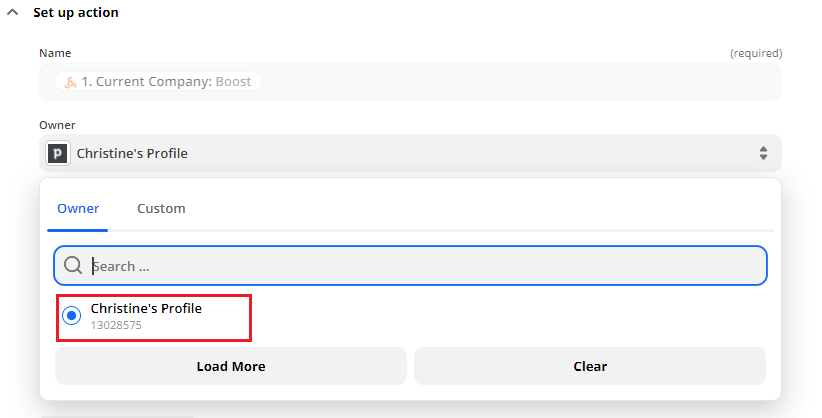
Secondly, if you wish to assign this company to a user from your CRM, select their account under Owner.
Furthermore, if you want to label the company in your CRM, you can do so by inserting the label option. After you’ve done it, click on the continue button and perform a test again.
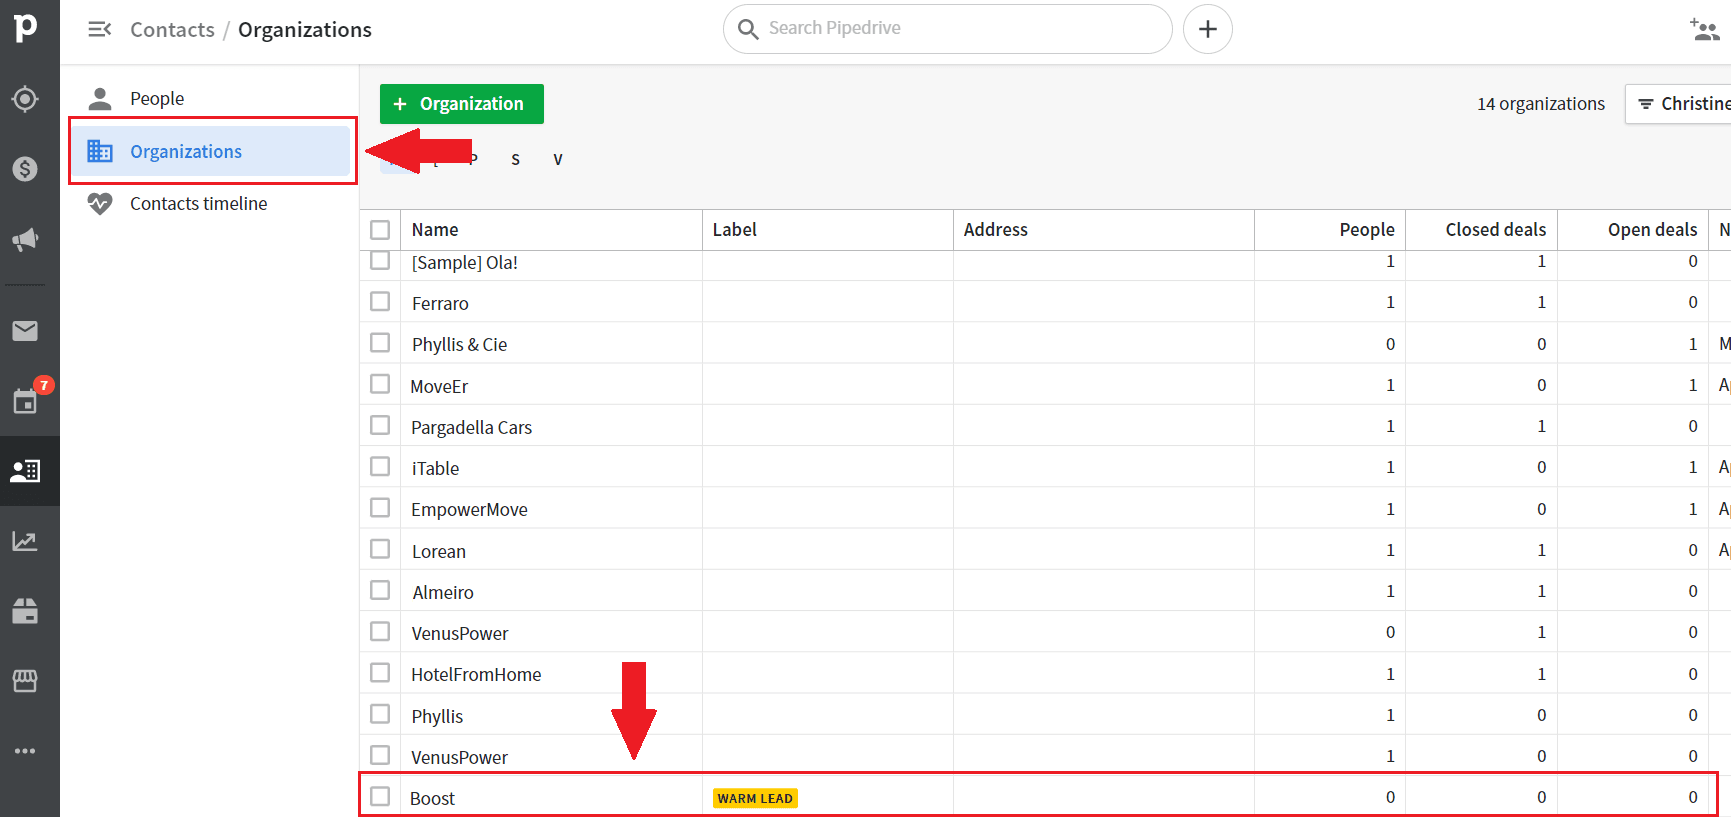
Once you finish the test, go to your CRM and check under Organization, and you will see your test organization there.
Crafting a person page in CRM
Similar to the previous step, you need to choose your CRM and click the Create Person button.

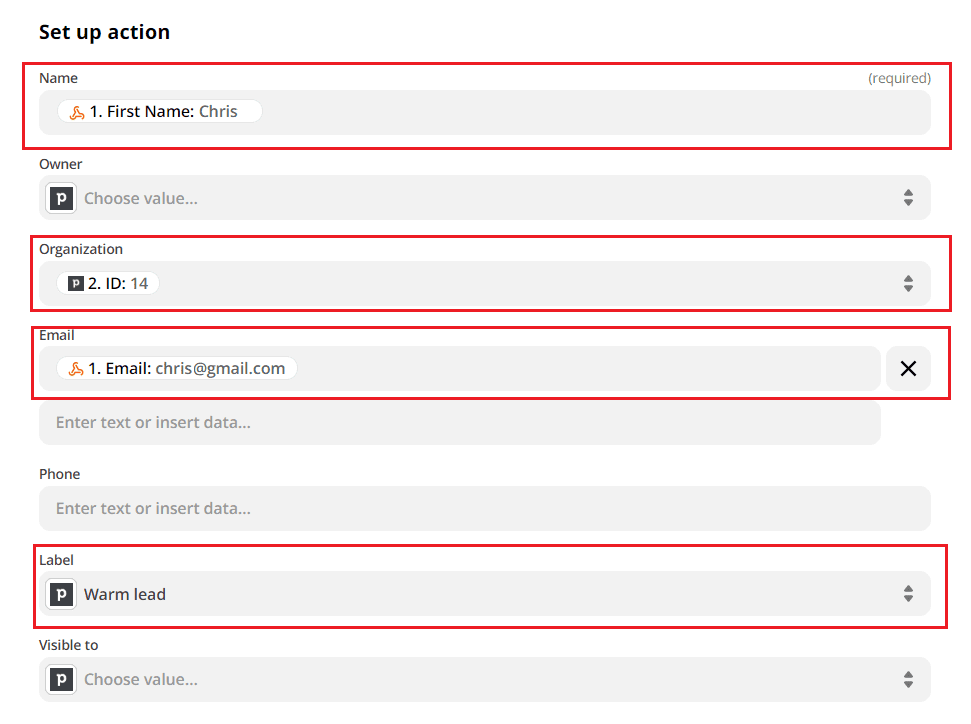
Now define the specifics of your Person page. For the name, choose the first name and/or the last name under the Catch hook from the menu. Secondly, choose the business or personal email address that the webhook caught. To clarify, if you use the Email Discovery feature in Skylead, then webhook will certainly pick this information up, and you will be able to send it to your CRM.
In addition, you can set your CRM label, who of your colleagues should be an owner, or see the Person page and access it.
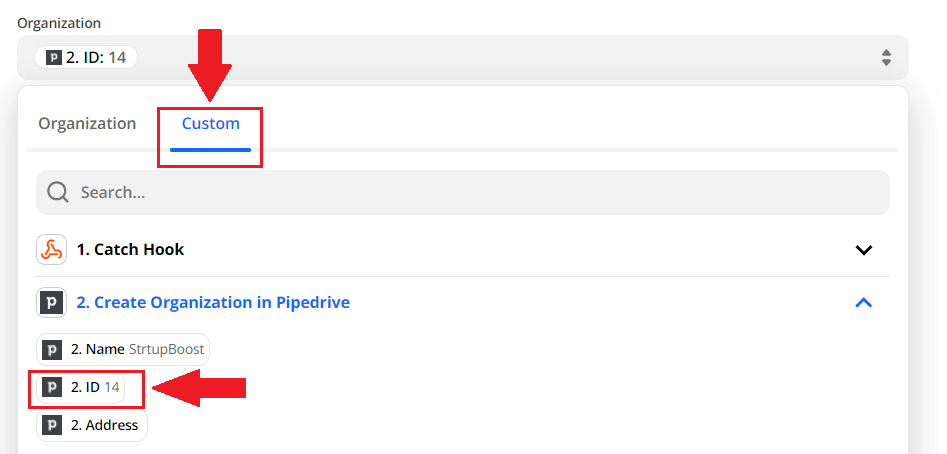
On the flip side, choosing an organization field is a bit different.
Since you need your Person and Organization page inter-linked in your CRM, you need to click Custom from the menu for this step. Then navigate to find the ID of the previous step under Create Organization in the Pipedrive. This way, the pages will be linked as soon as they are created. In other words, when Skylead sends data to your CRM via webhook.
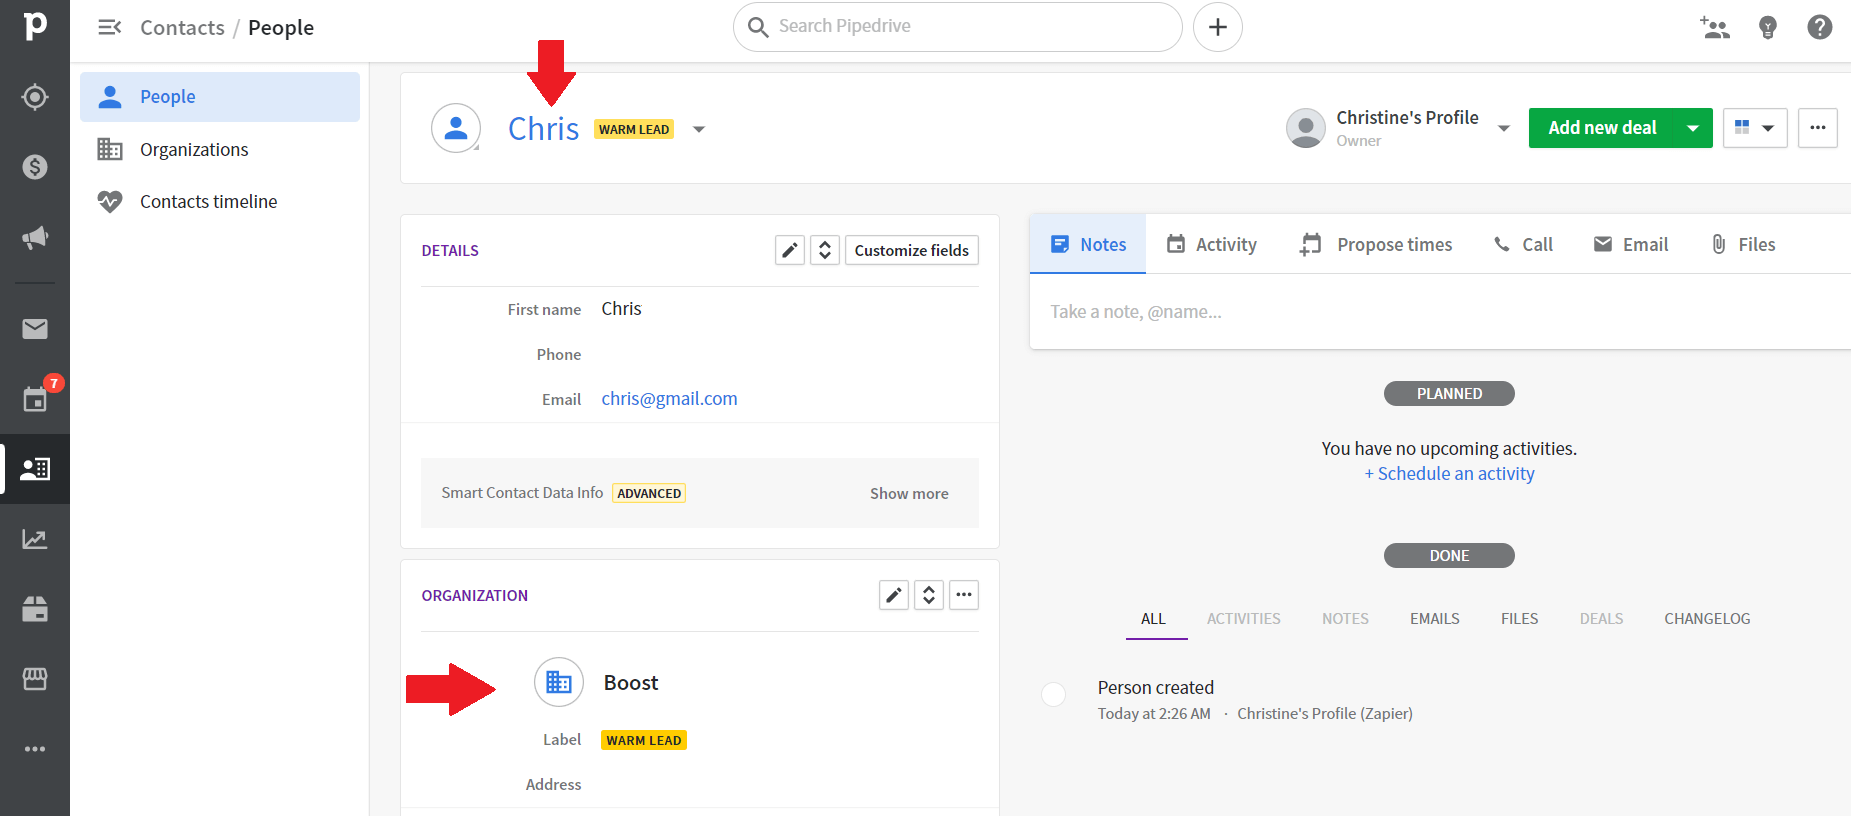
Now, go ahead and test this action. Then, go to your CRM and find that lead’s page. Here is what a newly created lead page looks like in Pipedrive after we’ve tested the action.
Deal creation
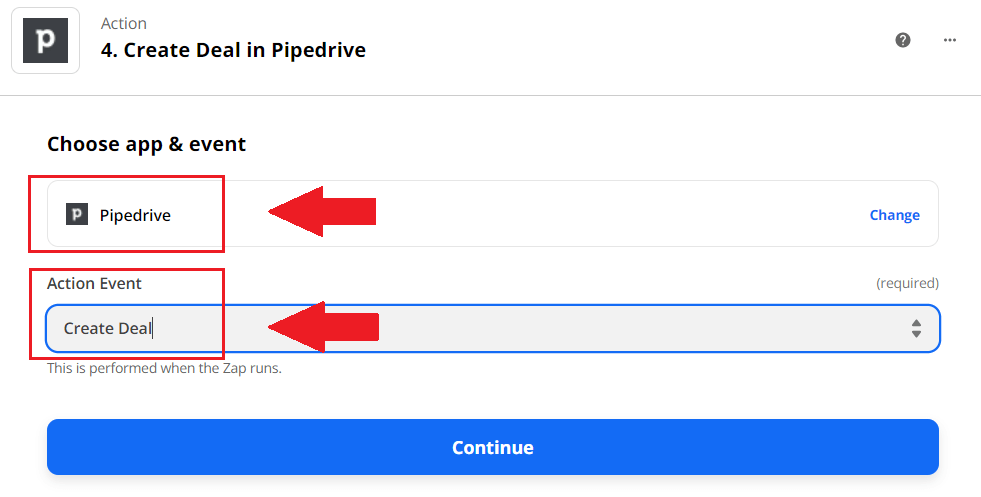
The time has finally come to create a Deal for your CRM. Once again, go through picking your CRM from the drop-down menu. Then, choose to Create Deal from Action event.
Firstly, you can choose the title to contain either a person’s name or company. Secondly, you can define the creation date by selecting the Last step executed parameter under the Catch hook.
Moving on, define the status, stage, and other values you find relevant to you. However, be aware of Organization and Person fields. Once again, you would need to link a Deal with your previous step. Thus choose Custom from the menu, and navigate to find ID both for organization and person.
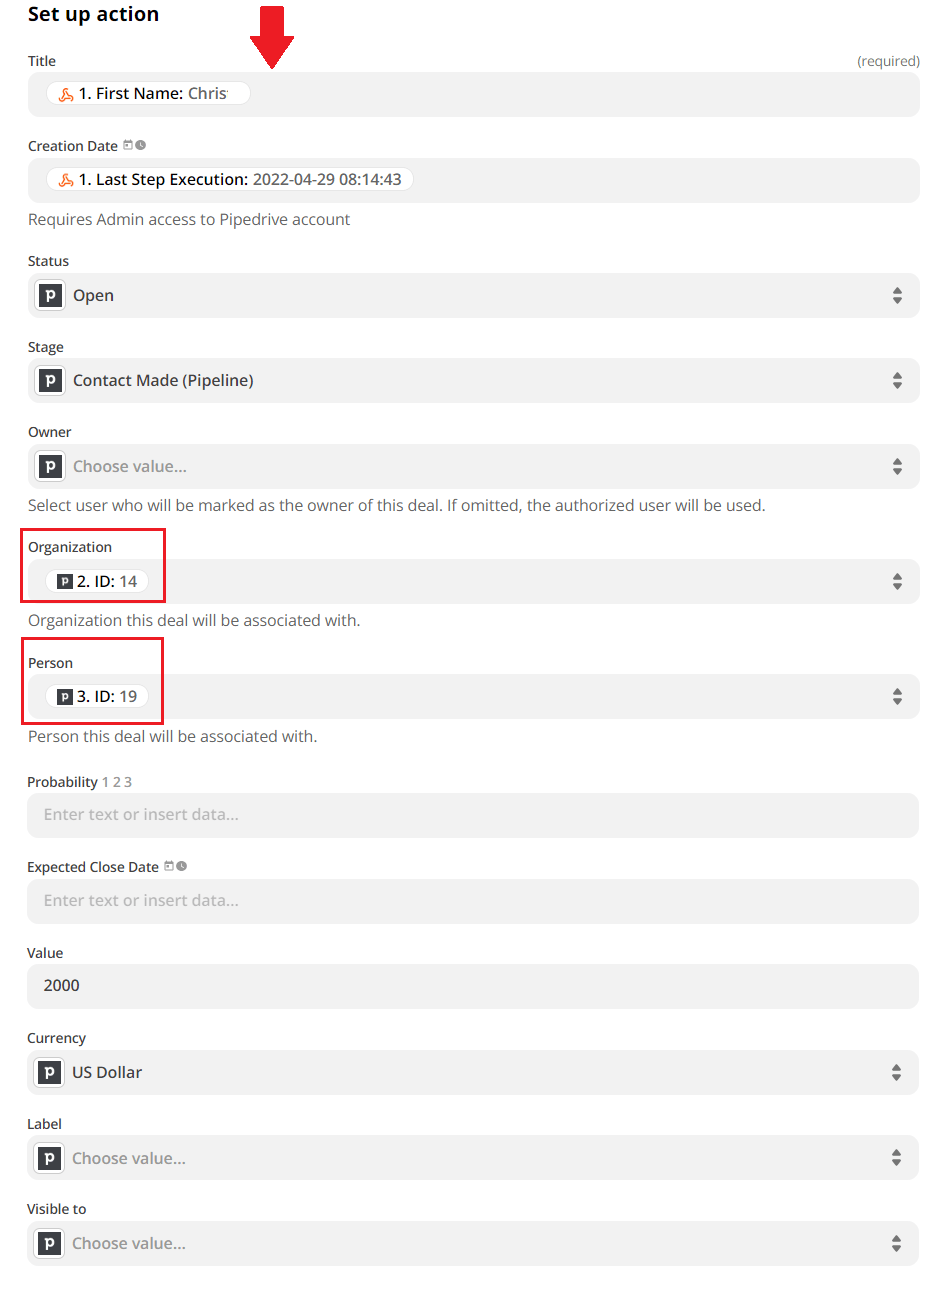
In addition, you can fill in other fields, as well. These fields are optional and entirely dependant on your business needs.
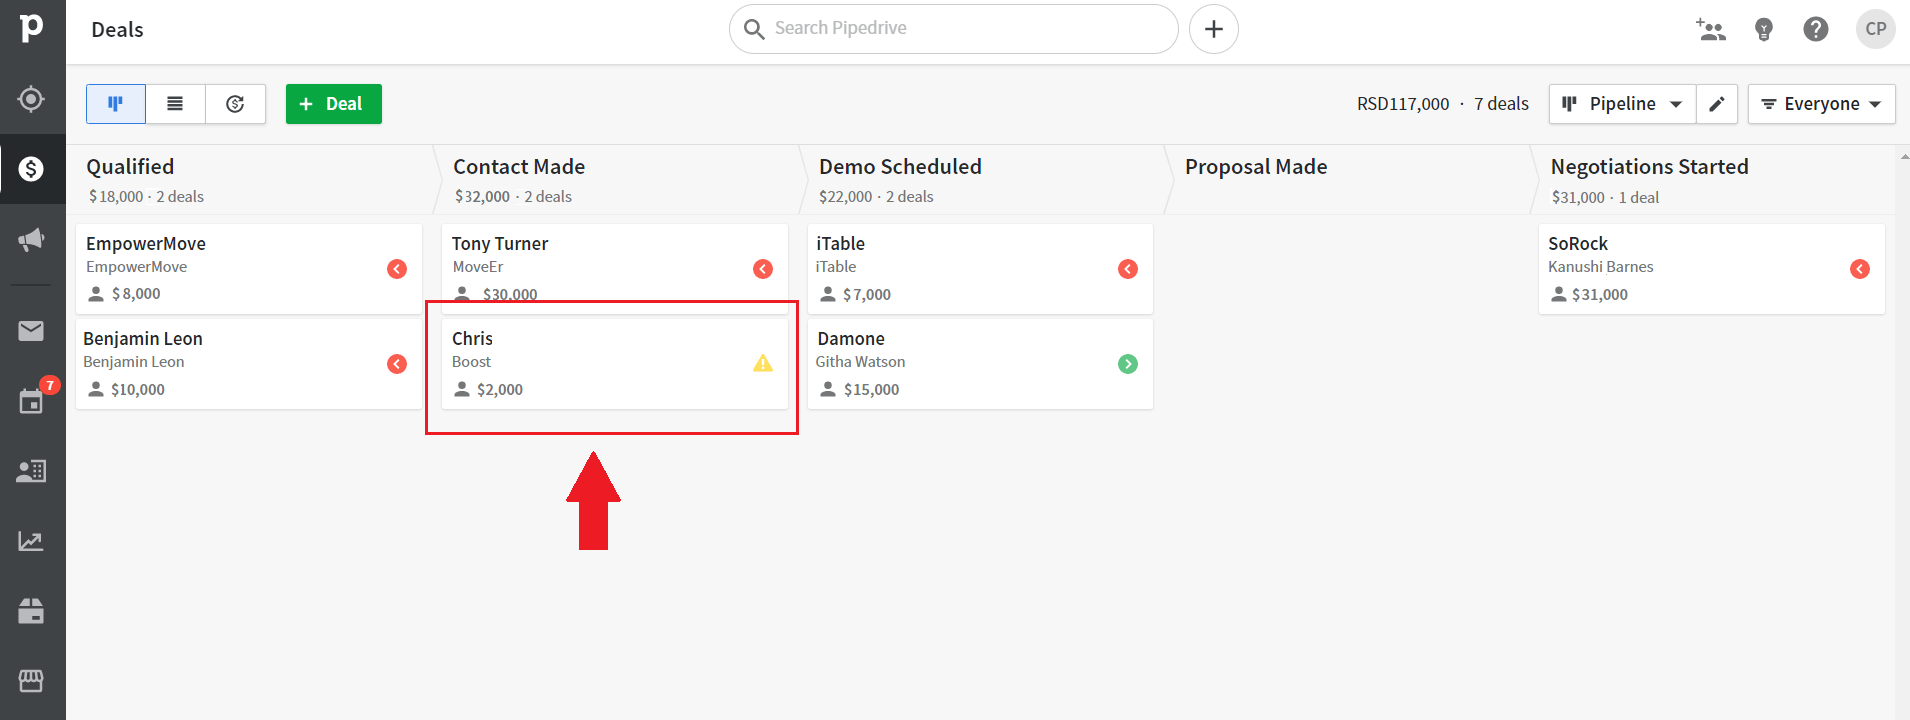
Now, you are done! The only thing left to do is to test it and see how it looks in your CRM. Voila!
Creating additional actions
If you wish to use webhooks to their fullest, you can try out different actions, apart from creating deals, companies, and persons. Here are a couple of additional actions that you can explore and test.
Note creation
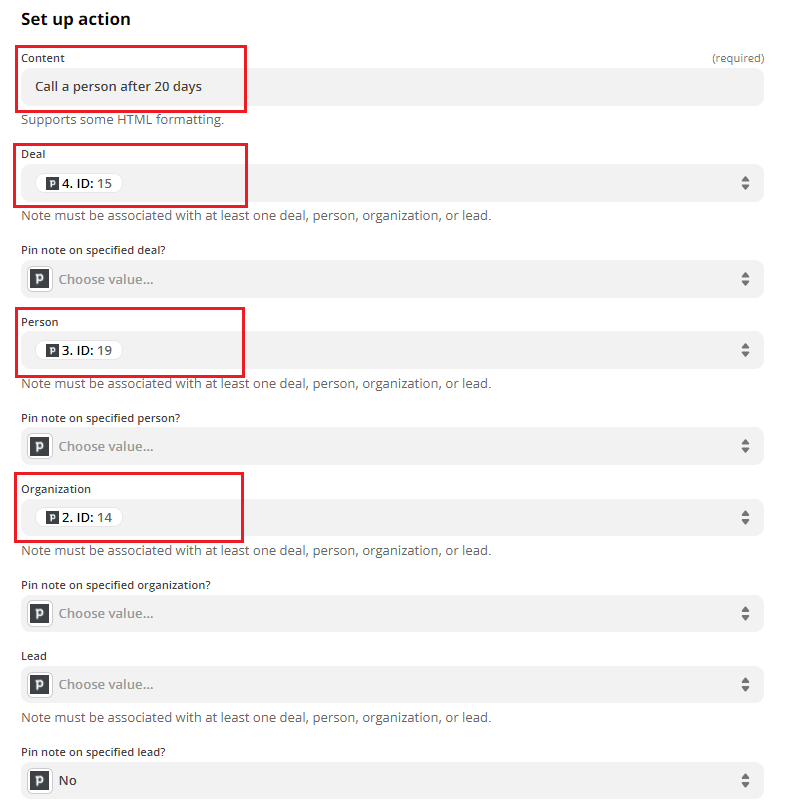
If you wish to pin a specific note to your person page in the CRM automatically, you can choose to create one in your CRM via webhook. For example, let’s say you wish to add a generic note to call every person in 20 days. Here is what the setup should look like.
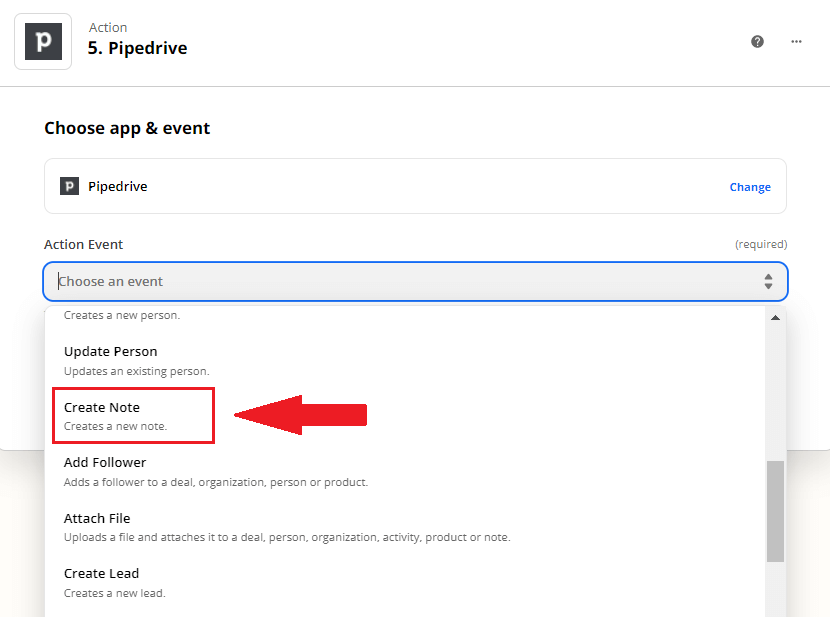
Firstly, click the + button using the existing webhook flow, and select the CRM of choice. Then under Action select Create Note.
in the Content field, specify what the note should contain. Secondly, to link it to a specific deal, person, and organization, choose their IDs from previous steps accordingly.
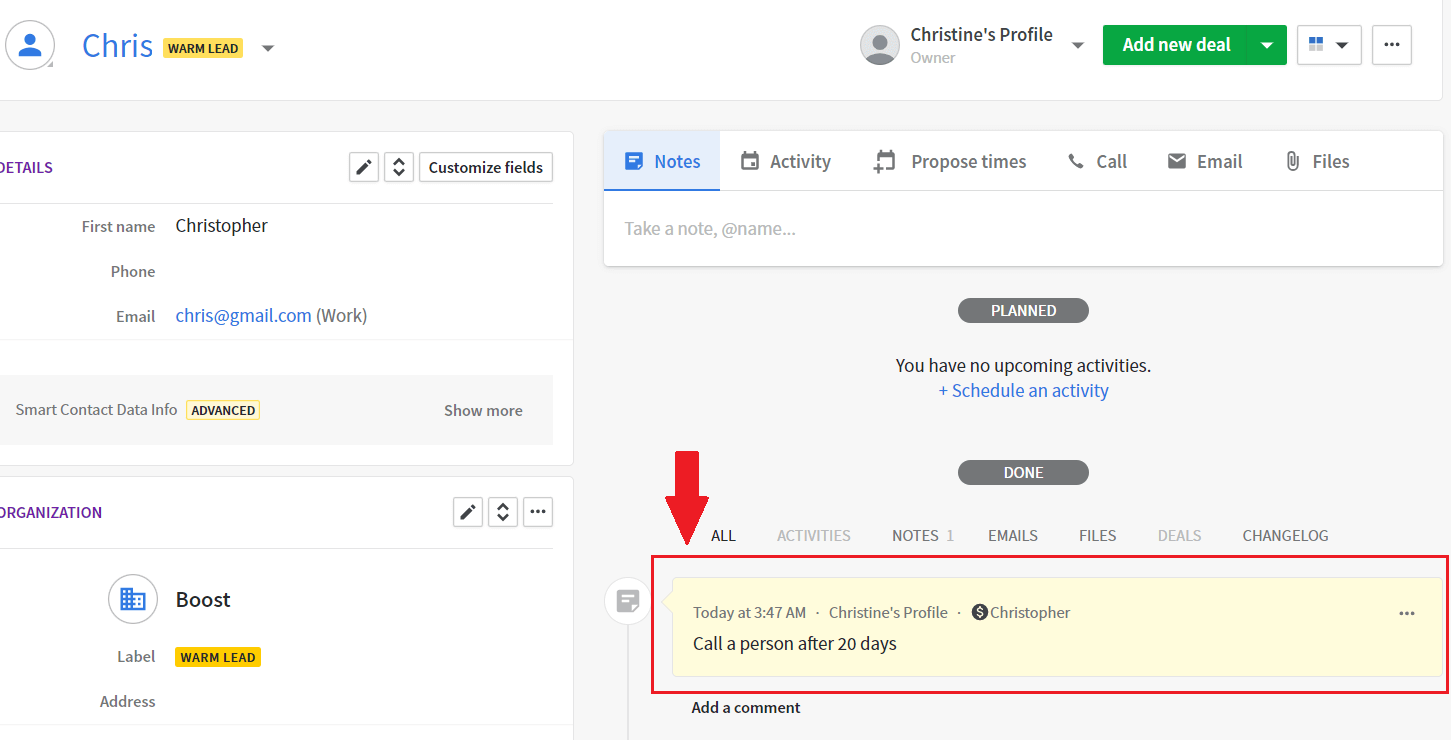
Lastly, test the action, and go back to your CRM. You will notice that your note appeared on a specific person's page, as it should.
Update deal
This option is nifty if, for example, you wish to fire a webhook and update a deal in your CRM if you change the lead’s label in Skylead.
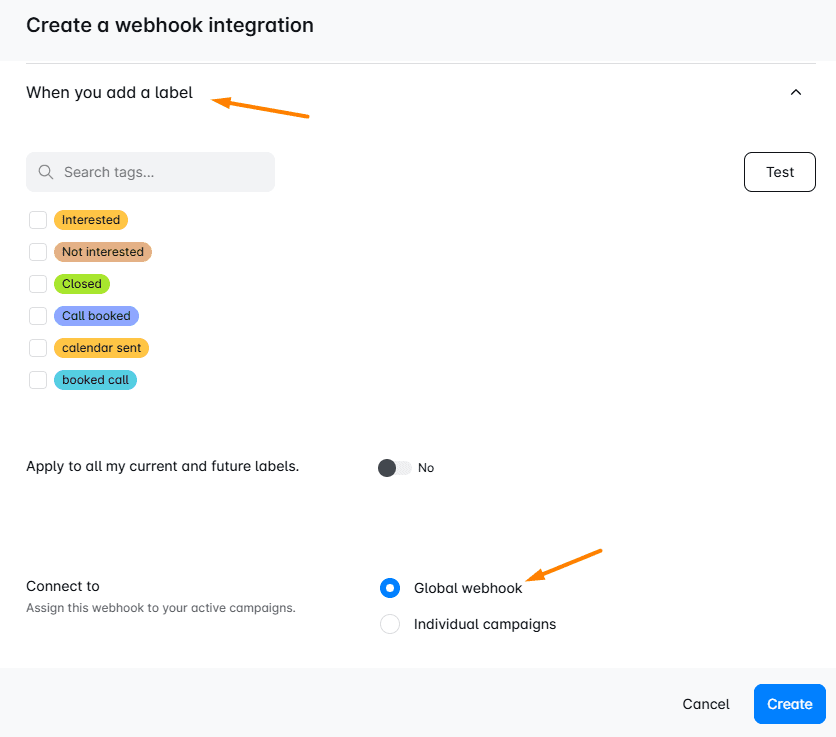
Here is how it should go. First, go to Skylead, and under Setup a Webhook, choose When you add a label option. Then, choose a global webhook or specific campaigns, and proceed to test it. After that, continue with creating a webhook as mentioned above.
To update the deal, first, you need to create a webhook in Zapier, as we did before. Then create a Find deal in Pipedrive action.
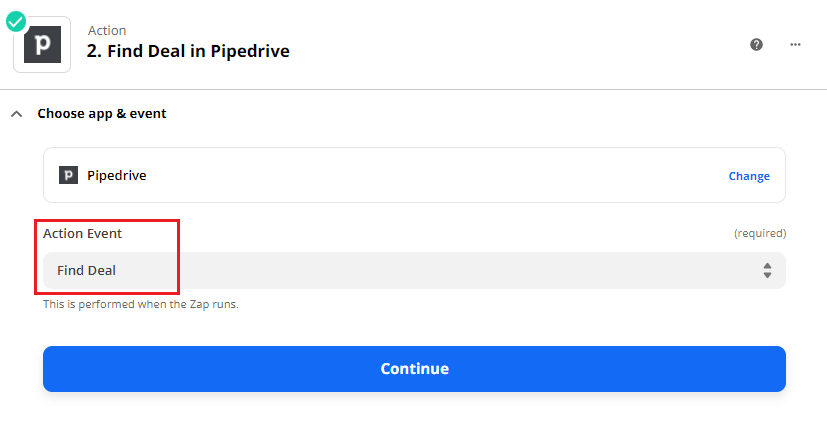
To clarify, here is what your setup could look like.
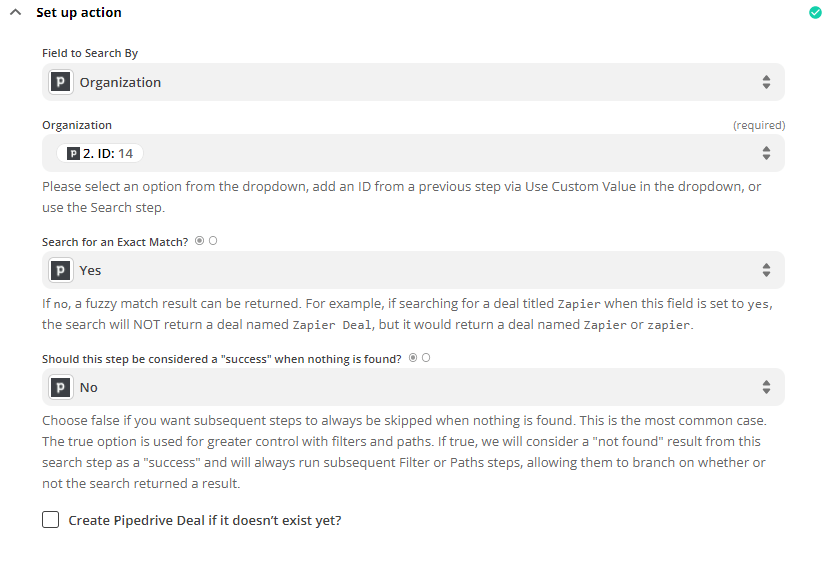
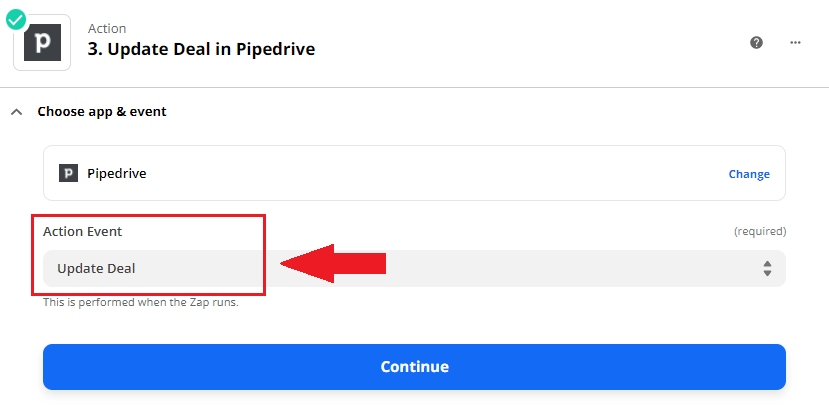
Then go ahead and test it. If the test was successful, it means the specific organization has been found. Next, create an Update deal in Pipedrive action.
Here is how the setup of the Update deal should look like.
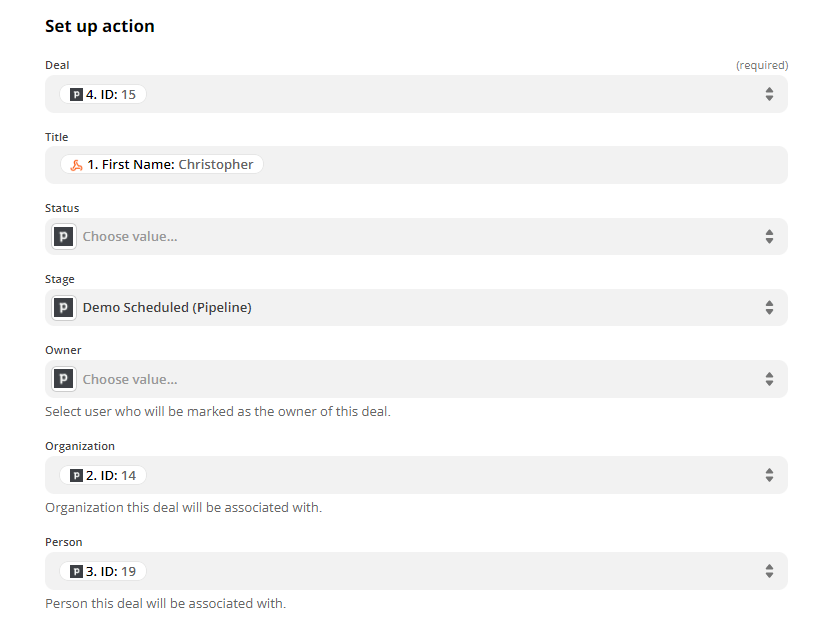
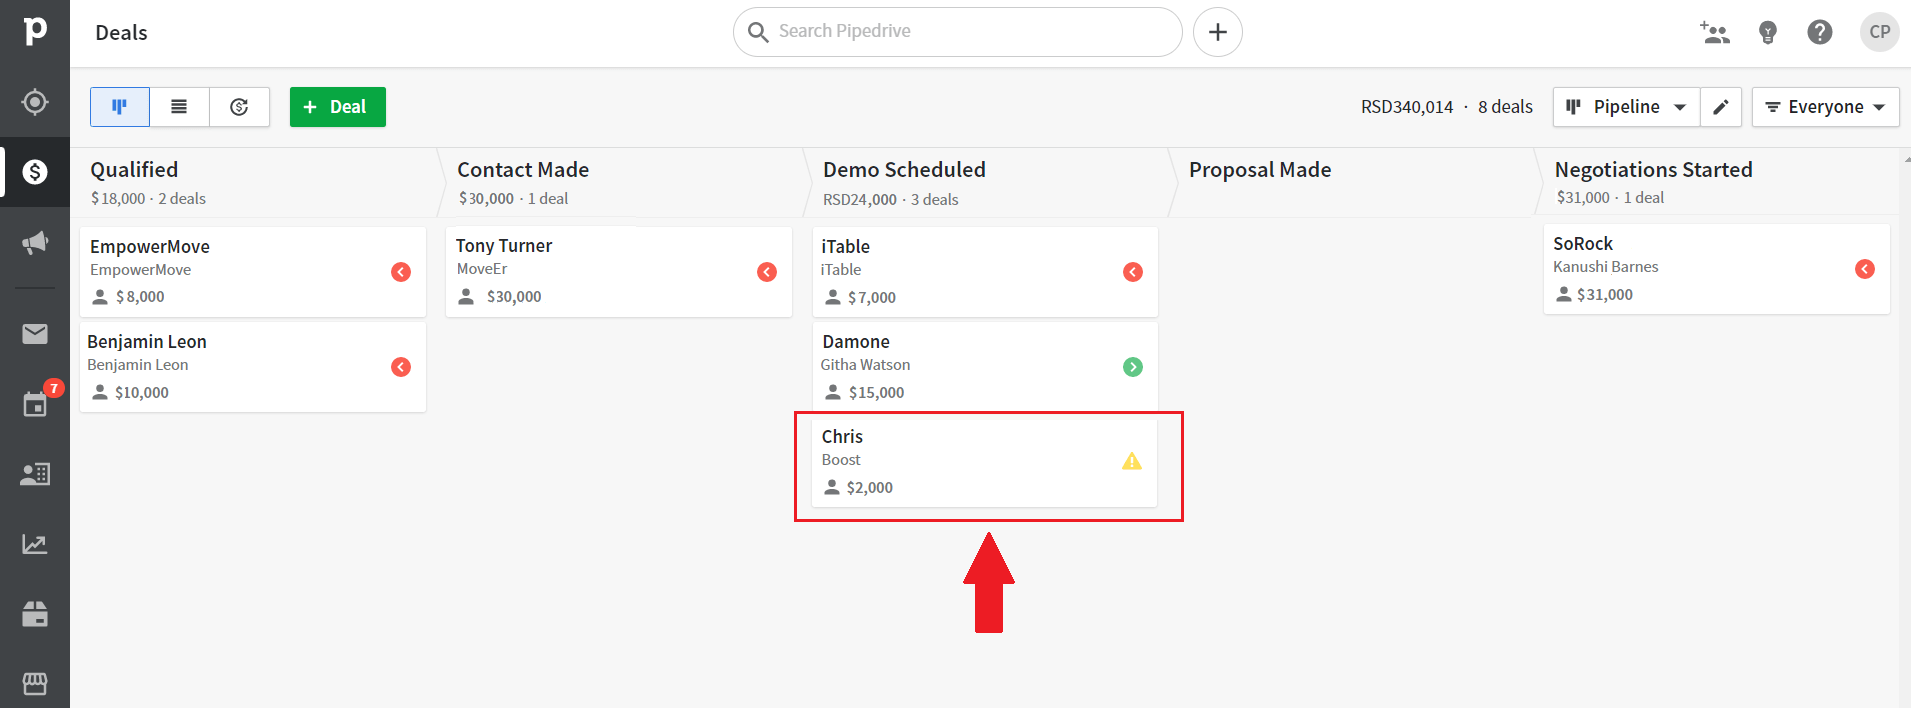
Now, go ahead and test it again. If successful, go to your CRM. You will notice that the deal has moved to the stage you set.
In summary
From now on, the sky's the limit. Webhooks may be terrifying at first, but once you get to use the first one, every other one gets easier. Luckily webhook providers, like Zapier, are user-friendly and give you a lot of room to experiment and use different options to soothe your business needs. Luckily, there are many options to choose from and play with.
Keep in mind that depending on your CRM and subscription plan, you will have more or fewer options of which data you can automatically import. But we hope this gives you a good understanding of how you can use Skylead or any other tool with your CRM.

Well, that is all, folks. If you are a fresh face to Skylead or have not started using it yet, it would be nice to have a chat. So, come and say hi using the chat on our website. Or, try out Skylead directly by signing up for a 7-day Free Trial.